,
17 tweets,
6 min read
Read on Twitter
🚨 P-way video fun-times! 🚨
This time, I'm looking at the process of track alignment design (or more specifically RE-design)...
I'm going to cover:
🌐 the survey information we collect
📌 how we then use that data in 3d
🛤️ creating the horizontal/vertical alignments
This time, I'm looking at the process of track alignment design (or more specifically RE-design)...
I'm going to cover:
🌐 the survey information we collect
📌 how we then use that data in 3d
🛤️ creating the horizontal/vertical alignments
Here is last week's video session on curvature:
Firstly, let's look at the survey process...
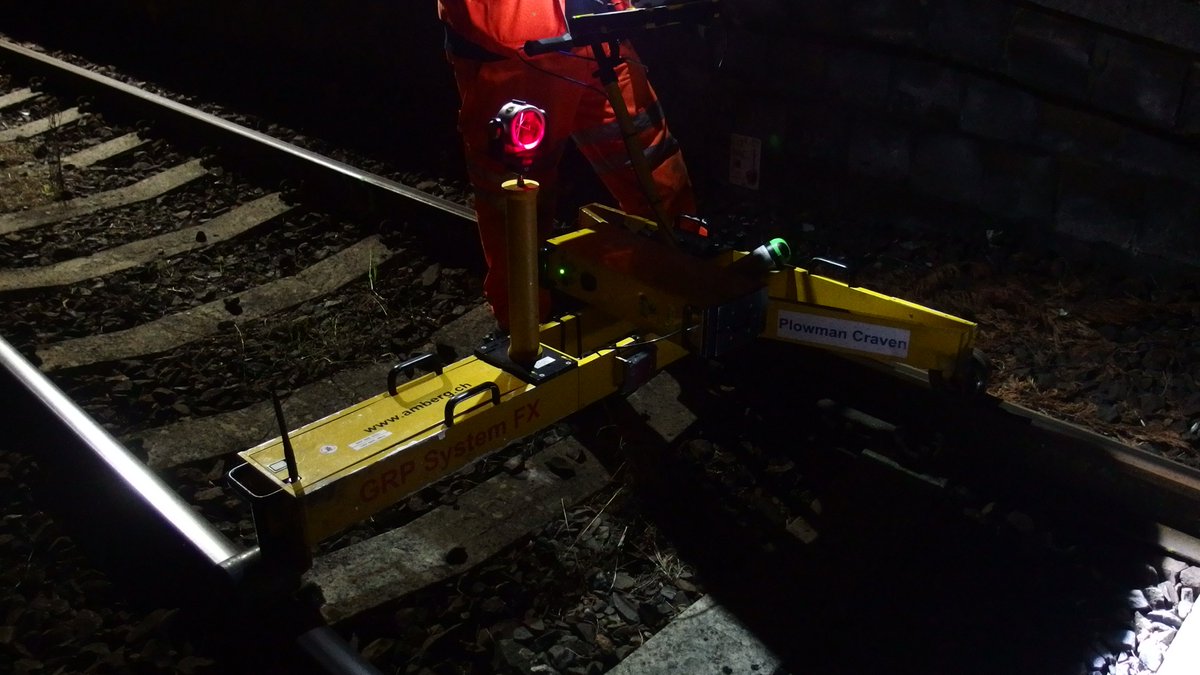
Here's me on shift as part of a survey shift collecting all sorts of information about the existing railway:
Here's me on shift as part of a survey shift collecting all sorts of information about the existing railway:
Our "topo" team collects the geographically positioned information using all sorts of clever whizz-gigs (usually in the middle of the night) 🌃
They then convert it into CAD data that we can then interpret and manipulate with our design software.
They then convert it into CAD data that we can then interpret and manipulate with our design software.

Once we receive that survey data, it looks like this...
(sorry about my headset and its comedy sound quality)
(sorry about my headset and its comedy sound quality)
It's at this point that the designer can pull out the really useful stuff for alignment design, such as:
🌉 bridges
🚉 station platforms
📏 the rails themselves
🌉 bridges
🚉 station platforms
📏 the rails themselves
Next, I import the track geometry into my alignment design software and start "regressing" the existing alignment (i.e. finding best fit lines that match the current geometry):
Oh, and by this point I'll have created my design "chainage" (i.e. distances along the track in metres) as a way to specify positions along the alignment:
Now we need to generate our "tie-ins" from the regressed alignment that allow us to smoothly move from the existing track geometry to our new track alignment...
Finally, I can actually start the design process! 🥳
Remember the speed table from last week? Here's a walk through of what it all means:
Remember the speed table from last week? Here's a walk through of what it all means:
I could create a million tweet-long docu-thread about the alignment design process, but we'd be here all night... (Feel free to launch questions at me though!)
Instead, here's a quick summary:
Instead, here's a quick summary:
That's the speed table - but what about those LIFTS ↕️ and SLUES ↔️ that I mentioned earlier?
We've covered the horizontal alignment, but what about the vertical alignment?
If we zoom in, you can sort of see how we piece the vertical alignment together with grades and their connecting vertical curves:
In order to design the vertical alignment, we exaggerate or stretch things in the vertical plane...
Even a pretty flat railway starts to look more like a roller-coaster 🎢
Even a pretty flat railway starts to look more like a roller-coaster 🎢
It is critically important that the horizontal and vertical alignments are validated against each other.
This is to ensure we avoid mixing fiddly bits like horizontal transitions and vertical curves - otherwise the design starts getting really tricky to install 🛠️
This is to ensure we avoid mixing fiddly bits like horizontal transitions and vertical curves - otherwise the design starts getting really tricky to install 🛠️
Once both the horizontal and vertical designs have been completed, we can combine the two to create our 3d rail strings! 🧶
These are issued to the other design disciplines and eventually to the installation contractor... Anyway, I hope that was a useful insight! What's next?!?
These are issued to the other design disciplines and eventually to the installation contractor... Anyway, I hope that was a useful insight! What's next?!?