We’ve heard that some other tomato companies are setting up greenhouses as nurseries in northern Nigeria, so we thought it might be beneficial to explain and share our own process too! Tomato Jos has been using this system for 5 years 😊
Step 1: de-clump your potting substrate.
Step 1: de-clump your potting substrate.

We use a type of peat moss (not pat moose 😉) that we bring into the country from Europe. We have tried other types of potting substrate including coco peat and a mixture of soil and manure, but have found that for us, this product works best. It’s highly water absorbent. 💧💦
Step 2: Adding water to the potting substrate
The peat moss is mixed with water. When we drop our seeds in, they will need moisture to germinate. So we get our potting substrate nice and wet all the way through.
The peat moss is mixed with water. When we drop our seeds in, they will need moisture to germinate. So we get our potting substrate nice and wet all the way through.

Step 3: Putting the substrate into our seedling trays
This step seems simple but is a bit technical. The peat moss needs to get all the way to the bottom of each cell (little hole) in the seedling tray. But at the same time, we don’t want to make the substrate overly compacted.
This step seems simple but is a bit technical. The peat moss needs to get all the way to the bottom of each cell (little hole) in the seedling tray. But at the same time, we don’t want to make the substrate overly compacted.

In past years, we rushed this process and ended up with seedlings that didn’t develop well because their roots didn’t have enough substrate to grow through and around. So this step is often where we put our most technical team mates.
Step 4: Making depressions for the seedlings
This is also a technical step. Pressing too hard can compact the soil and can also result in the seed being buried too deep, which can negatively impact germination. But if you don’t go deep enough, the seeds may also not germinate...
This is also a technical step. Pressing too hard can compact the soil and can also result in the seed being buried too deep, which can negatively impact germination. But if you don’t go deep enough, the seeds may also not germinate...


Step 5: Seeding!
This is the slowest part of the process. We hire local Fulani women to do the work, and it is usually a great income boost for them. Many of the women have been working with us for multiple years now, and are able to execute their tasks quickly and competently.
This is the slowest part of the process. We hire local Fulani women to do the work, and it is usually a great income boost for them. Many of the women have been working with us for multiple years now, and are able to execute their tasks quickly and competently.

Each seedling tray can hold 338 seedlings. The women doing this work drop exactly one tiny seed into every depression in the seedling tray. It may look easy, but trust us - it isn’t! These seeds are improved “hybrid” varieties, bred for yield, color and disease resistance.
Step 6: Quality check
After seeding, each tray goes through a quality check to ensure that there is one seed in every depression. No double seeding, no skipped holes!
After seeding, each tray goes through a quality check to ensure that there is one seed in every depression. No double seeding, no skipped holes!

Step 7: Covering the seeds
After the trays have been checked, we put a thin layer of dry peat moss on top to cover the seeds. Remember, seeds germinate in a warm, dark, moist environment. They are buried alive, and pop out of the ground like zombies! 🧟♂️🧟♀️🌱
After the trays have been checked, we put a thin layer of dry peat moss on top to cover the seeds. Remember, seeds germinate in a warm, dark, moist environment. They are buried alive, and pop out of the ground like zombies! 🧟♂️🧟♀️🌱

Step 8: Irrigation
The covered seedling trays are doused in water so that the peat moss (and the seed inside) will be nice and damp. Water is life!
The covered seedling trays are doused in water so that the peat moss (and the seed inside) will be nice and damp. Water is life!

This process has been tweaked and modified over the past 5 years. Our team can comfortably seed 700-800 trays in a single day. This amounts to about 270,000 seedlings, enough to plant 9 hectares of tomatoes.
The completed seedling trays are transported to our “germination chamber” which is a shipping container. We stack the trays, making sure to leave room in between each one so that the seedlings can actually pop out. When the container is all filled up, we close it.

The germination chamber, step 9 in the process, is crucial because it provides the warmth that the seeds need to sprout. Depending on the weather, the compaction of the potting substrate, and the moisture, it can take anywhere from 3 to 6 days for the seeds to sprout.
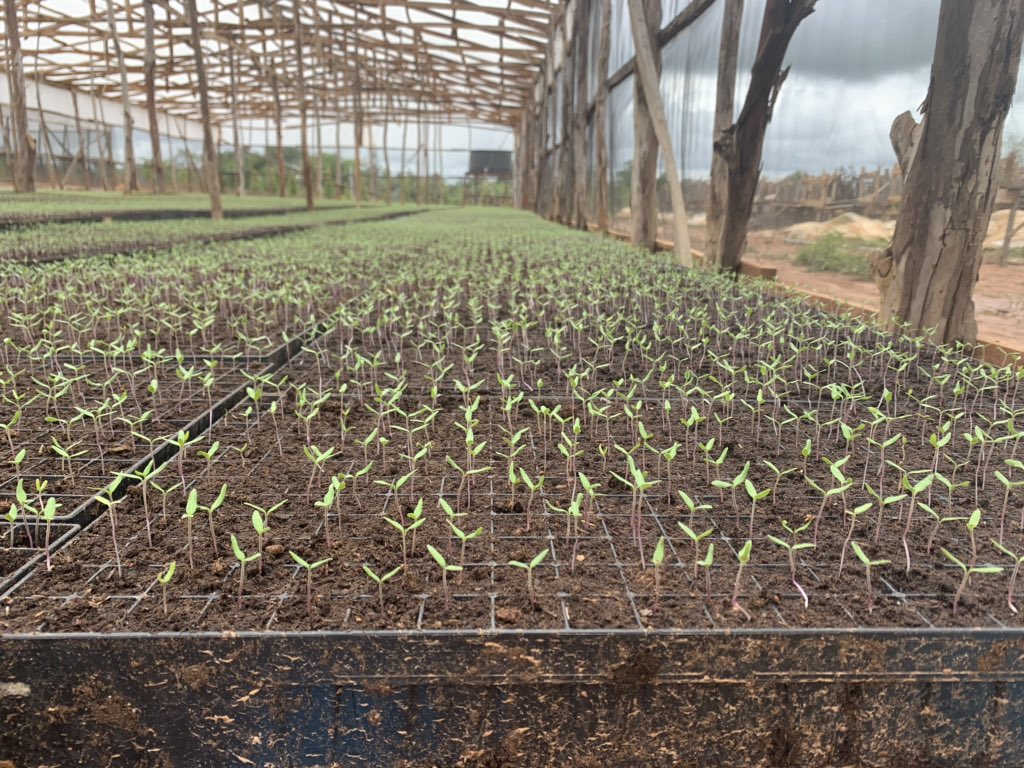
Step 10: Moving the germinated seedlings to the greenhouse or nursery
In this case, our seeds sprouted after 4 days. As soon as you can see 50% if the seedlings in a tray, you need to move it outside. These little guys need lots of sunlight to grow and develop!
In this case, our seeds sprouted after 4 days. As soon as you can see 50% if the seedlings in a tray, you need to move it outside. These little guys need lots of sunlight to grow and develop!

On Sunday, we loaded up our first batch of seedling trays to bring them back to the greenhouse, which had been set up to receive them during the three days that they were in the germination chamber.


Step 11: More irrigation!
Once the seedling trays are organized and laid out in the greenhouse, we give them another good soak. This year we invested in an atomizer sprayer, that Esson is using here- it makes the water droplets very small so that they don’t damage the seedlings.
Once the seedling trays are organized and laid out in the greenhouse, we give them another good soak. This year we invested in an atomizer sprayer, that Esson is using here- it makes the water droplets very small so that they don’t damage the seedlings.
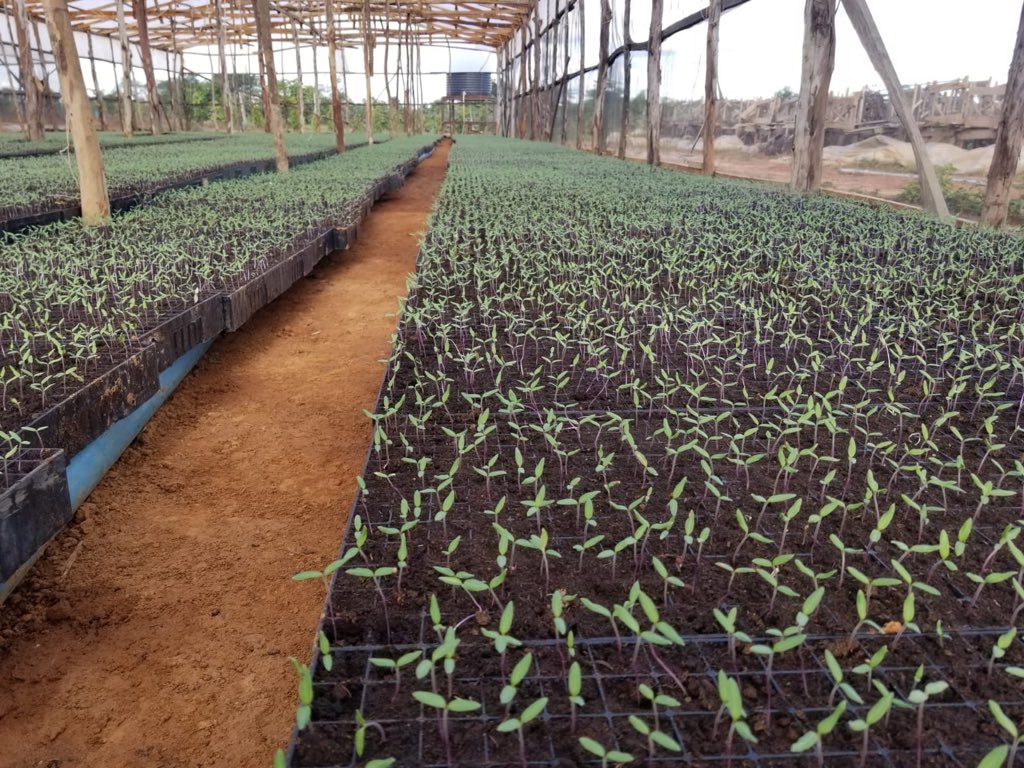
In past years we put our seedling trays on wooden tables, but this year we are using PVC pipes. The seedling trays should ideally not rest directly on the ground - airflow underneath promotes drainage and helps strengthen the roots. Additionally, the soil can also hold disease.
The wooden tables also ended up spreading disease, and they broke down over time. So in order to save on costs we are trying out plastic. So far, so good!

One day after removal from the germination chamber, the seedlings had already “greened up” significantly. This is because they are starting to produce chlorophyll now that they’re in the sun ☀️

We are not fortunate to have billions of naira at our command, but we are fortunate in a sense, because pit tight budget has enabled us to learn where it makes sense to spend money and where it doesn’t.
Where we spend more money:
Seeds
Potting substrate
Seedling trays
Our team
Irrigation system
Where we spend less money:
Greenhouses
Germination chamber
Nursery benches
Automation (for now)
Knowing the difference between nice-to-have and need-to-have is priceless!
Seeds
Potting substrate
Seedling trays
Our team
Irrigation system
Where we spend less money:
Greenhouses
Germination chamber
Nursery benches
Automation (for now)
Knowing the difference between nice-to-have and need-to-have is priceless!
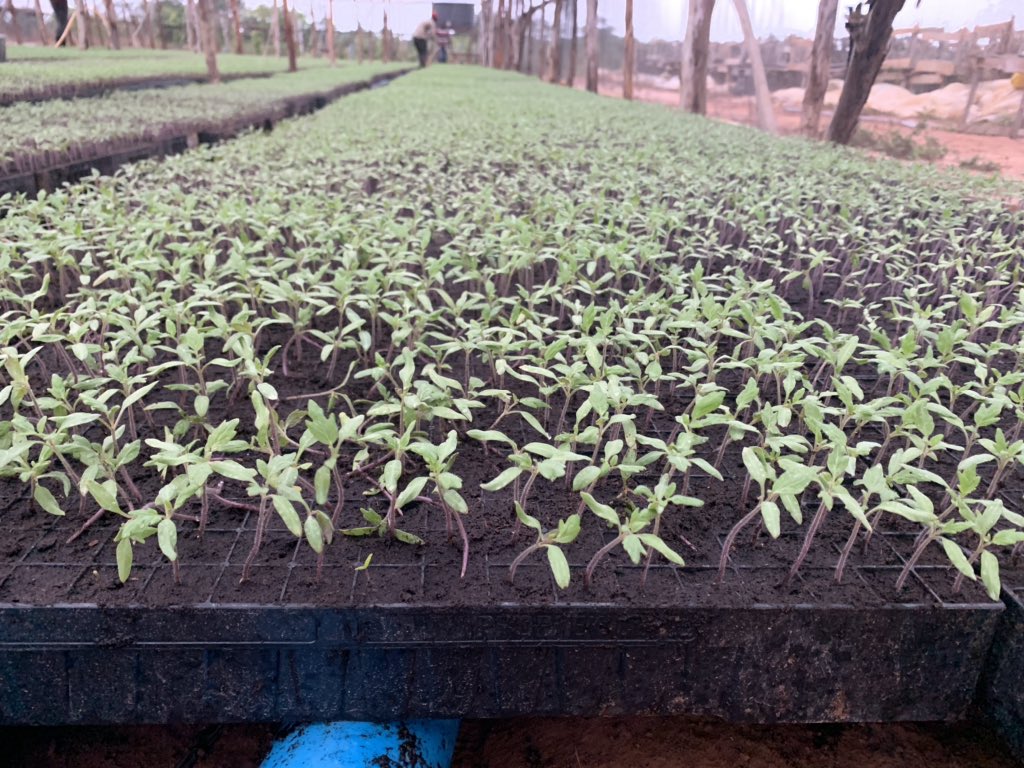
Here are the same seedlings on Day 0 (Sunday, when we pulled them out of the germination chamber), Day 1 (yesterday) and Day 2 (today). Can you peep the difference?


The cotyledon or “seed leaves” have unfolded, the plants have straightened out, and their stems have taken on a slightly purple hue.
Seedlings on Day 2
Seedlings on Day 2


Would you like us to follow these seedlings, with periodic pictures and updates, from the nursery all the way into the field?
Here are the seedlings on Day 3: the leaves are bigger and more green. Soon, we will start to see the terminal bud and the true tomato leaves will unfurl! As a reminder, more than half of the seedlings we grow will be distributed to smallholder farmers. 💪🏾👨🏿🌾🌱#FarmersFirst
Here are the same seedlings on Day 6.
If we show you just our best angles, you will be impressed! The first true leaves are starting to come out and the whole row all together looks like a lush, green, carpet... or does it?
If we show you just our best angles, you will be impressed! The first true leaves are starting to come out and the whole row all together looks like a lush, green, carpet... or does it?


If you look at the same seedlings from different angles, you can see that they are not actually uniform. We only achieved 80% germination, and inconsistent irrigation caused inconsistencies in the growth of the plants. Some of the plants had wilted, and required emergency water!


Day 8
The true leaves keep growing, but we’ve had some pest issues (peep the chopped stem in the foreground of the first pic). Further down, another tray of Day 8 seedlings (pic 4) is looking far less developed... this could be due to temp differences in the germination chamber.
The true leaves keep growing, but we’ve had some pest issues (peep the chopped stem in the foreground of the first pic). Further down, another tray of Day 8 seedlings (pic 4) is looking far less developed... this could be due to temp differences in the germination chamber.


Day 10
Our greenhouse team rotated some of the trays to give the weakest plants a chance to improve. Some of the seedlings that fell down are past the point of recovery, but others will pick back up.
Our greenhouse team rotated some of the trays to give the weakest plants a chance to improve. Some of the seedlings that fell down are past the point of recovery, but others will pick back up.


Day 12
The growth is harder to spot when its not coming in leaps and bounds, but it’s continuing... the high variability continues to confound us: some seedlings look like they are ready to transplant, while others seem only days old!
The growth is harder to spot when its not coming in leaps and bounds, but it’s continuing... the high variability continues to confound us: some seedlings look like they are ready to transplant, while others seem only days old!


Meanwhile, in our other greenhouse, the second batch of seedlings seem to be doing better than the first. We pulled them out after only 2 days in the germination chamber and that seems to have helped a lot.
Day 13
The seedlings are a little more sturdy, their leaves are a little larger...
The seedlings are a little more sturdy, their leaves are a little larger...


Day 21
In all our 5 years growing seedlings and tomatoes in Nigeria, we have never had seedlings quite like this... the variable in growth is startling! We think it has to do with the fact that the seedlings are so close to the ground.
In all our 5 years growing seedlings and tomatoes in Nigeria, we have never had seedlings quite like this... the variable in growth is startling! We think it has to do with the fact that the seedlings are so close to the ground.


Without good airflow underneath the seedlings trays, the roots can keep growing down instead of around and around in the potting soil, within the individual cell. Some seedlings’ roots seem to have reached the ground underneath and that has spurred their growth even more.
Another new challenge that we have never faced before: bacterial speck. This is, we believe, a result of the cold, humid weather that the prolonged rainy season is causing. Hopefully we can nip the problem “in the bud” as they say, with chemical and revised irrigation processes.