,
102 tweets,
68 min read
Read on Twitter
I’ve been far too lazy lately. It’s time to do something about this. 


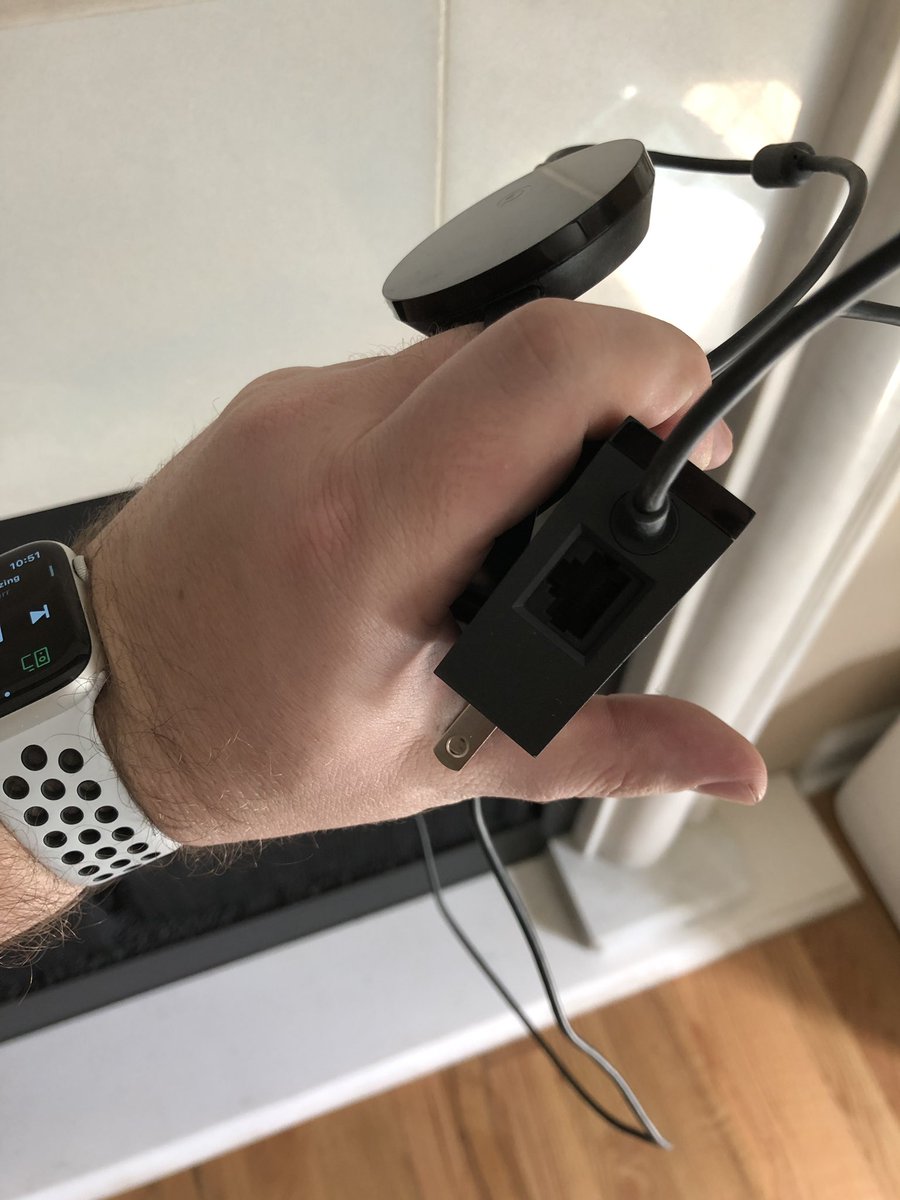
Disassembly note: the Chromecast Ultra comes with an Ethernet port in the base. While streaming even 4K isn’t a ton of bandwidth, it’s a lot of *time* on WiFi and causes a lot of competition. It’s going back wired along with the TV.
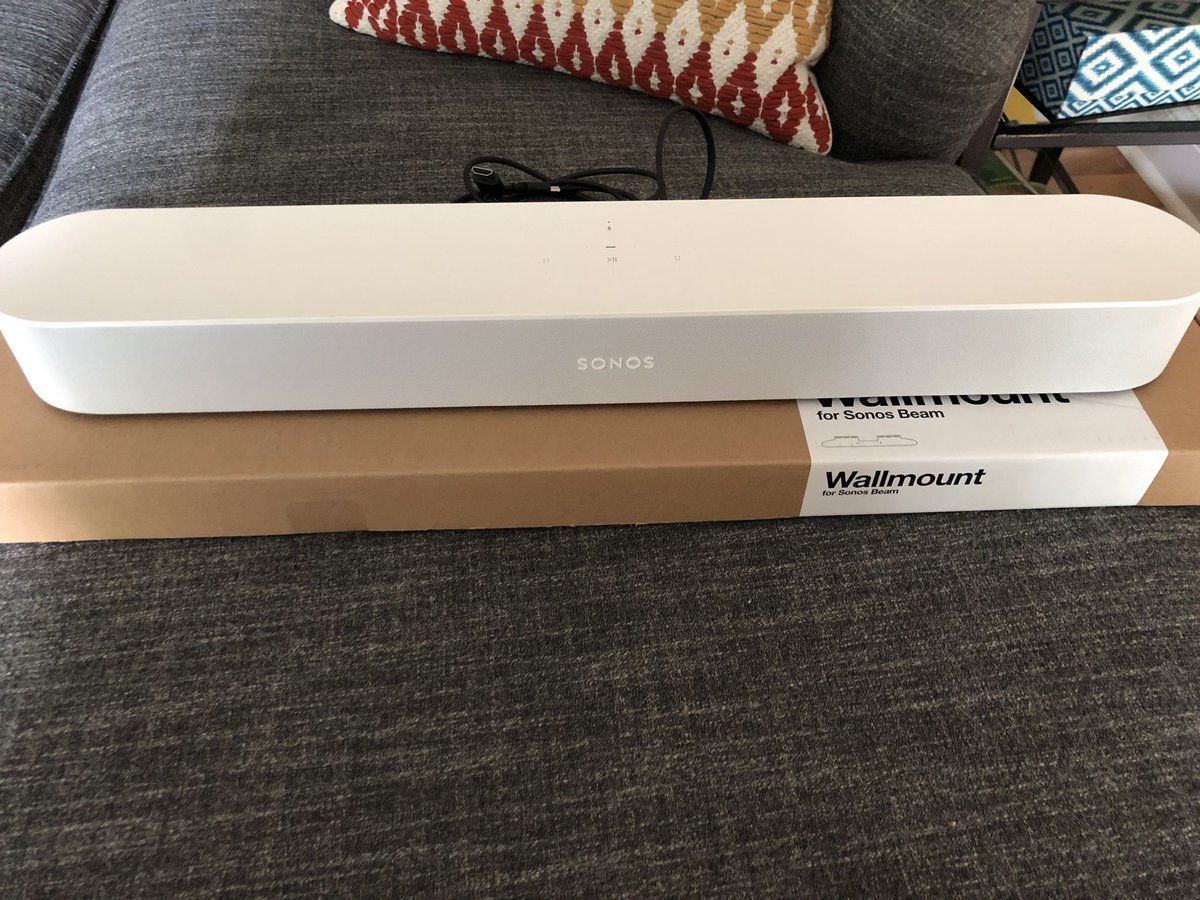
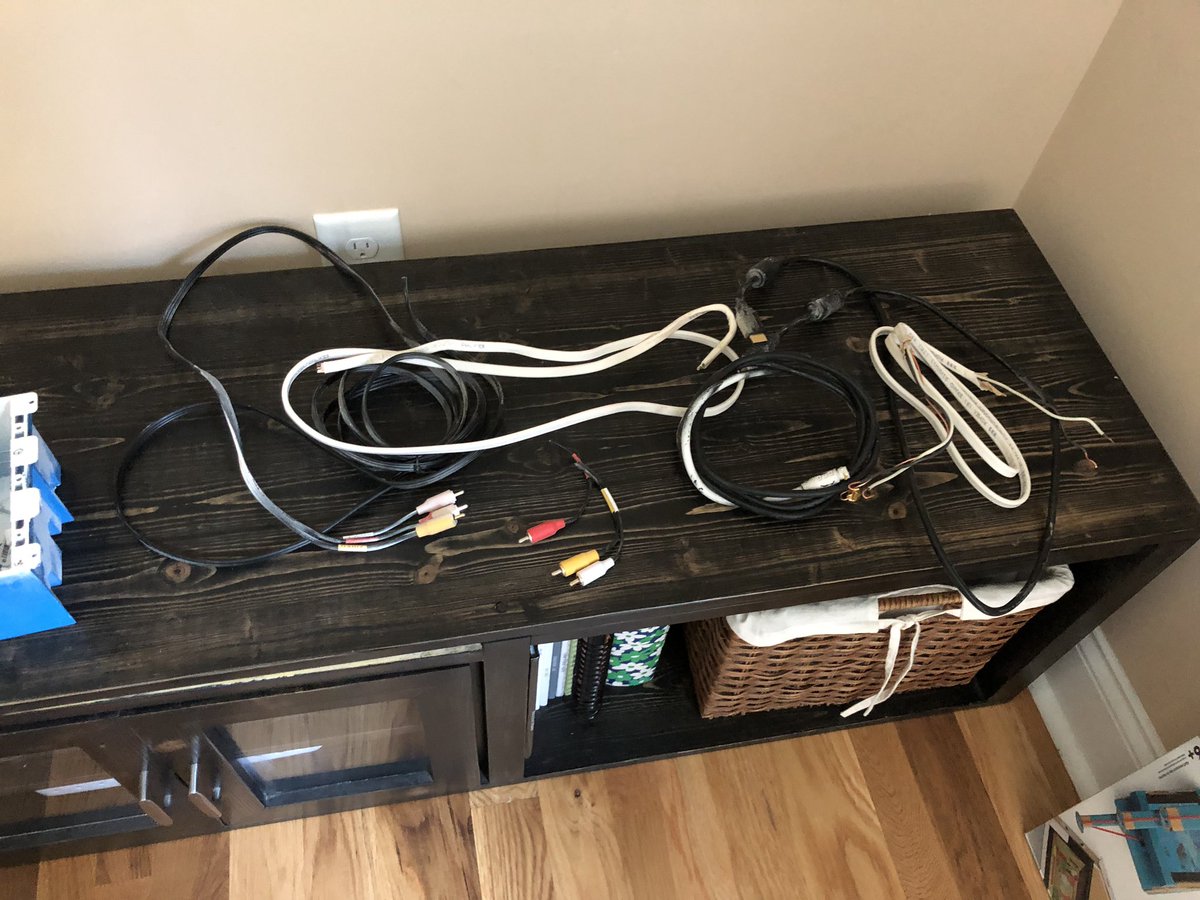
Pieces and parts disconnected - the Sonos Beam will go back on a wall mount all clean next time, after @E_Craver paints a new color towards the end of this.
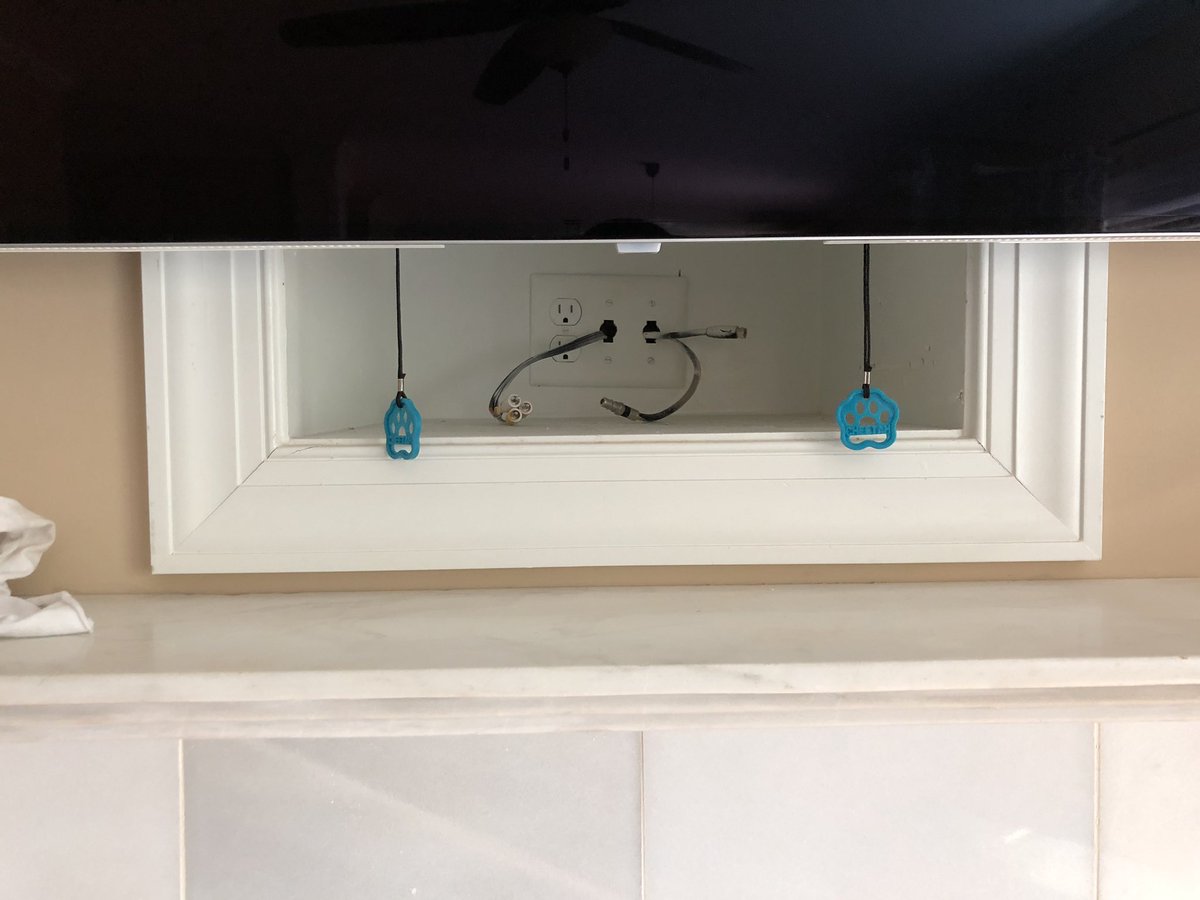
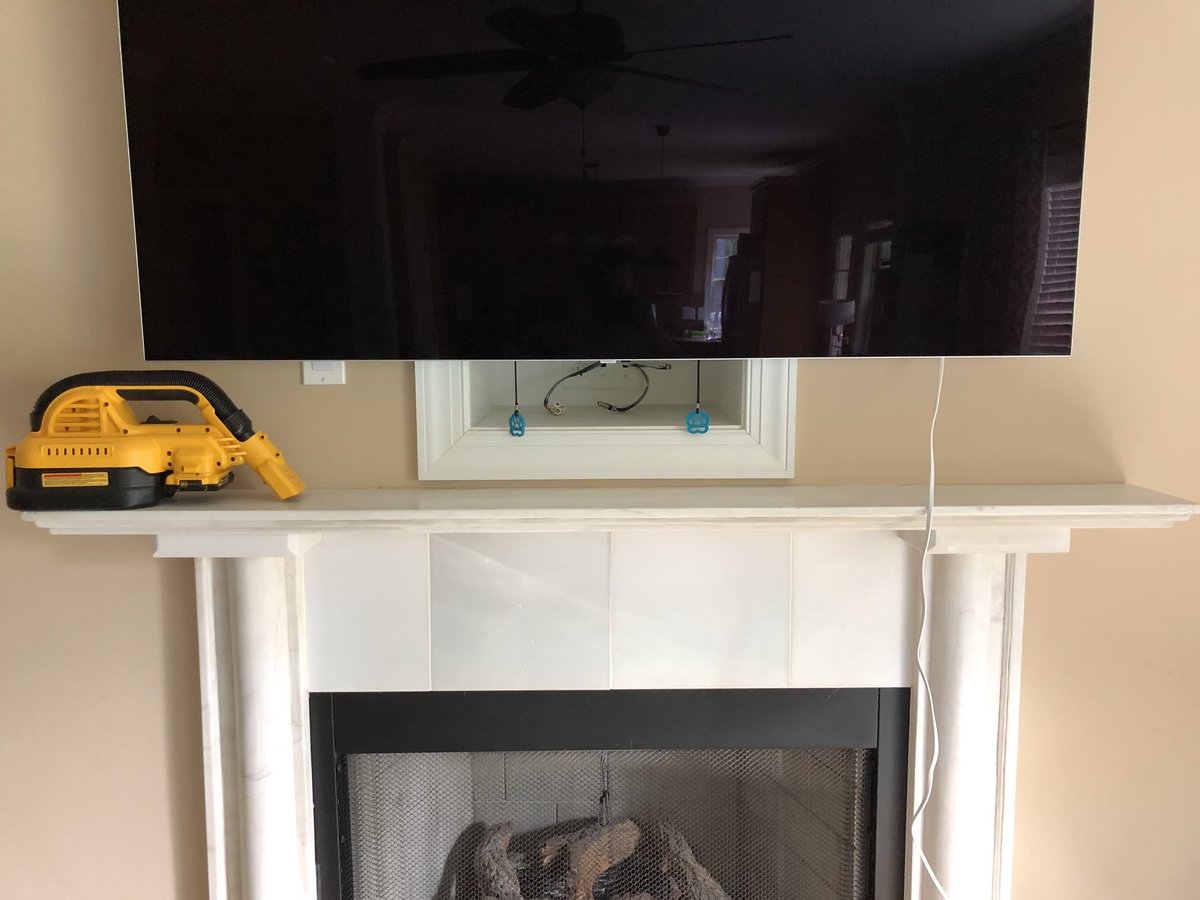
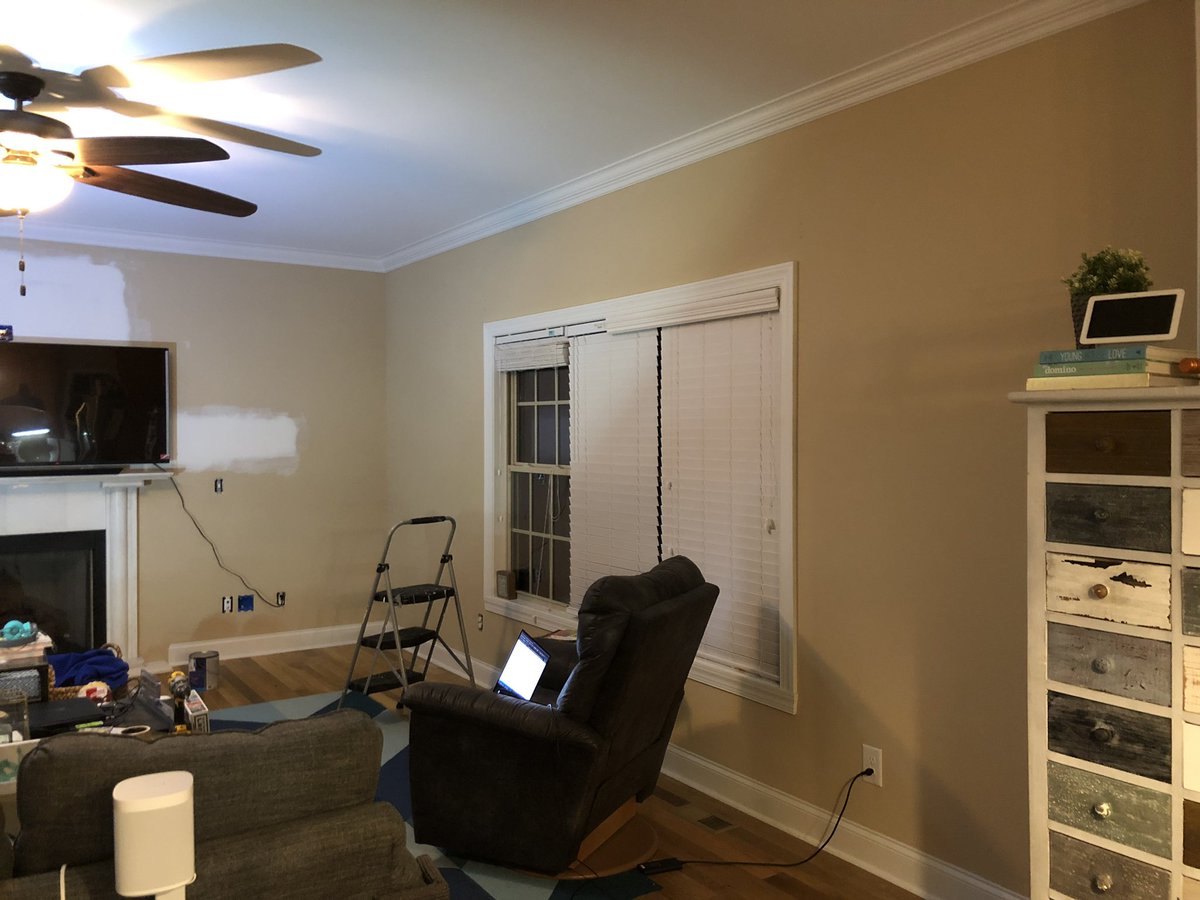
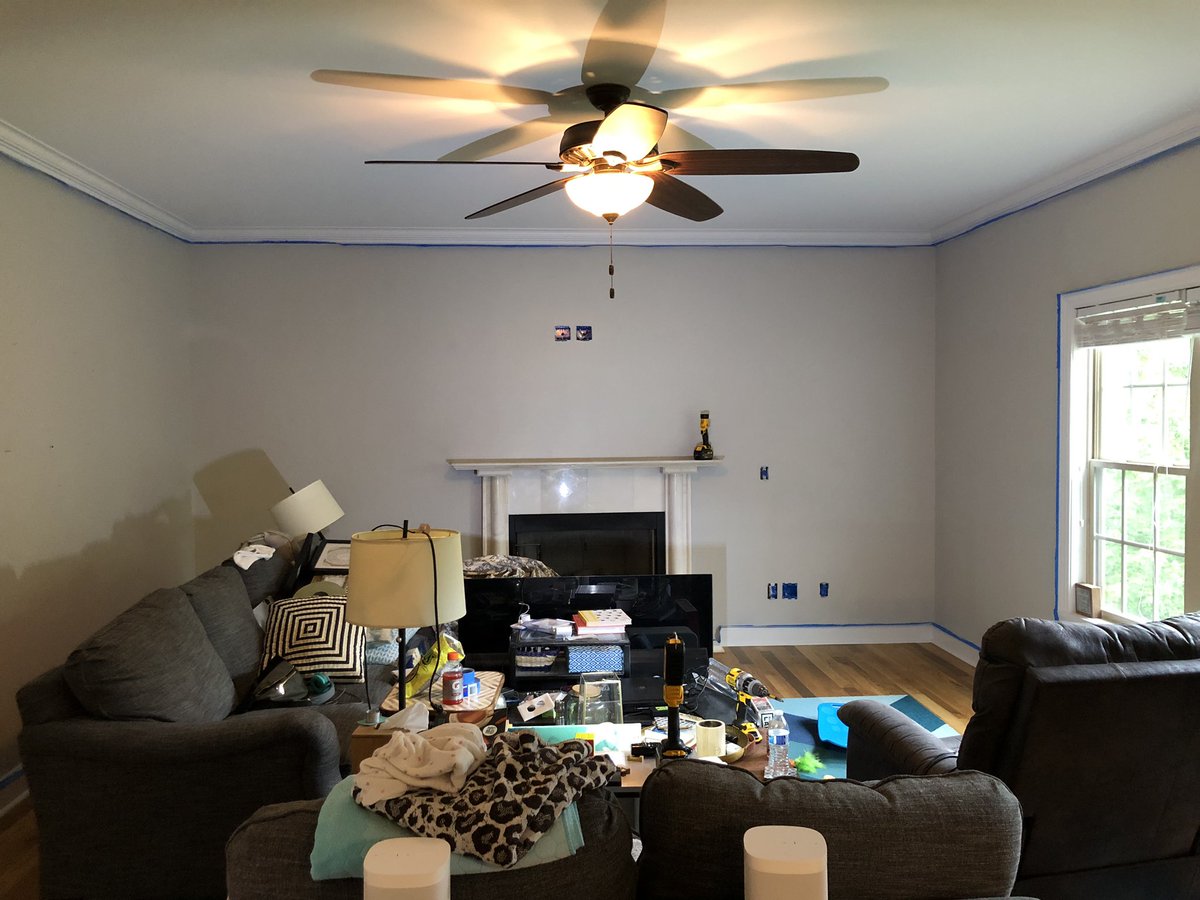
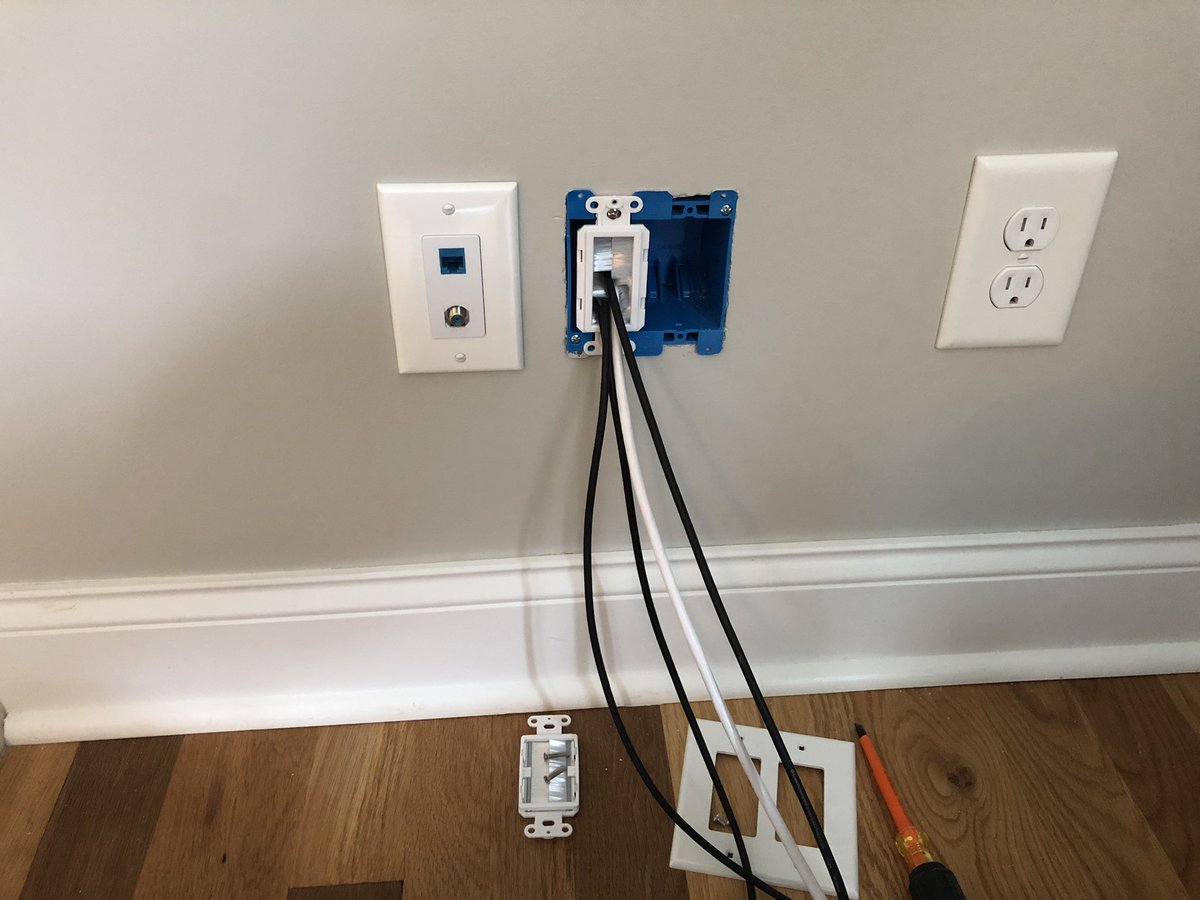
Here’s the layout that makes no sense to me. The box at the bottom is very visible (see first photo), the HDMI is outside of that bottom to top. The power and coax up top are crazy high (these are 9ft ceilings). Also: use low voltage separators people! This is not a legal box:
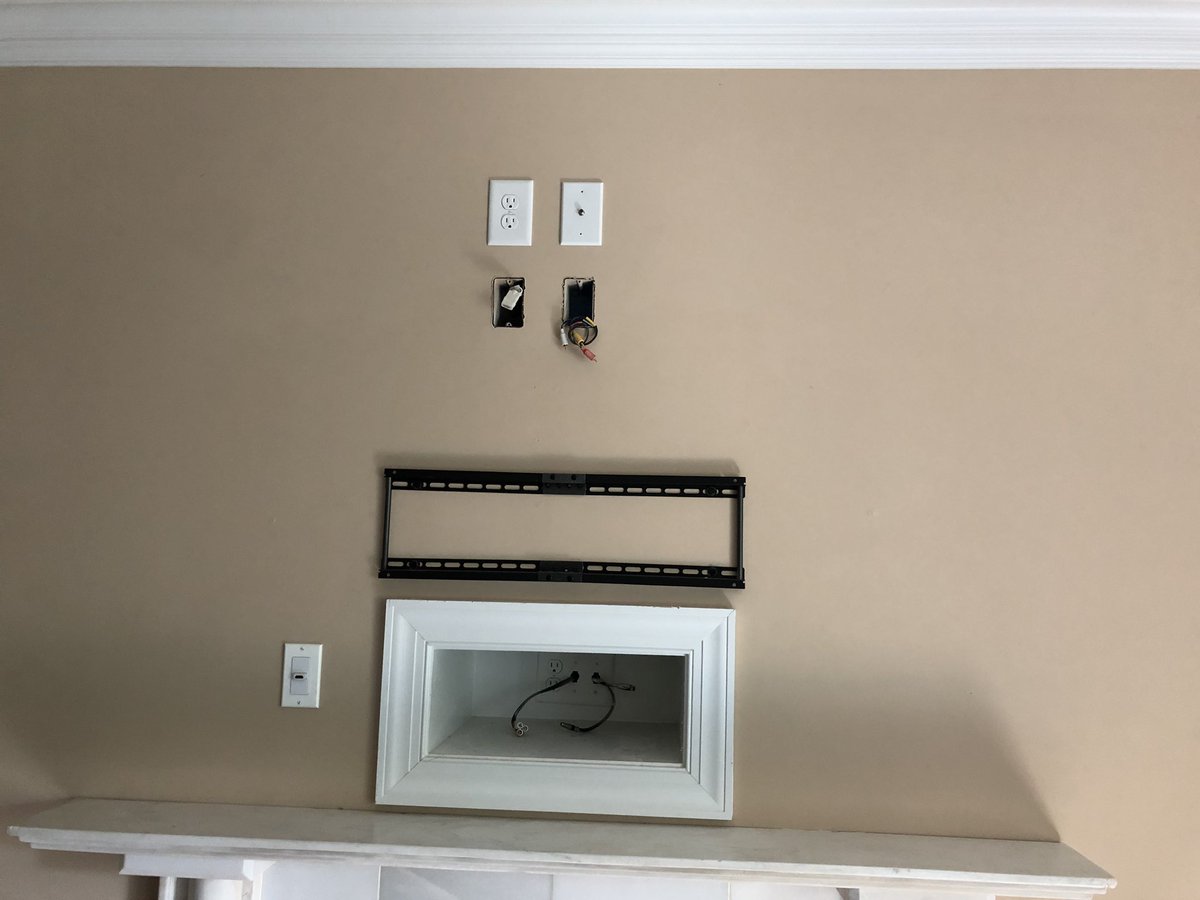

I did the math, you’d need a 105” TV at a minimum to cover all these outlets.
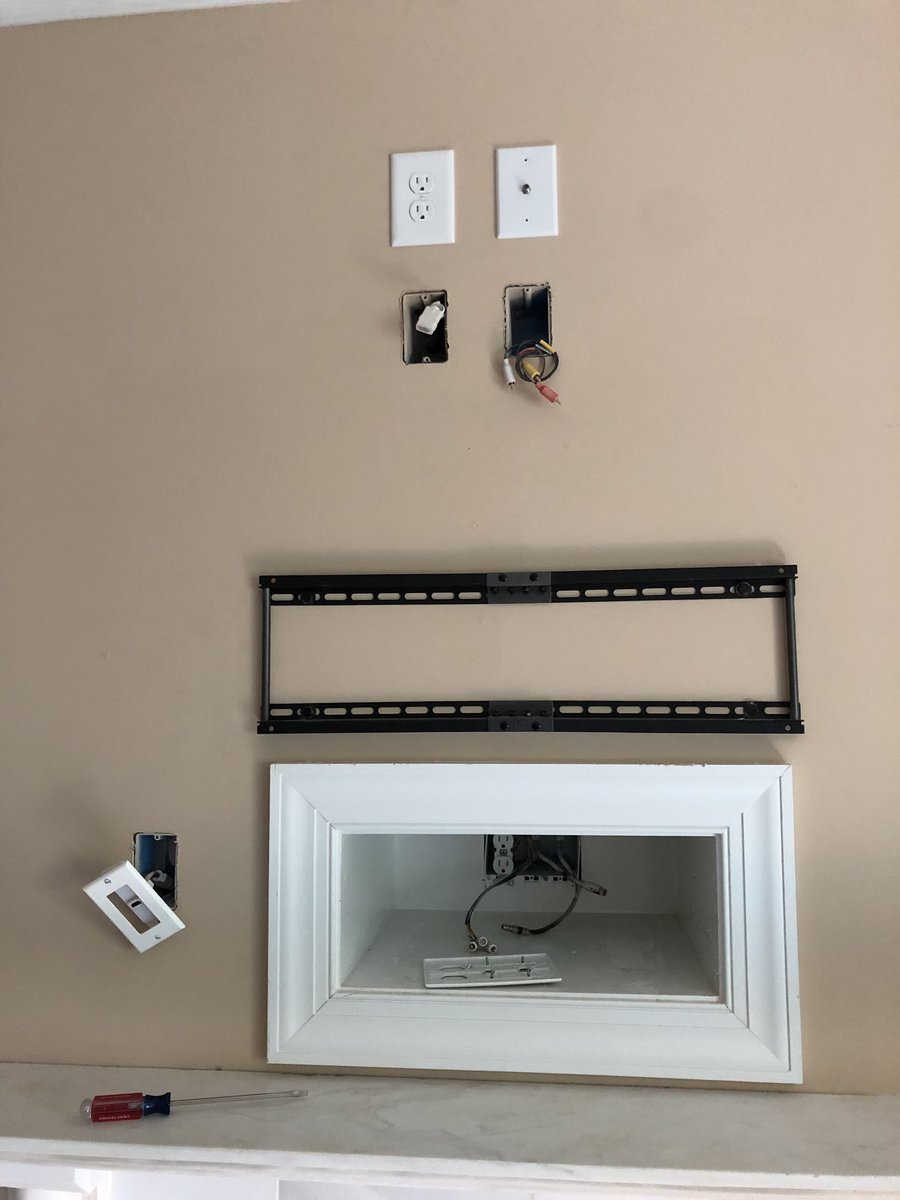
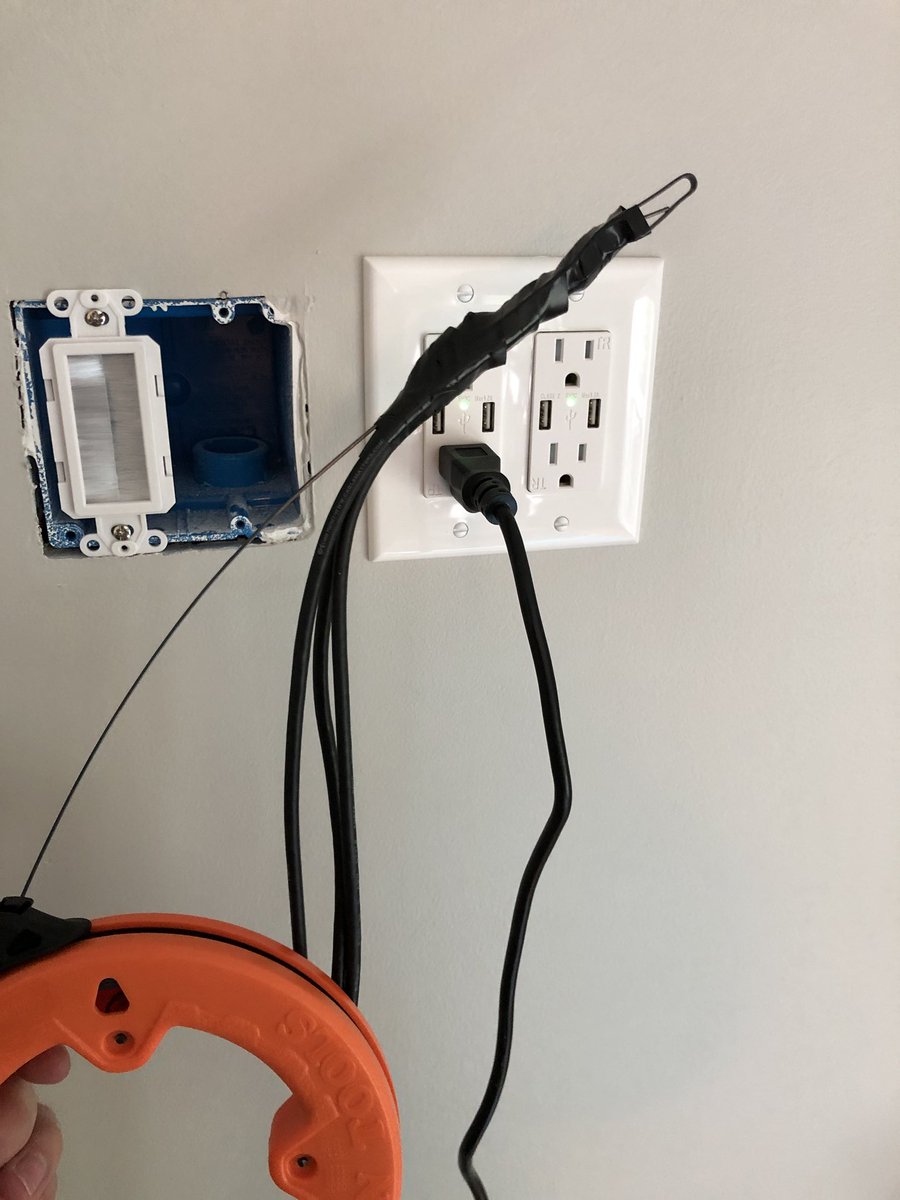
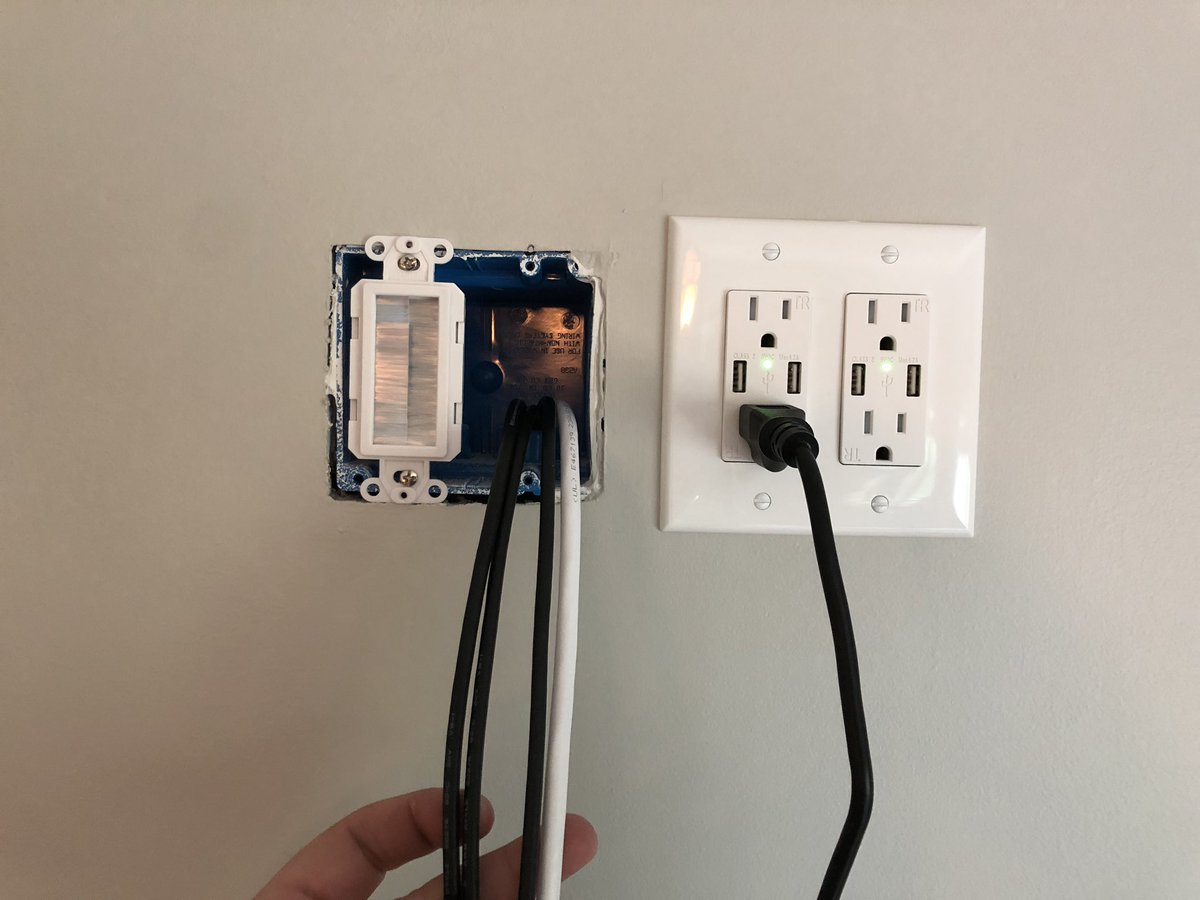
Outlets and mount down...yeah there’s another line in there that’s live. What the hell, take pride in your work.


These locators are a super easy way to find the right breaker without multiple trips. That green light up piece in the previous photos is the transmitter. When power dies, it stops transmitting:
Locator and secondary wires dead (hey...at least it’s the same circuit right?). Wires are now out...on to the box, which appears to just be some coated chipboard.


Box needed...persuasion. Back plane was far wider so it wasn’t coming out in 1 piece anyway. But now, so much room for activities! That cavity is about 2 ft deep.


I honestly don’t know how the fuck they got this in here

I know how it came out though.


Oh my god, 3 wires into this box and *another* loose romex that goes...who knows where. It’s not live...but then again the breaker is off.
Wires are out - I’ll need to figure out a legal junction up top and re-route coax to the media center down at the floor for satellite.
Wires are out - I’ll need to figure out a legal junction up top and re-route coax to the media center down at the floor for satellite.


Next step is figuring out what I want to cut out. Mapping where stubs are now. Ideally, cutting a square section for a super easy drywall job would be easiest. Let’s see if we can arrange that.


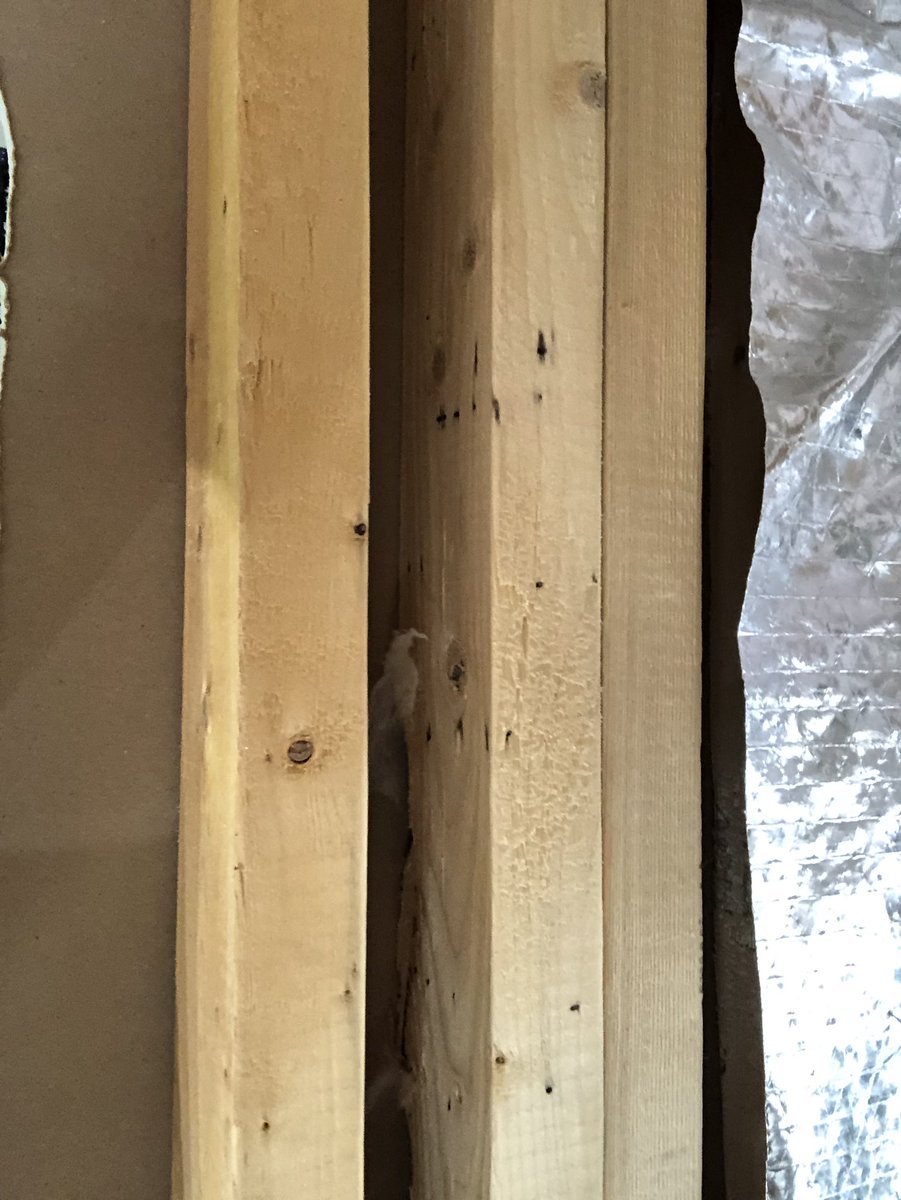
Well crap. Power is coming through the top plate and that’s going to be an issue because I need power to be lower. But luckily we have double studs on each side within the reach of a 48” drywall sheet, so the cutout can be a big rectangle.


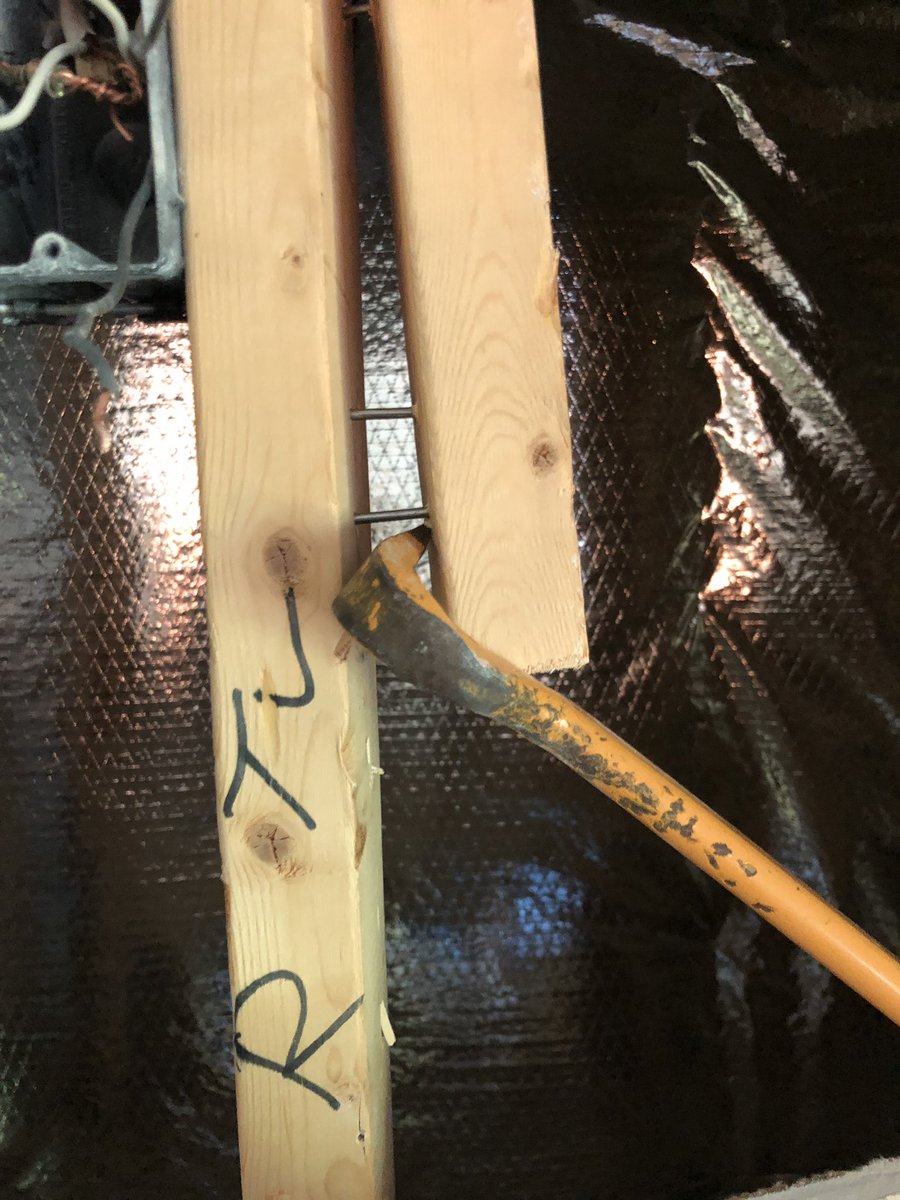
Took a section out first to get a better view of things:


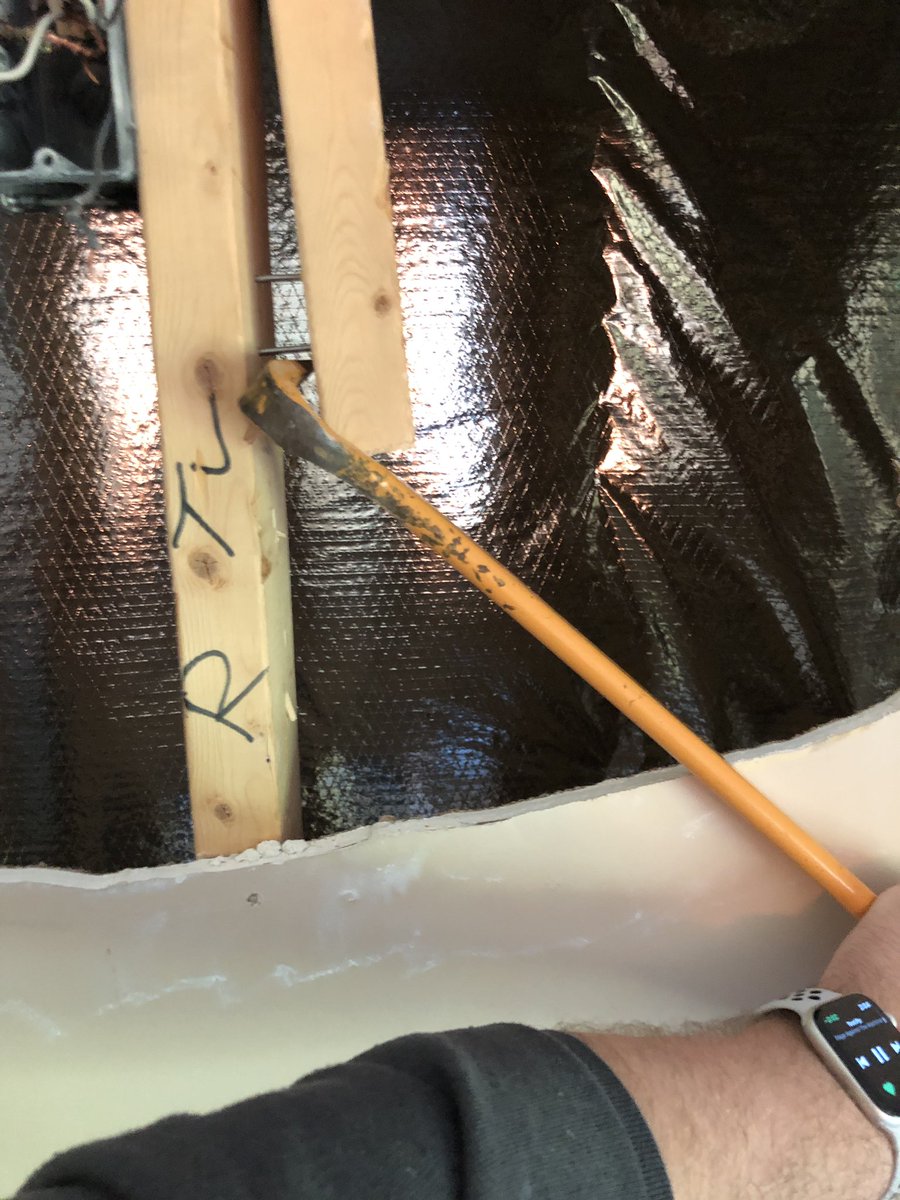
Tip: when using a bar, don’t just pry the way you’d initially think. Rotating gives you a lot more force for separating things:
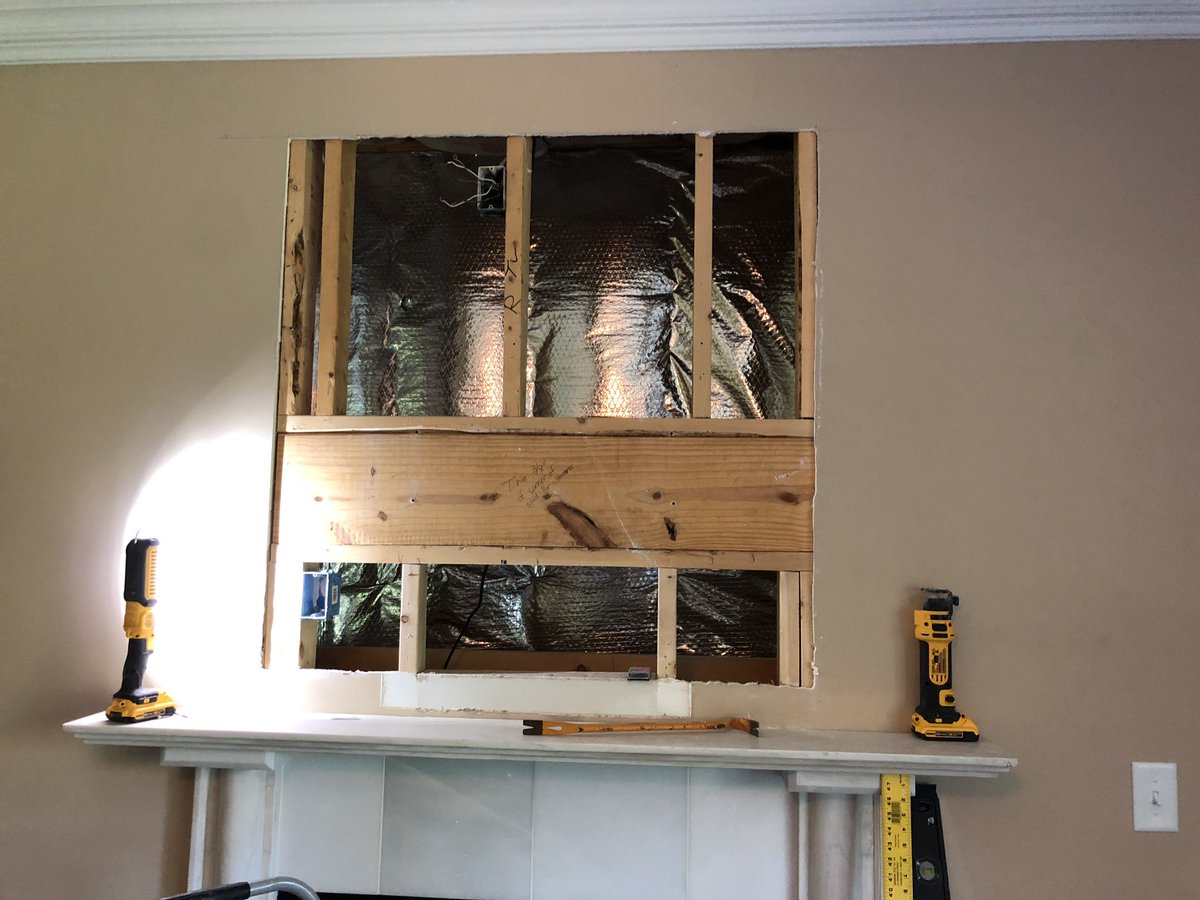
Next I found the double studs and tried to do as rectangular a cut as I could for the sheet going back, leaving the inner stud exposed to screw the drywall to. Main section is out now. While I think about the power, I’m going to tackle the conduit run on the right.


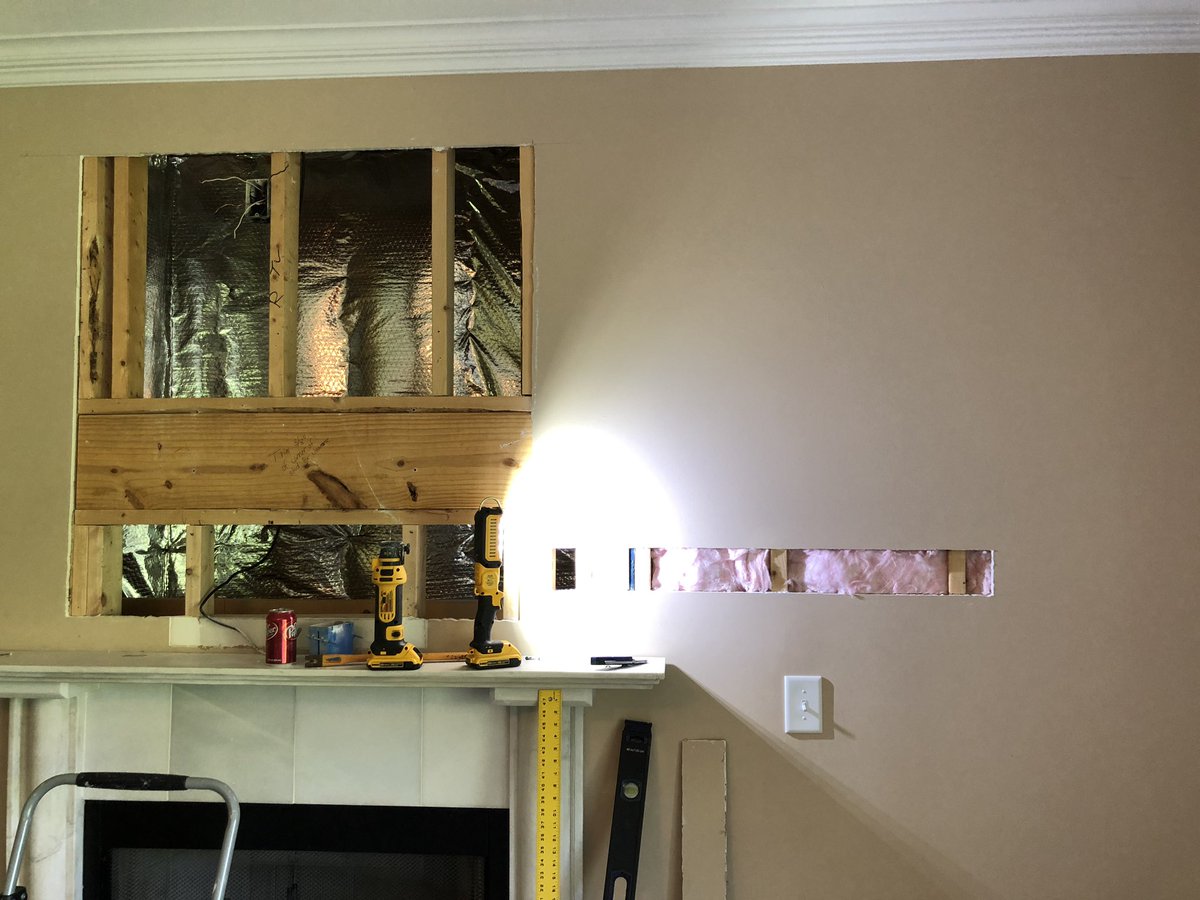
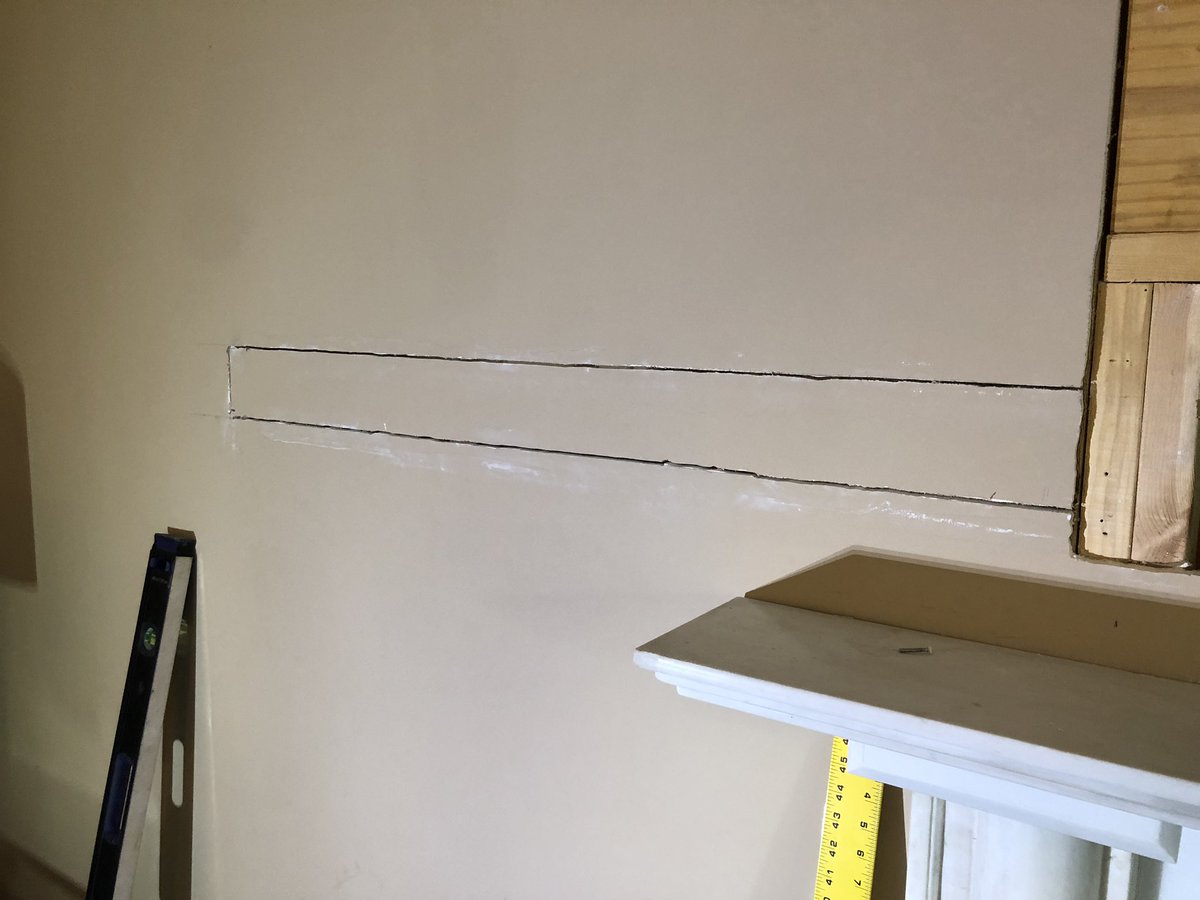
On the conduit run I just need enough area to get a hole saw in, so I did a level line just past the last stud I needed to go to (I’m also researching power here), then another 4 inches down. Scored heavily, then routered it out, then scored again so the back paper cut clean:


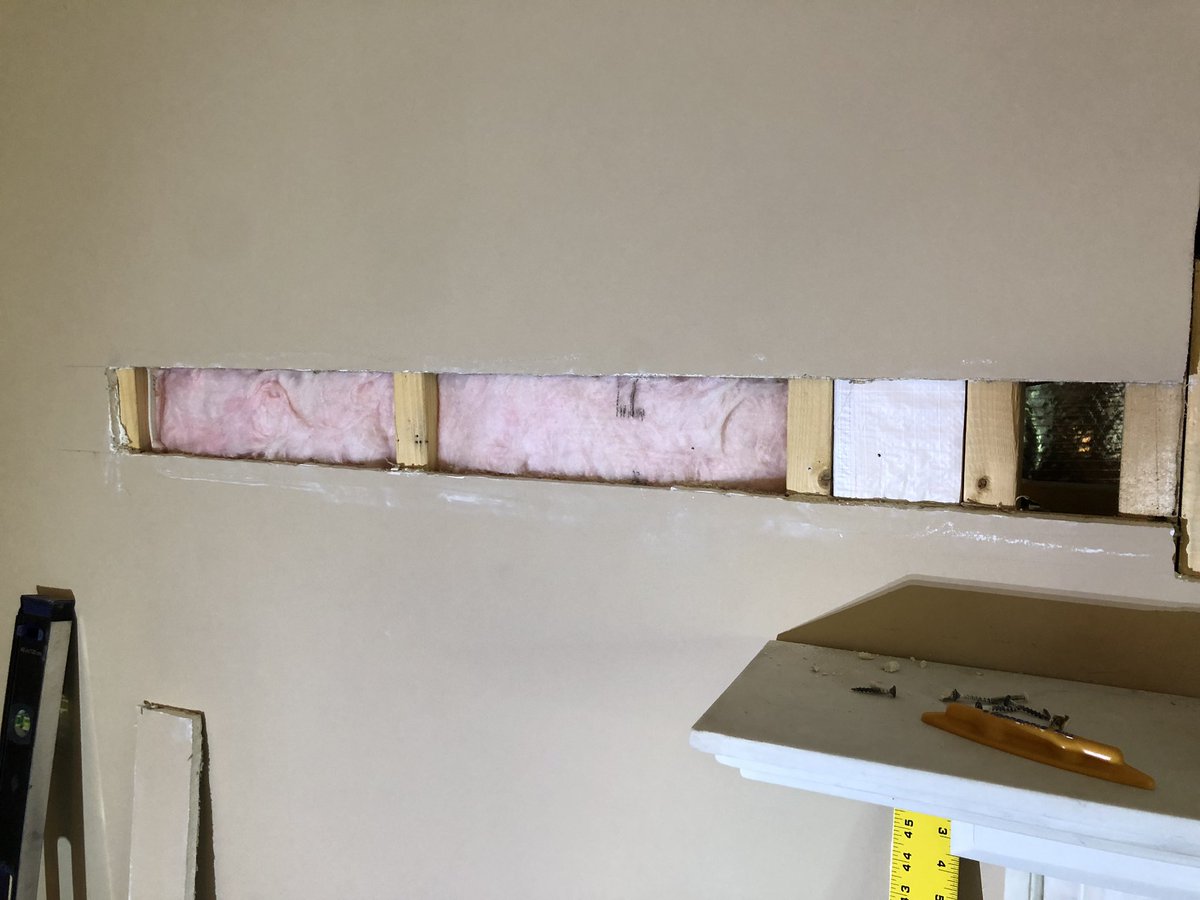
Okay so we have power, but only a single line...this means power comes from this side or...not. Time to turn in a breaker and see which side is still hot while out box up top is disconnected. I also found the coax run which is nice - I can just capture that down bottom in a box.


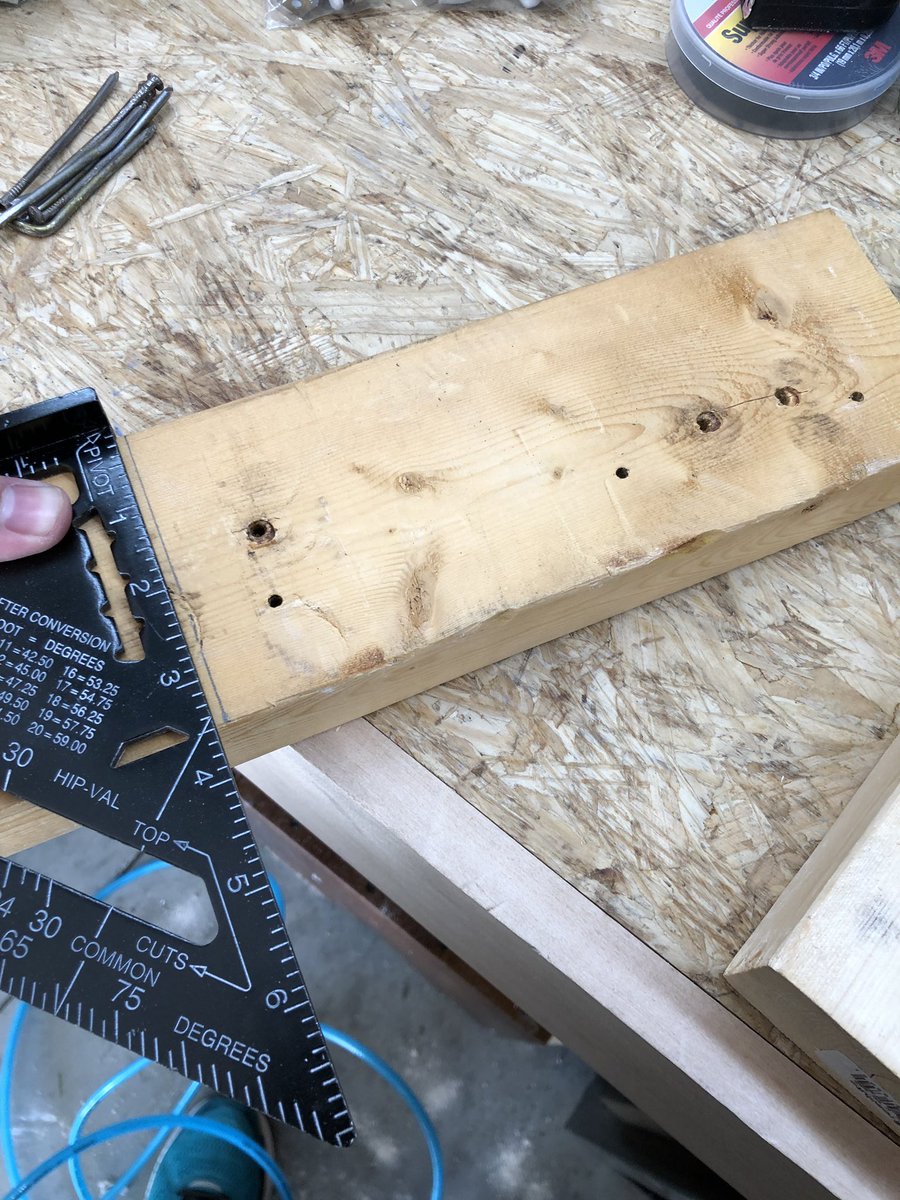
Might as well go ahead and take care of the only framing to do: the gap where the box was. The rest works for where we want to be. We’re just using scrap from up top’s double blocks earlier. And I finally just made a screw kit with various lengths and sizes to keep around:


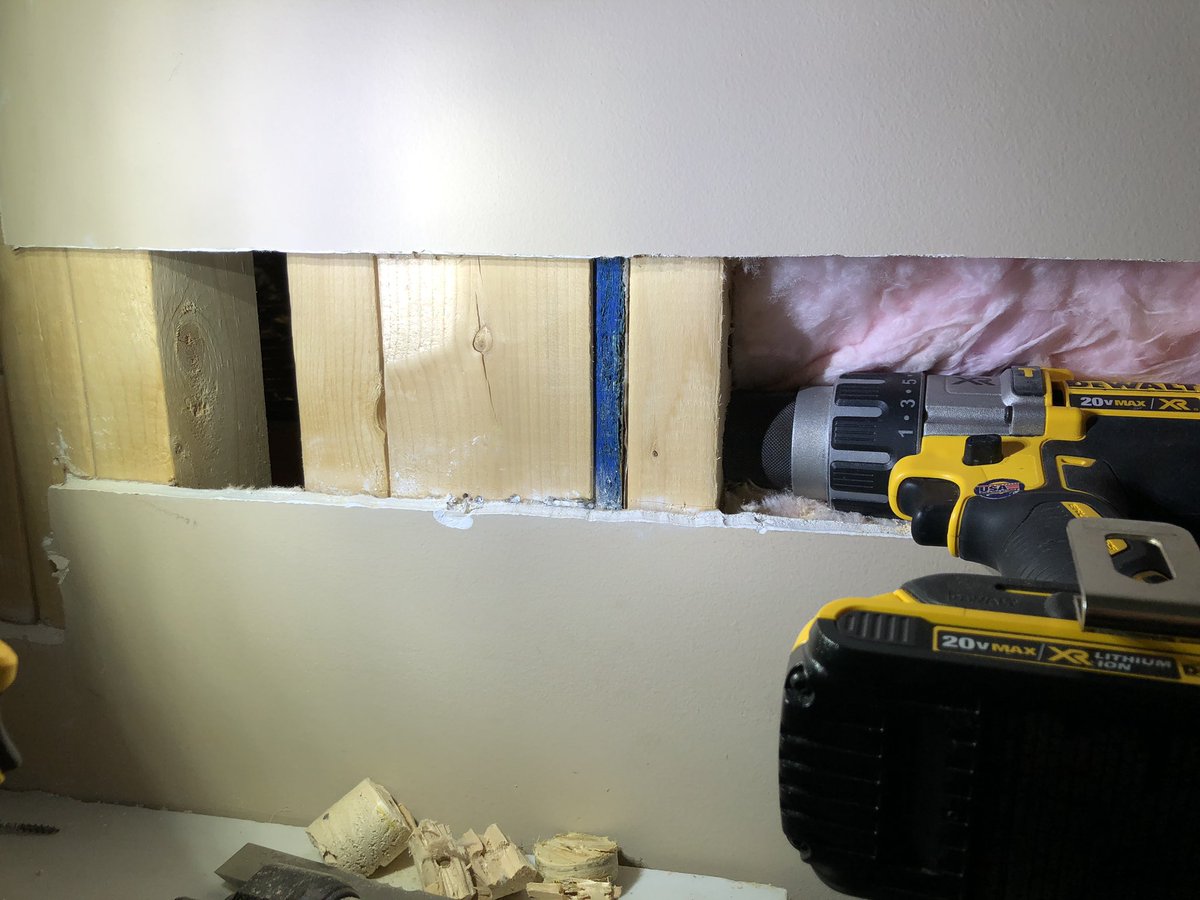
This next part is why I’ve been lazy, I knew this corner would be a bugger to get the conduit through.


I’m halfway through and going to up the corner hole to a size big enough to fit the drill chuck. If I can do that and extend the hole saw to the furthest it’ll hold in the check then...maybe. Or I don’t have the tools here to do this. Let’s see!
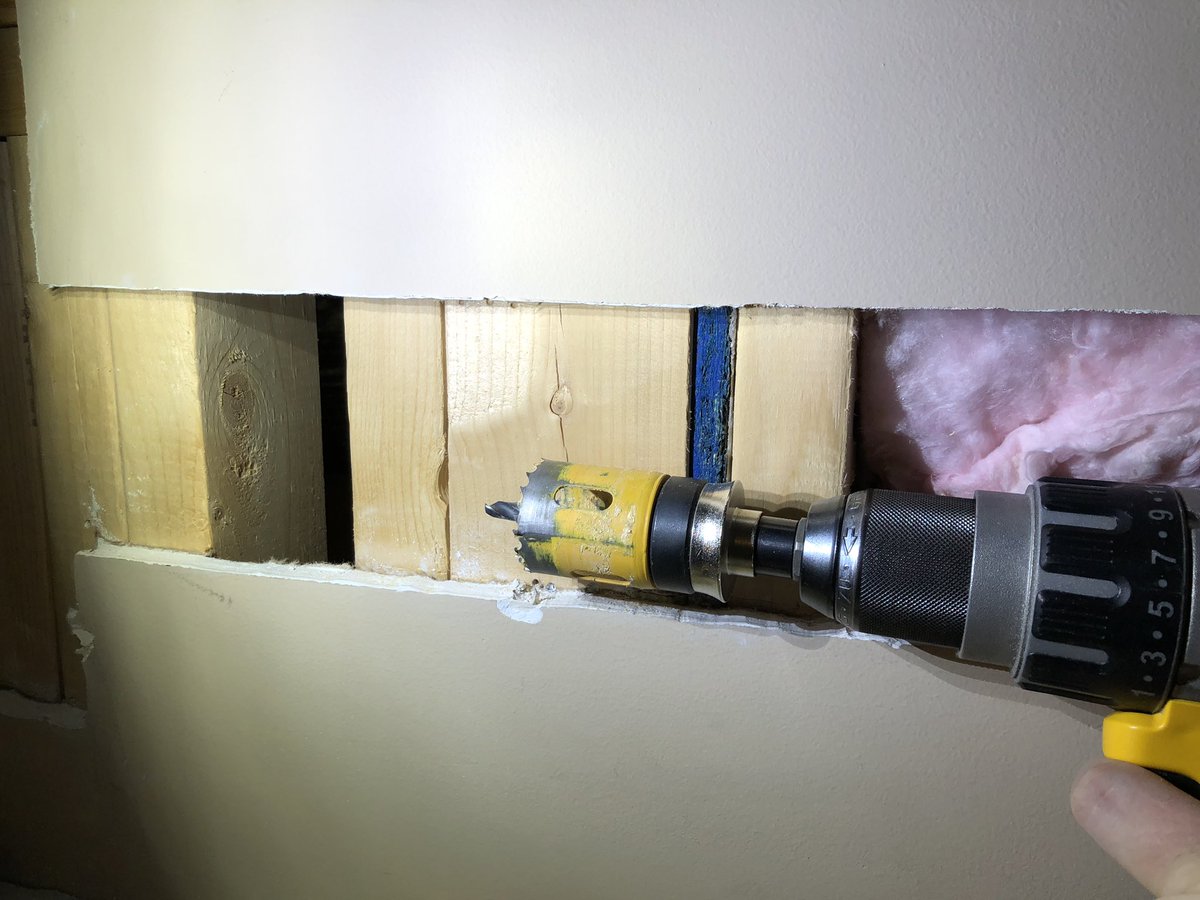
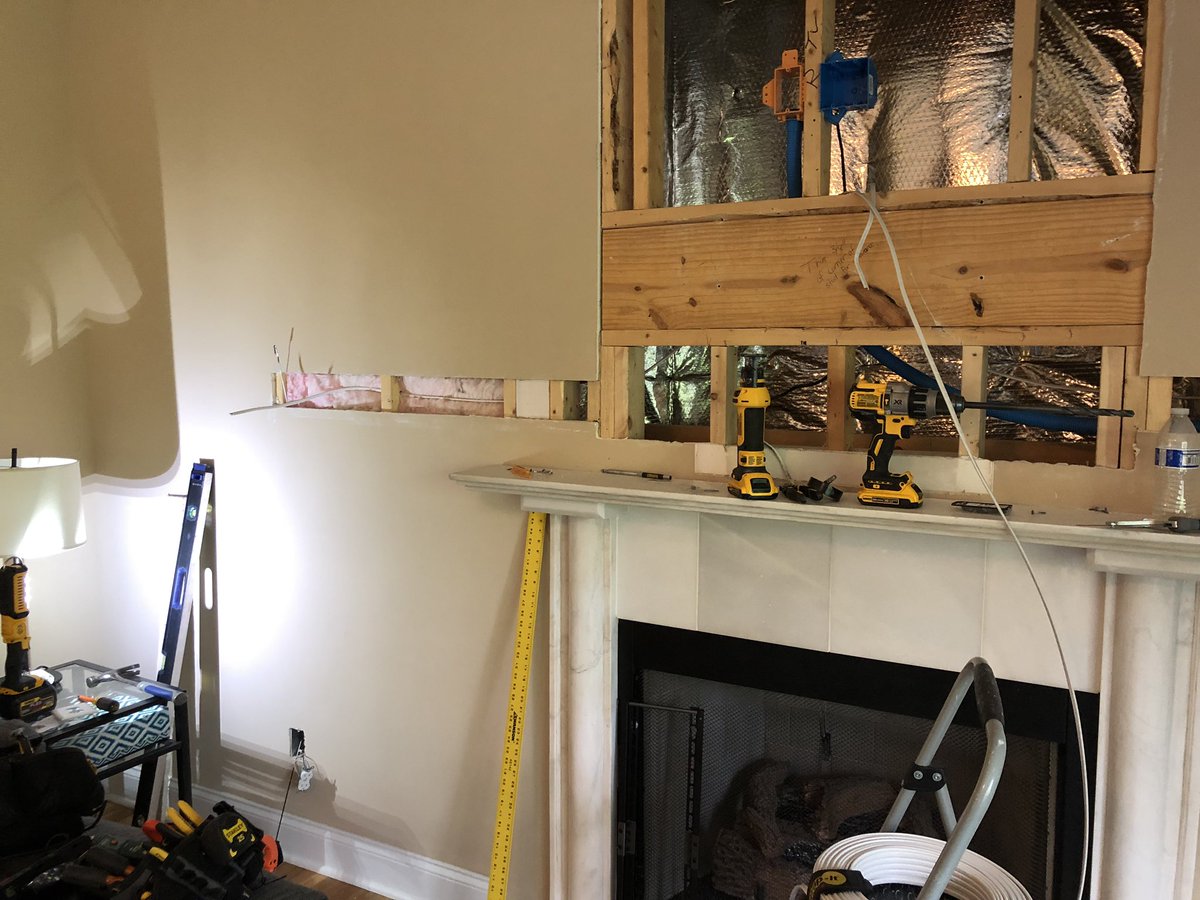
Victory! Now to borrow a far-easier long bit for the electrical line I need to re-route from the plug down there to a lower spot in the wall and do it properly.


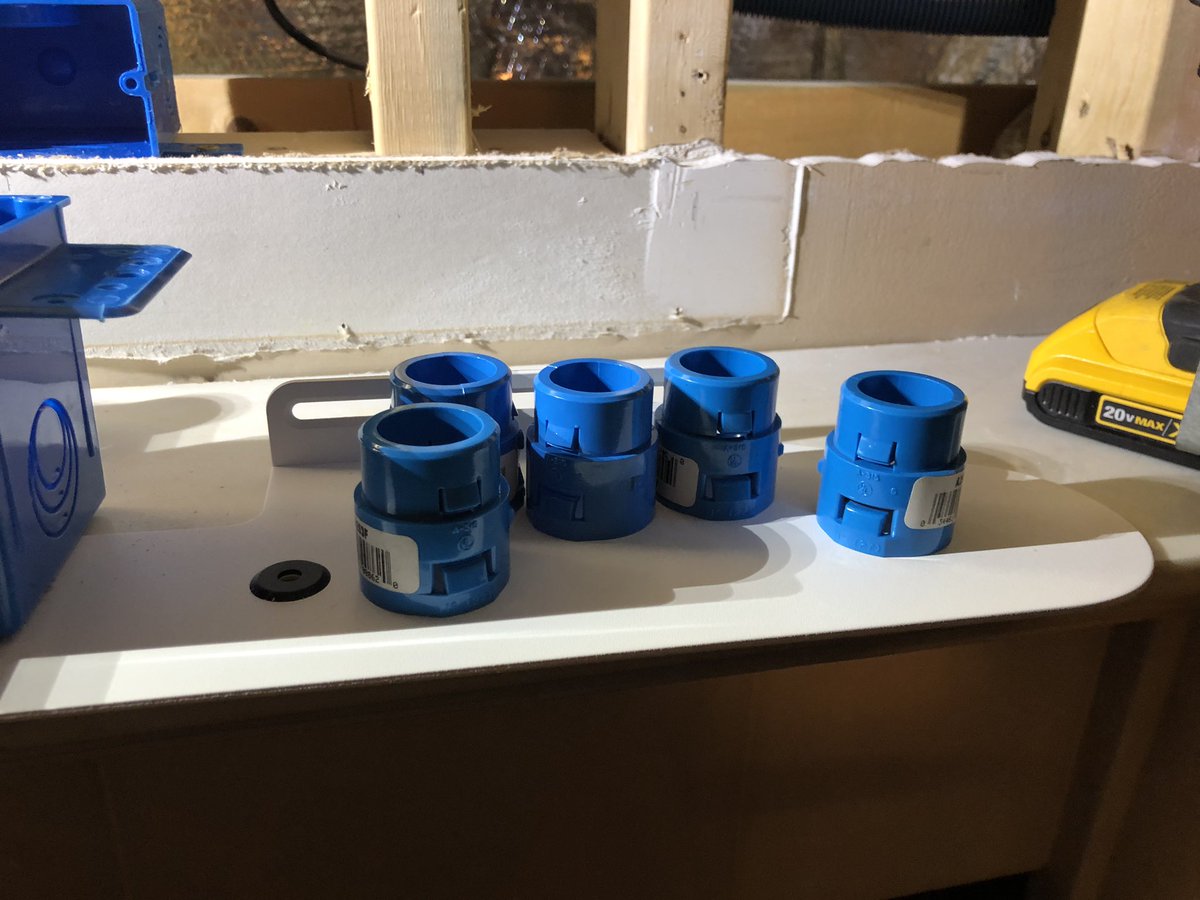
Conduit run wasn’t bad, but this 1” plastic is super stiff. I’m going to go get some hard outlet connectors before finishing this up.


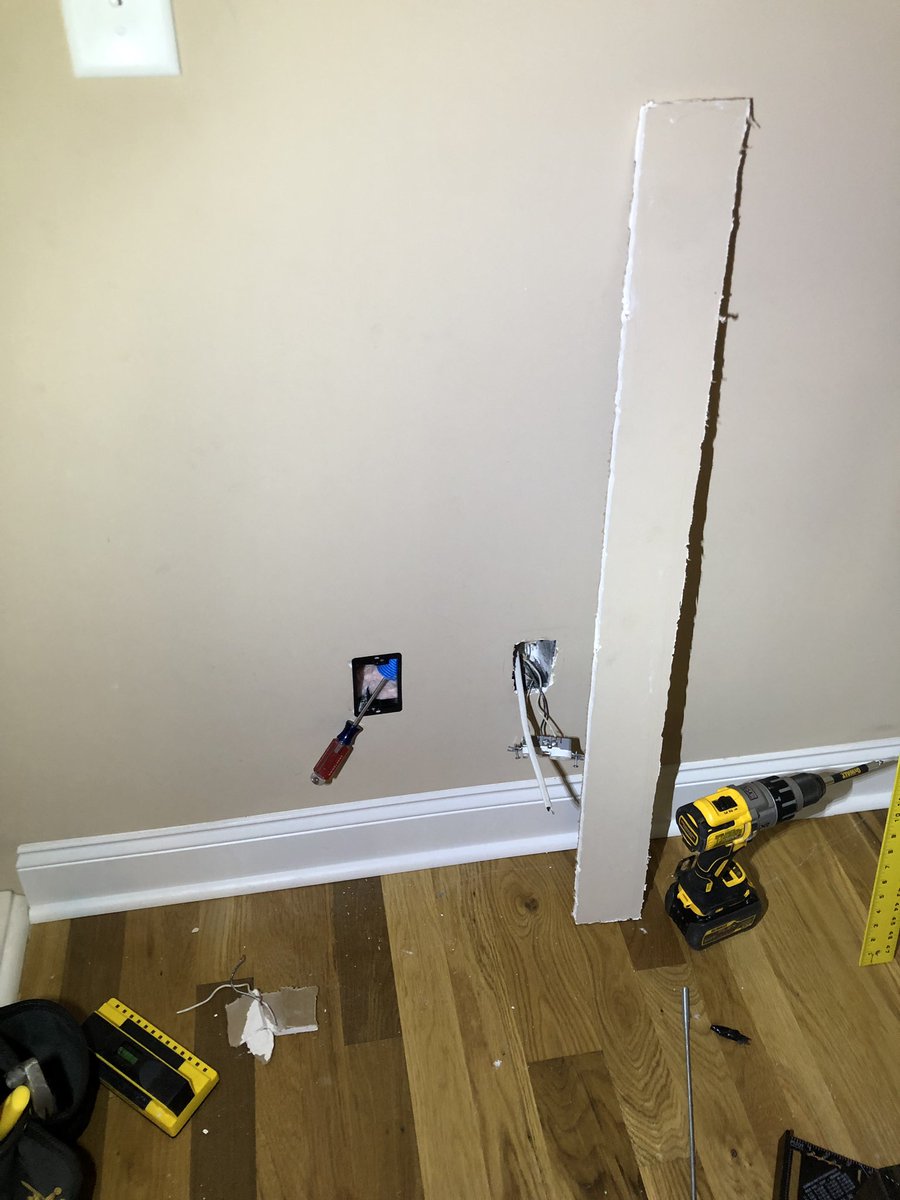
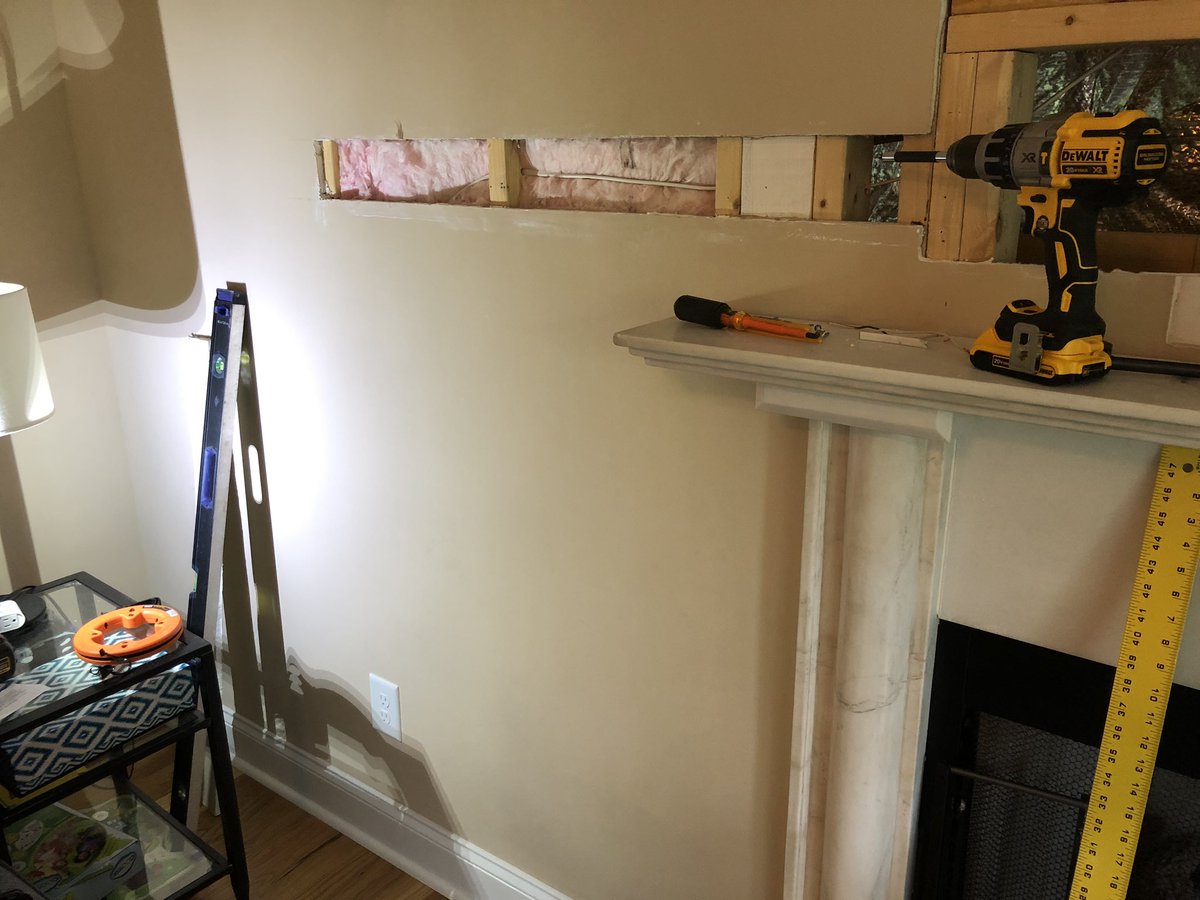
Got electrical run from the outlet to top but I’ll need to do the other side probably tomorrow...in just out of energy. And we have to go help dad hang that giant puzzle on a ceiling shortly. That’s all for today...living with the mess overnight:


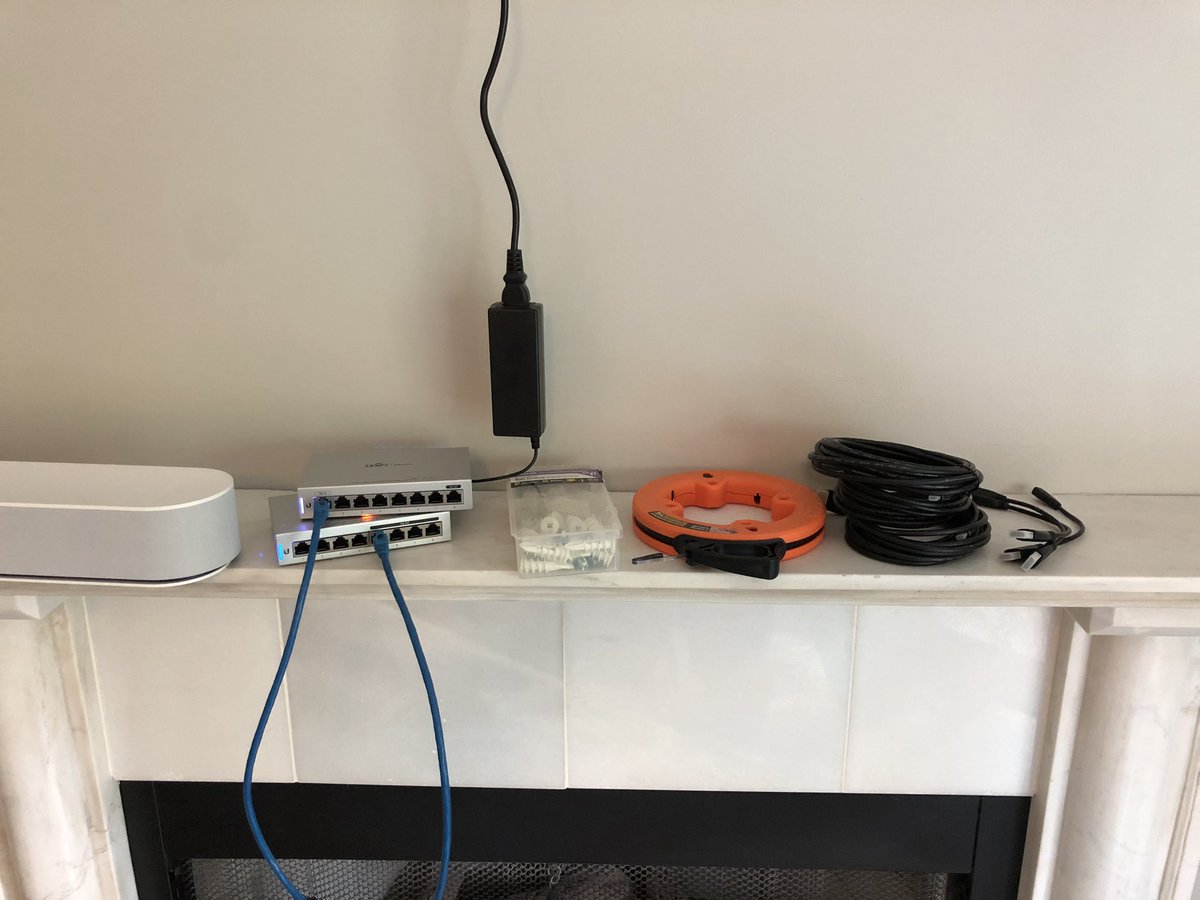
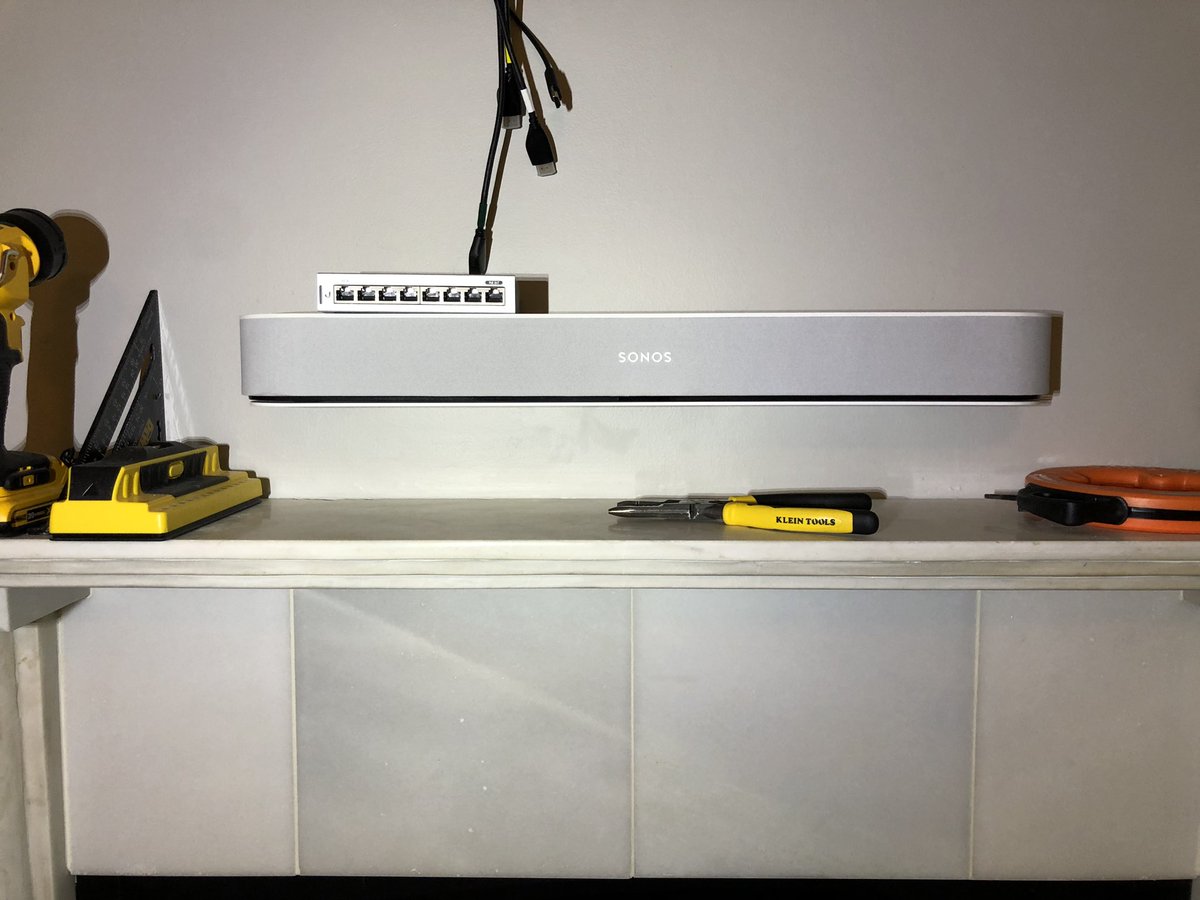
Okay so I forgot about the Sonos having Ethernet too. Oops. I'm going to run a single Cat6a line up behind the TV instead. Coming from the US-8-60W at the base, this will power a US-8 (amazon.com/Ubiquiti-Netwo…), which runs purely off PoE. That'll supply TV, Chromecast, and Sonos:

Note that the US-8-60W is an 802.3af switch, which when powering a US-8 isn't enough to drive most of the 48V APs. You need 802.3at input for that, or attach the 48v power supply...but that would defeat the point battery-backups I have coming from my office.
I just did a similar cutout on the left side to route the other leg of power down. That’s all connected up (nothing special) and top boxes are next.
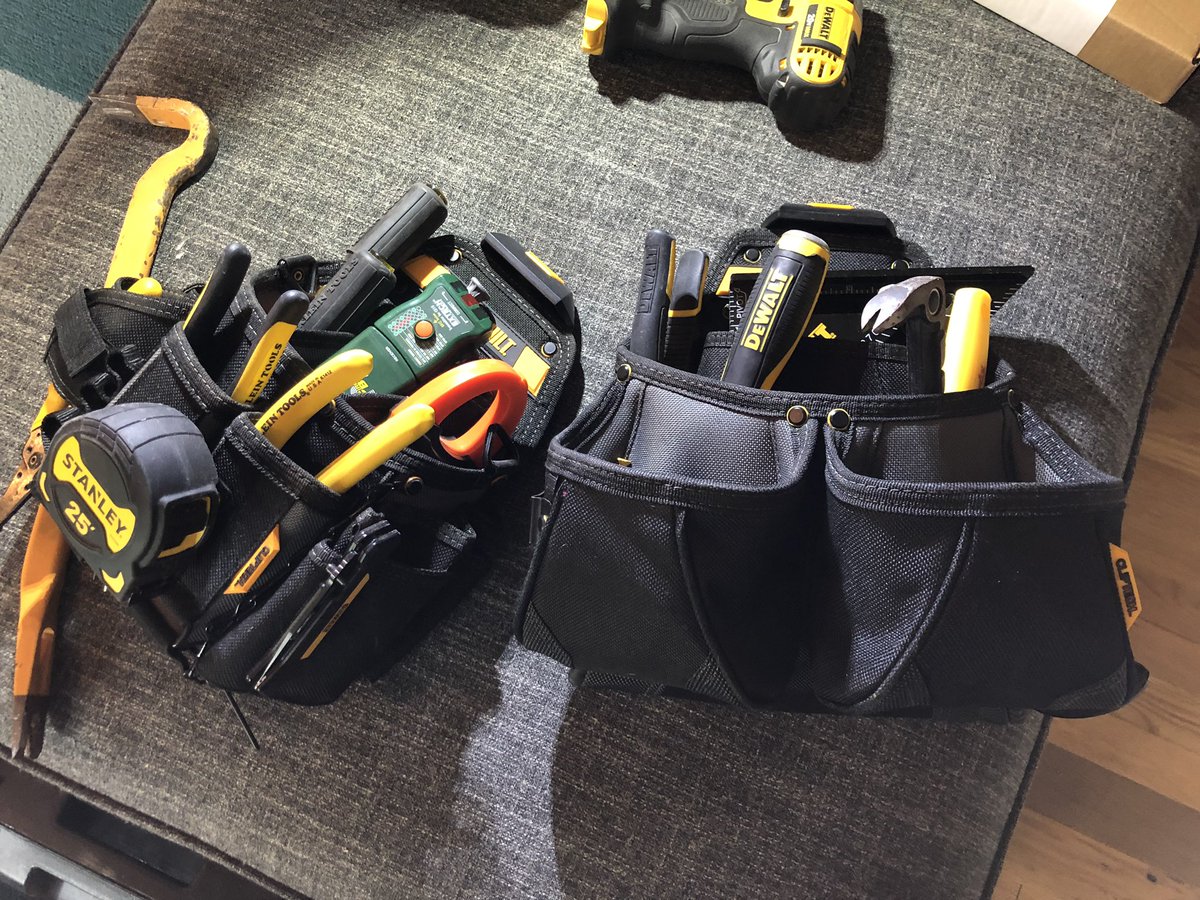
I talked about this when building the shop but I must say it again: these modular tool belts are *awesome* for carpentry + other combo projects like electrical. I can just change my pouches in seconds without maintaining a whole other tool belt like I used to...I love this thing:

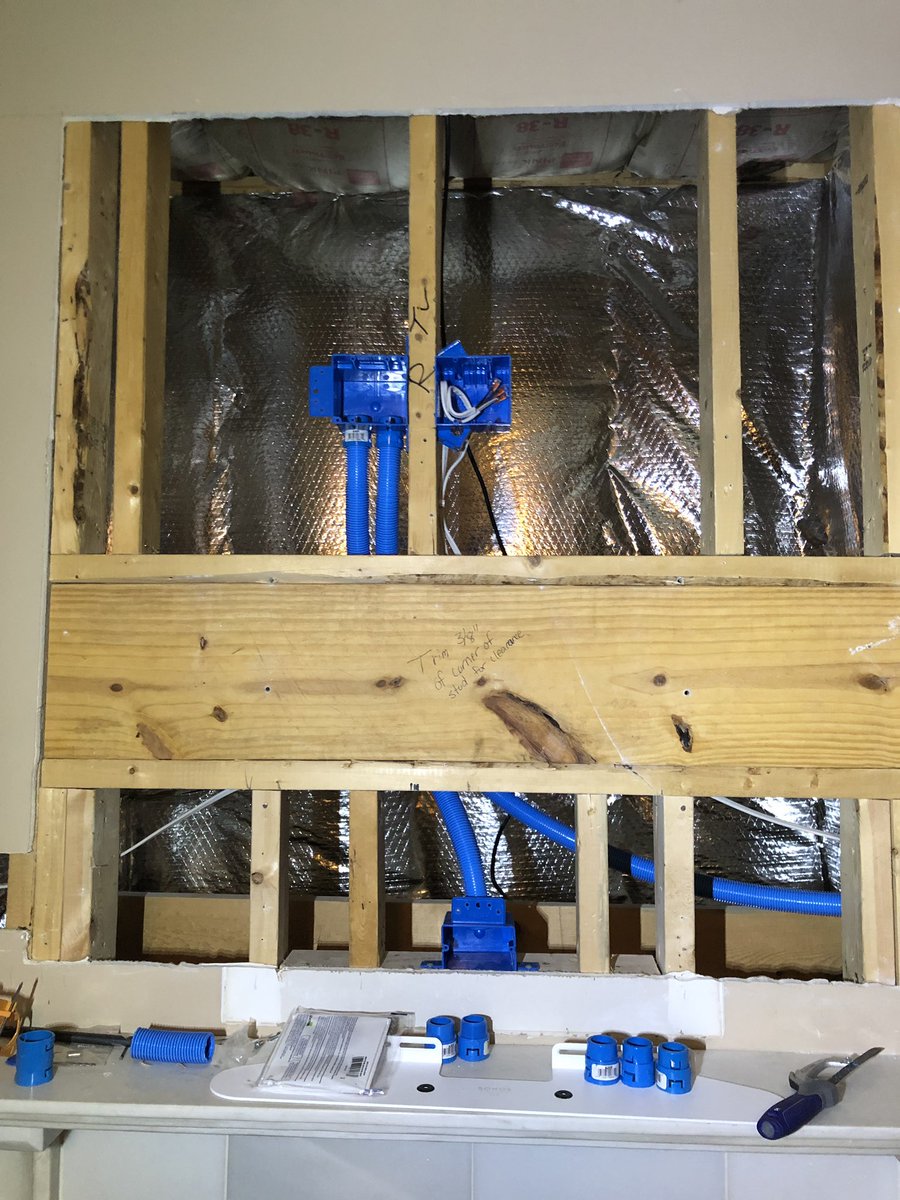
Since the top needs drywall yet, no point installing plugs...but we need a circuit working in the living room so for now I’m just tying these together. If you notice vs. yesterday I thought about it a bit more and in just going with 4 plugs behind the TV up here. Also, conduit:
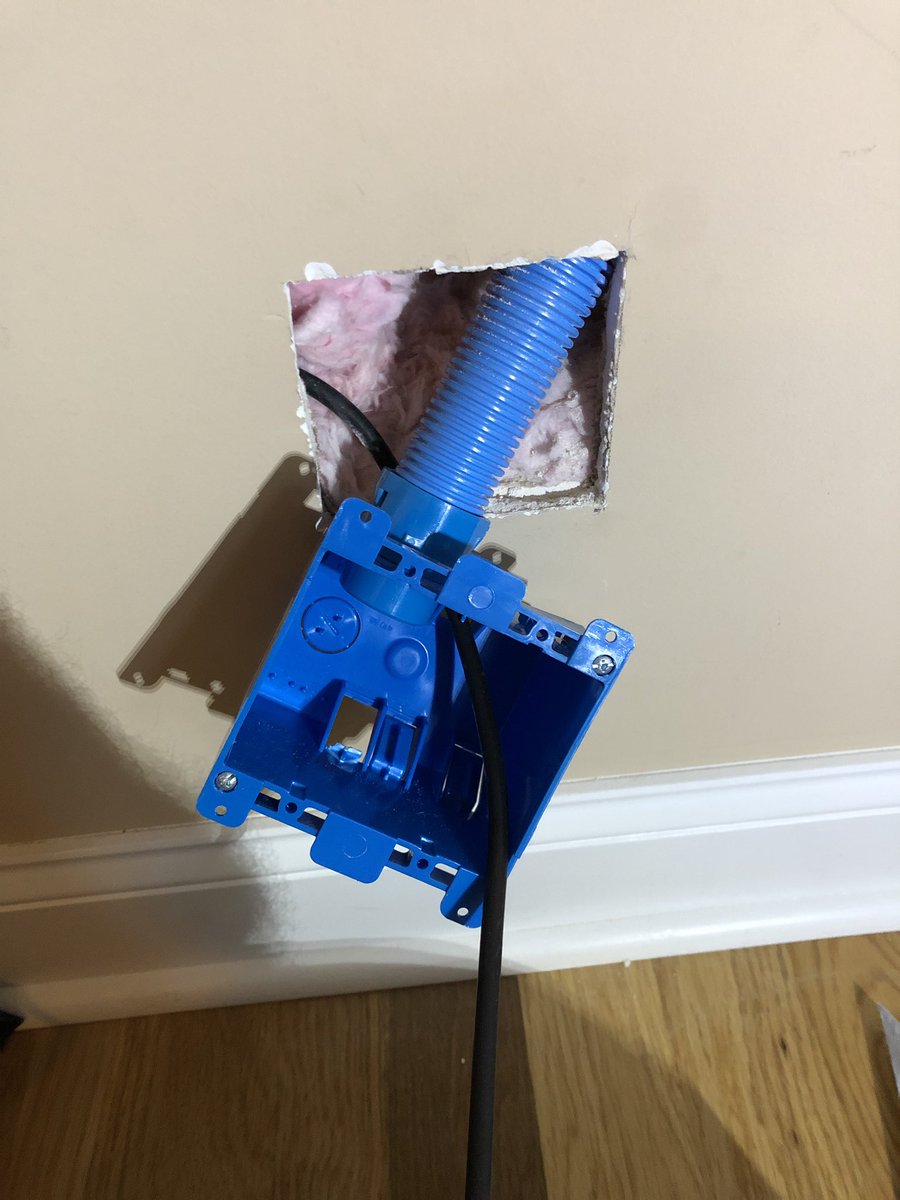
Figuring out how the Beam is going to mount next - the good news is it’s not very tall. The bad news is...it’s not very tall, and doesn’t cover an outlet plate. But a box recessed *behind* the drywall instead of flush with it and cutout, attached to the same conduit...maybe!


For anyone wondering if I plan everything ahead of time: I try to, but obviously I suck at it.

But hey, that’s why we use screws - blocks moved and here’s our layout...let’s make this work. The box has tabs to align with drywall but those won’t let it rest flat, so let’s take care of that.

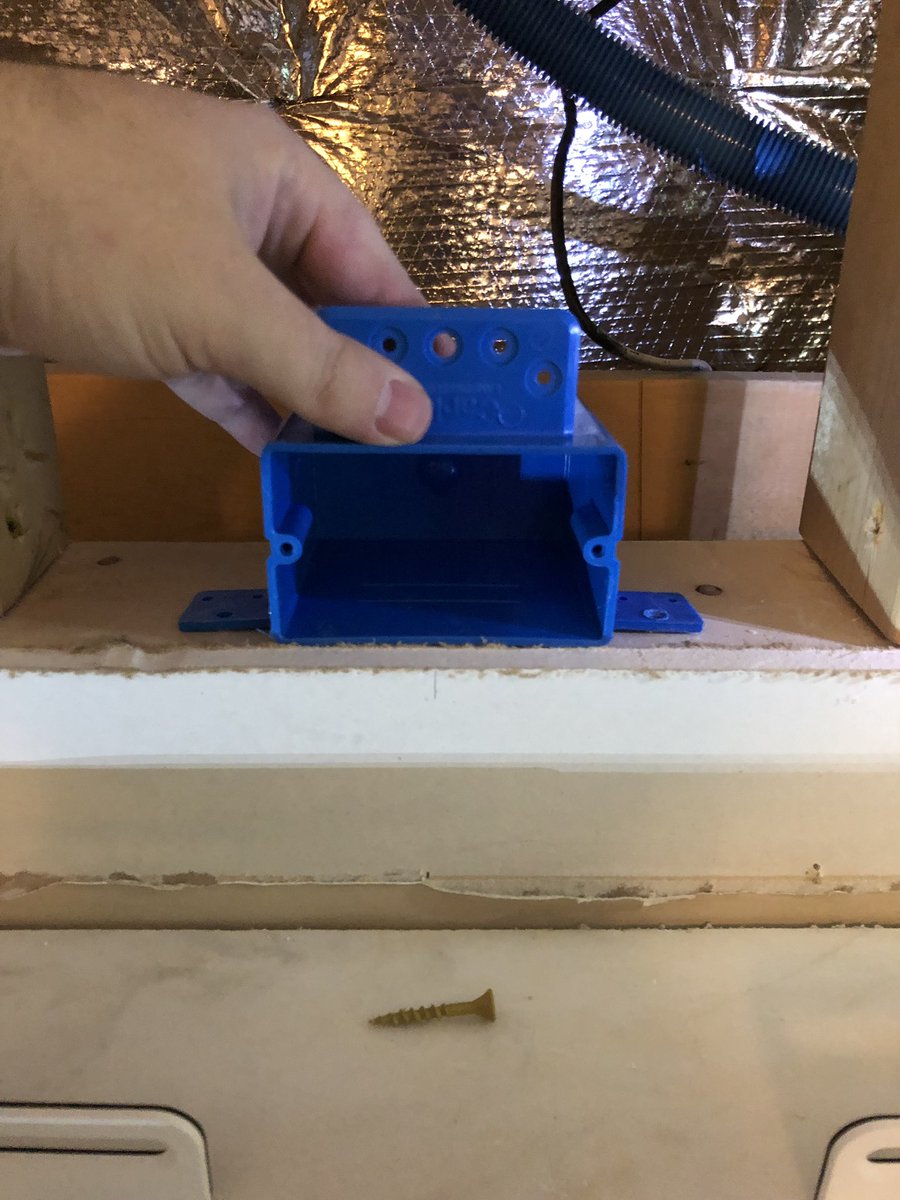

Tabs come off easy with a quick dremeling. Test fit for the conduit adapter too:


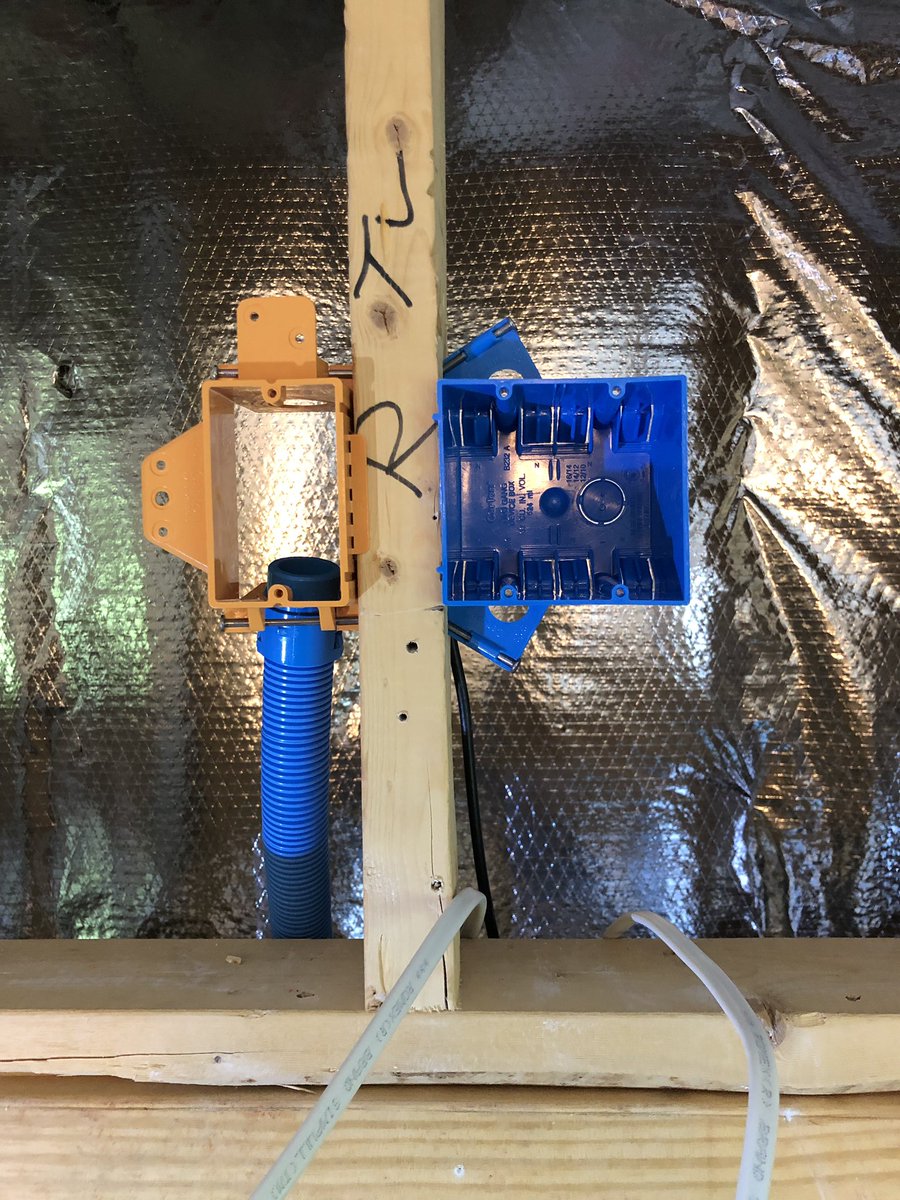
I’m going to run conduit from this box to the top of the low voltage box, so top goes to the Beam (power and HDMI), bottom goes the to the media center. But I’m one conduit clip short because someone put a threaded one in the wrong spot and I didn’t check all 4 arrrrrgh!


Hmmmm if I have to go back for another conduit clip I may swap out the top low voltage box for a double instead. The 1” conduit *really* doesn’t like to bend...and nor do cables pull through it for that matter. I think a double brush plate box is the best option for 2 runs down.
Well, at least Spotify figured out the reason for my trip back to Home Depot.


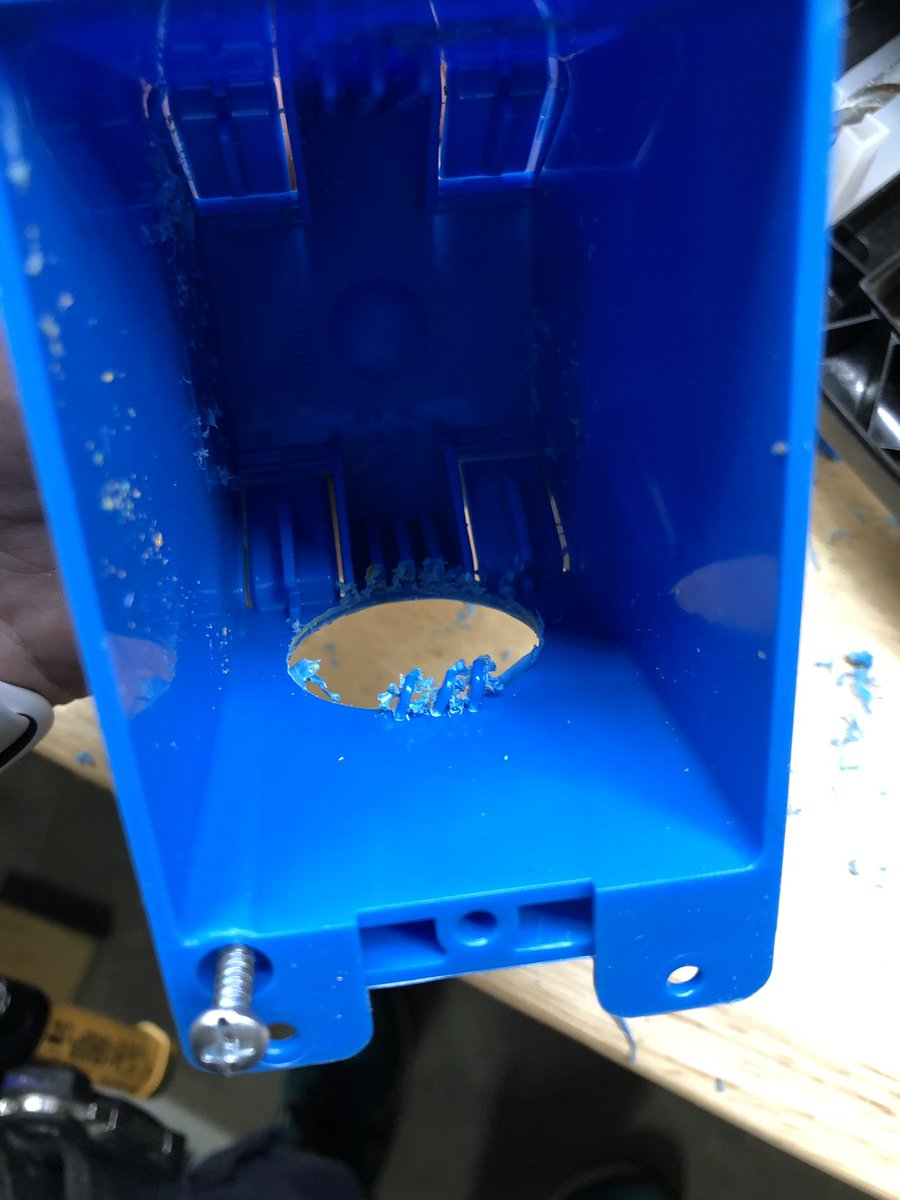
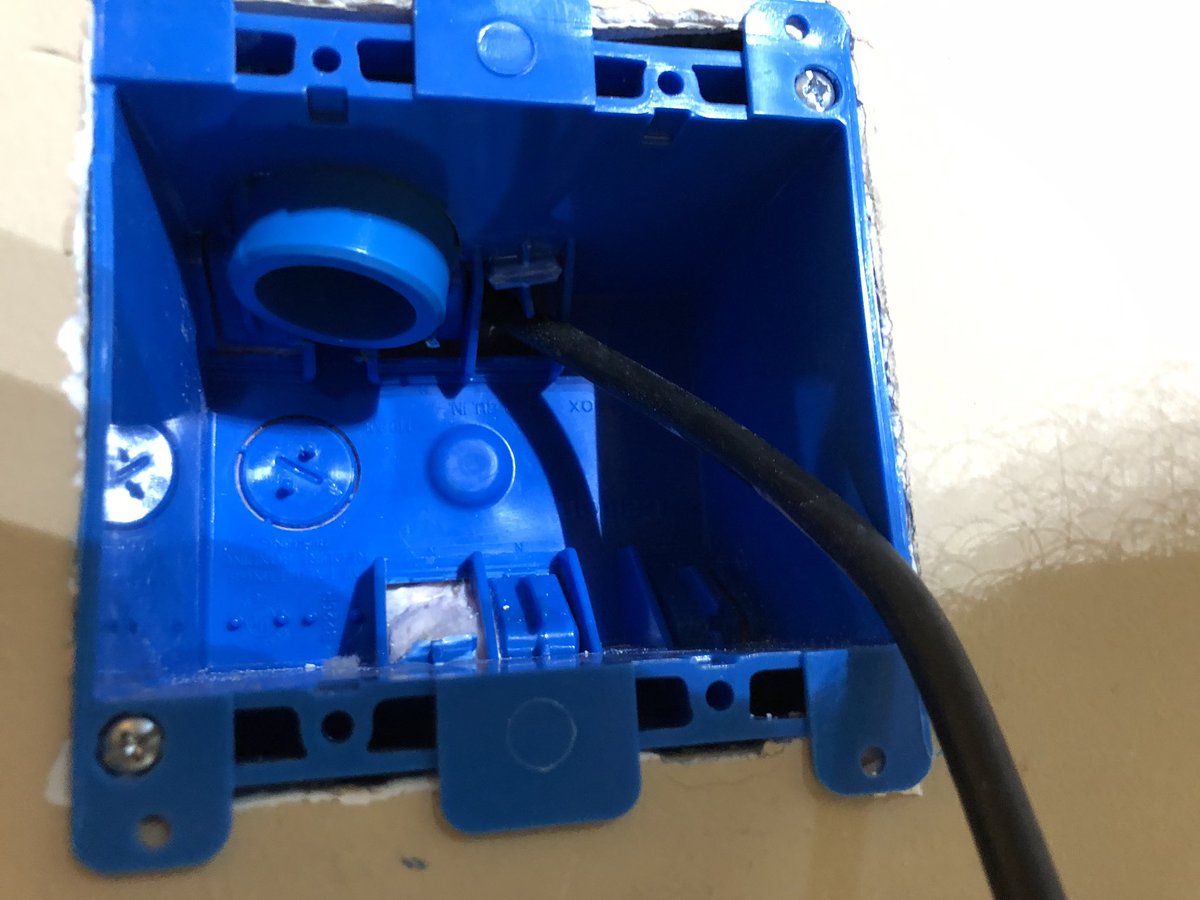
To hell with going back to buy more...stocked up. Conduit is now in place up top, now I have to figure out how to connect it down bottom. They don’t sell an “old work” box that accepts a conduit connection so...time to make holes in things:

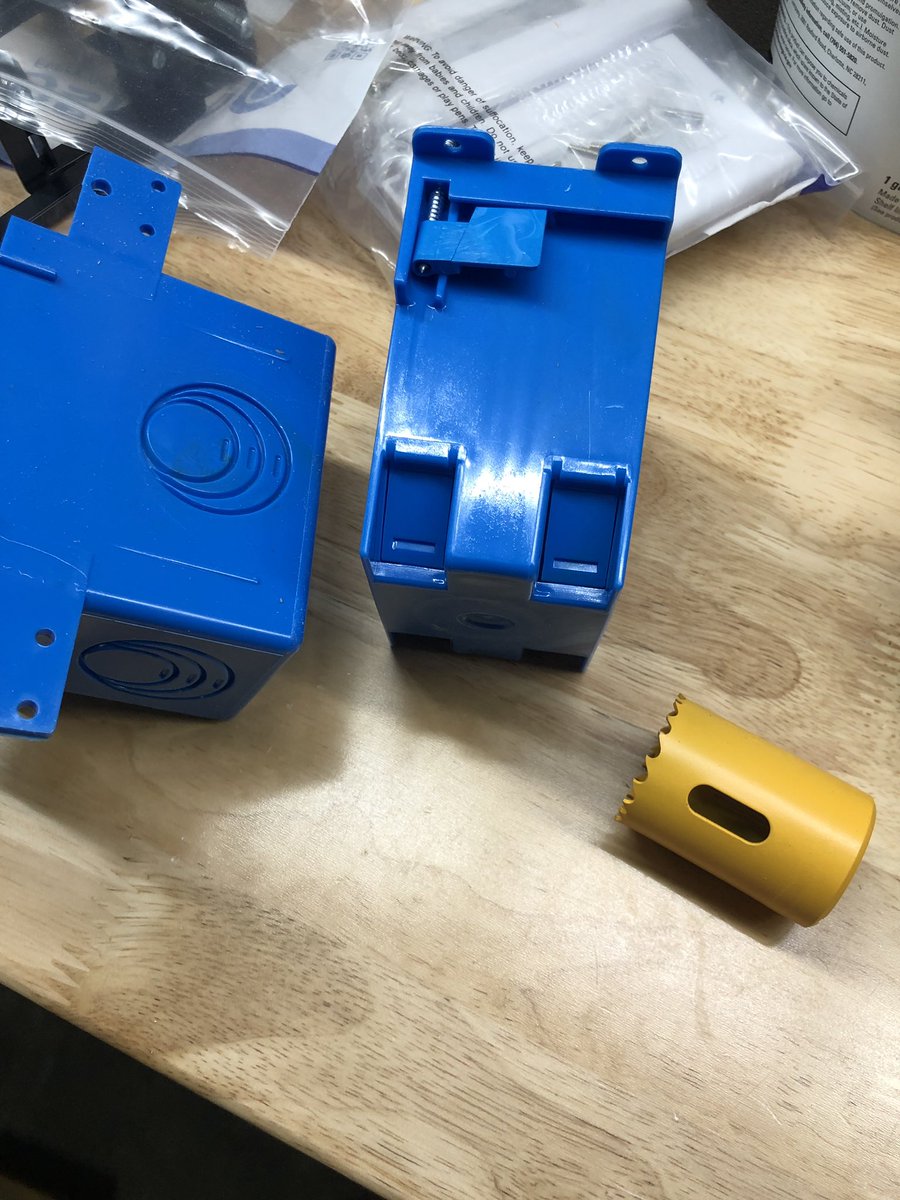
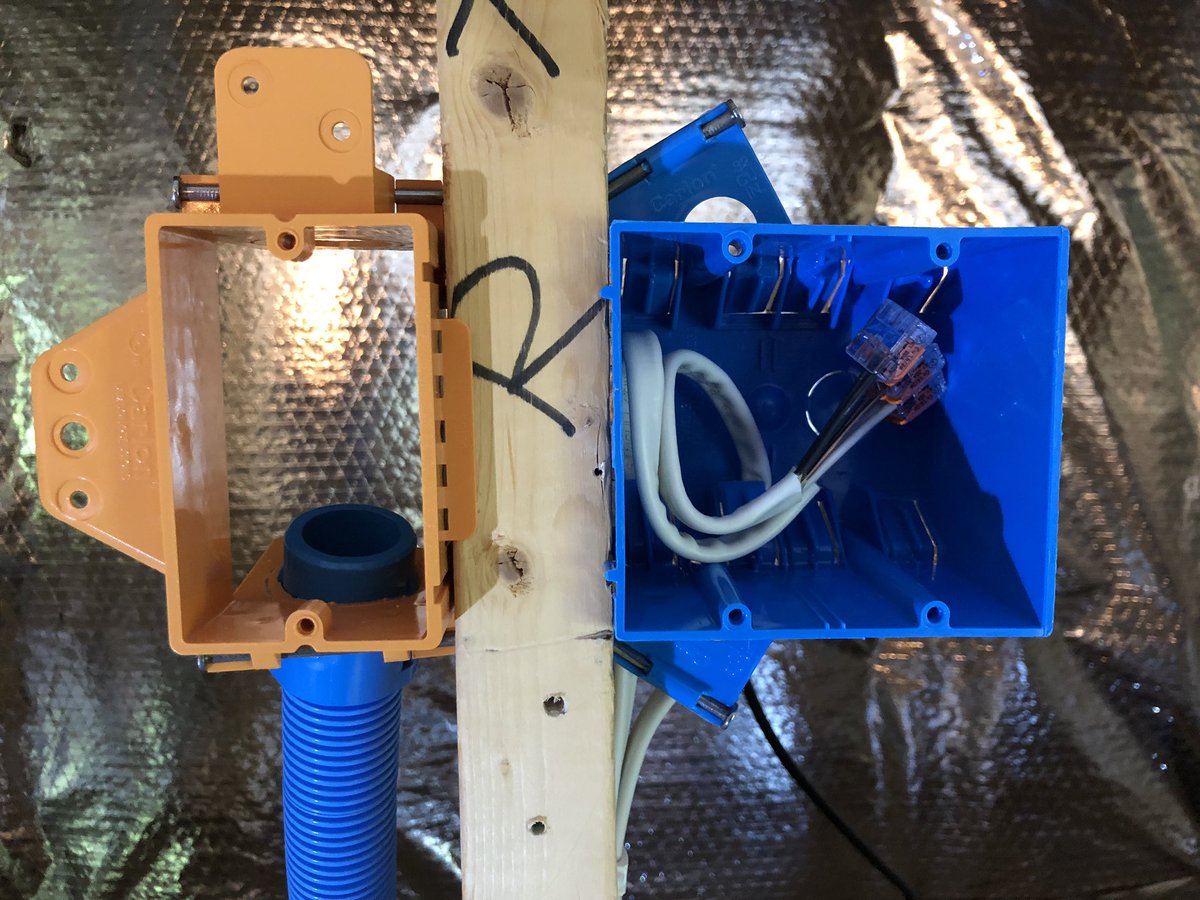
Well that definitely wasn’t made to work in plastic...worked though! Some dremel cleanup for all the burrs and we have a box that mayyyyybe will work down bottom. We’ll see!


Stopping here tonight because I’m having doubts about getting that single box with conduit installed without tearing up the wall.
I may swap it for a double which will also make running Cat6a up from the basement into it a little less crowded. Power’s back on though, yay plugs!
I may swap it for a double which will also make running Cat6a up from the basement into it a little less crowded. Power’s back on though, yay plugs!

Compared to day 1, evening 2 has less mess! And more holes! Just need to finish boxes down bottom, but should be able to do drywall up top regardless tomorrow evening.


Time to make the bottom box a double and re-route some coax...that ought to be enough.


First up: doing our thing to the double box outlet. Hole saw and dremel cleanup...obviously I’m winging it here.


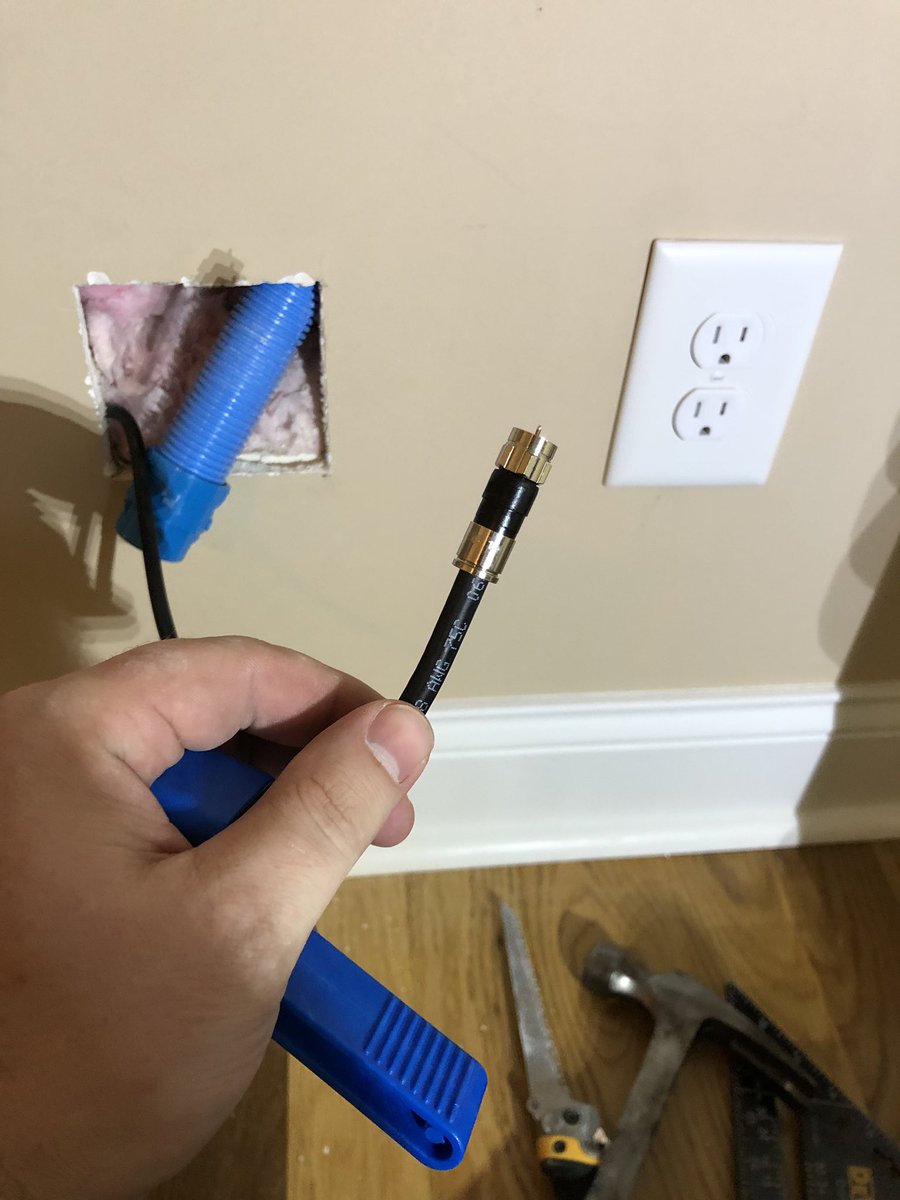
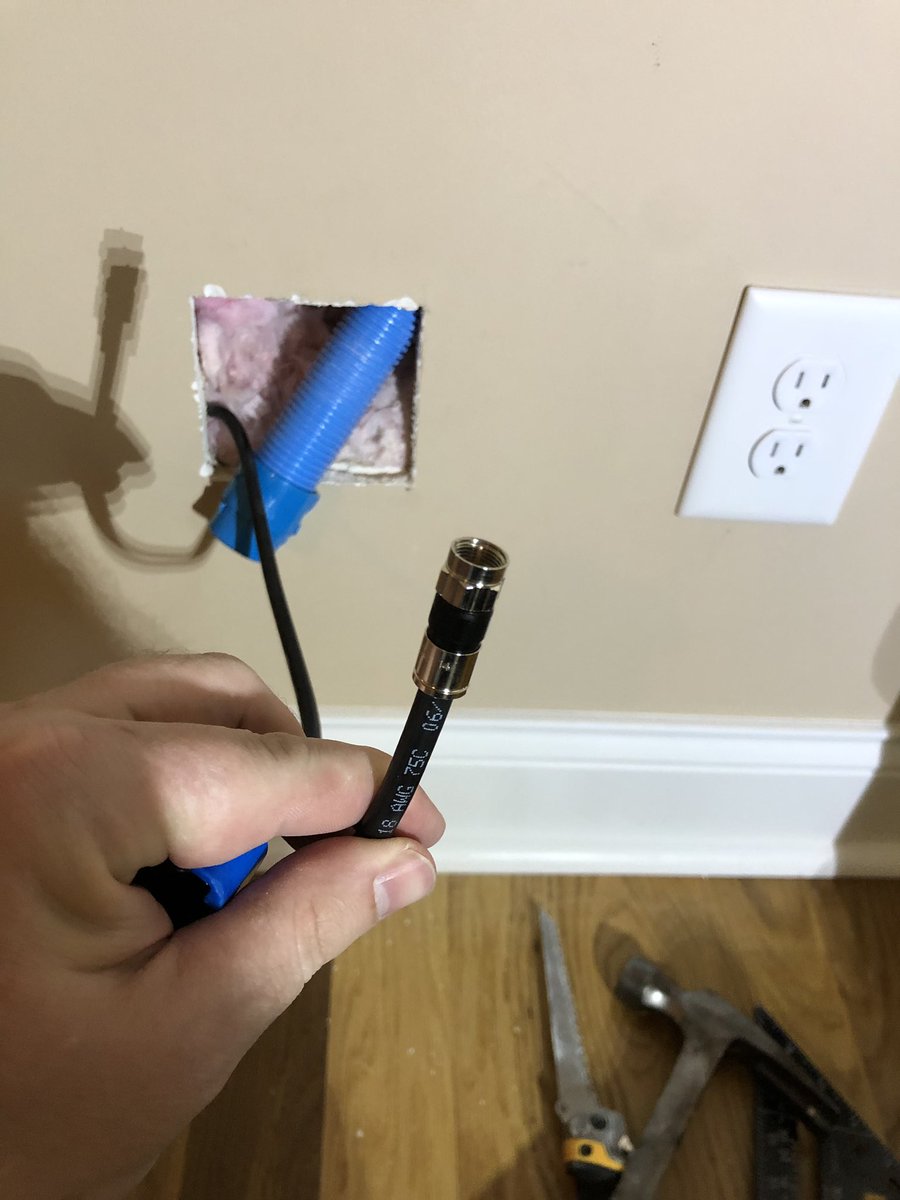
Cut the coax, pulled it down, and will make an outlet here later...but putting an end on it now to test satellite connectivity.


It’s hard to convey how much of a bastard this was to get in the wall. That 1” conduit is sooooooo stiff and the box’s depth (due to insulation) means it’s closer to the front than I’d like. But...it’s in! Conduit is complete.

I’ve decided that was so hard to do that I’ll put another low voltage plate for Ethernet from the basement separately. It’s just too damn hard to get that thing in...not changing it now. But hey - conduit runs tested and they work great!

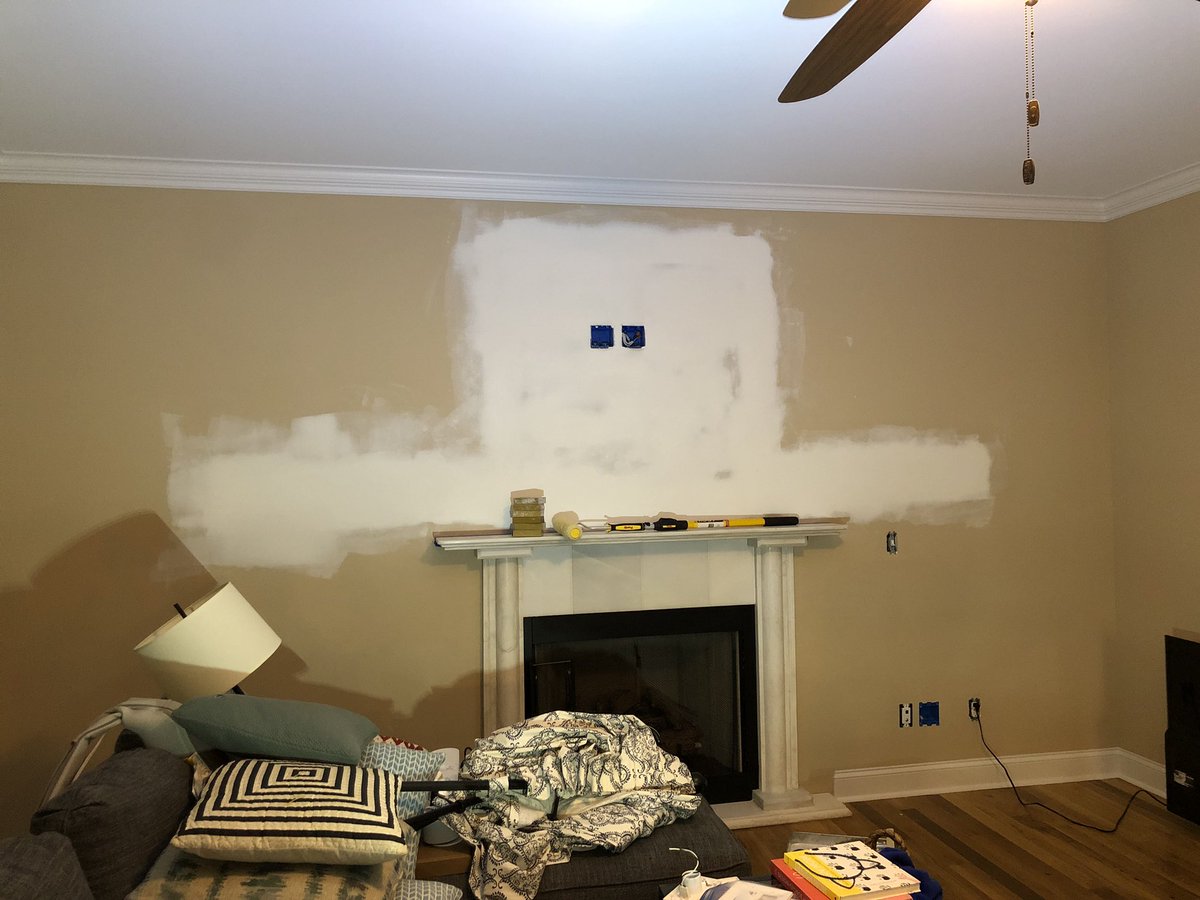
Drywall time! Let’s get this back together.


Mixing some water in the joint compound went great...until the end. Oops. I guess these are work shoes now.


Dad stopped by to help me hang and with the first coat of mud - many days left but getting there! We’re no drywall experts...that’s a craft I’ll readily pay for but giving it a shot.
Worst case is it ends up so ugly we need a bigger TV to cover it…
Worst case is it ends up so ugly we need a bigger TV to cover it…

Tonight is boring...just another coat of mud. I’m winging it here, but getting there! The top is a bevel piece so it’ll take another day or two of build-up, but I picked up a 12” knife today to help the final surfacing.
I took Friday off so...probably running some cat6a then.
I took Friday off so...probably running some cat6a then.


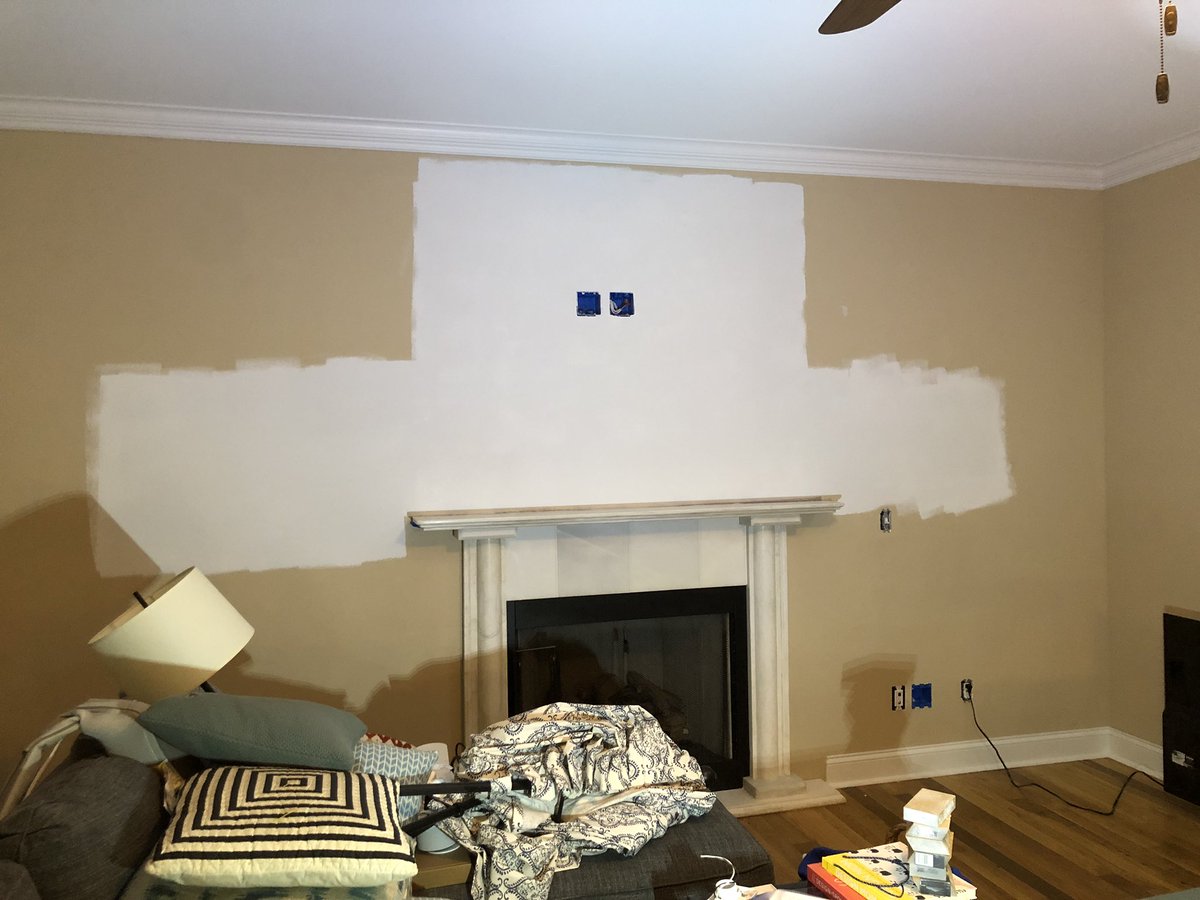
Last night’s before and after...still boring! The top with the bevel side in the installed sheet needs quite a bit of build-up. Another coat tonight, then hopefully to sanding and painting this weekend.


Last night before and after again...I guess it’s hard to tell anything from these photos but it’s getting much better - almost done! This is really boring, isn’t it?


And…tonight! A few people asked how life was without a TV...well, we’re cheating. The new TV for the bedroom is waiting on a stand still, so it’s going up and down nightly for the joint work. Tomorrow I can sand I think. And I suck at this, so there will be a *lot* of sanding.


Also: the plastic film and labels on there are just until we carry it upstairs! Put down those pitchforks, I’m not some sort of psychopath who doesn’t peel off the plastic.
It’s a rainy day tomorrow...so maybe some cat6a action to get the network up here.
It’s a rainy day tomorrow...so maybe some cat6a action to get the network up here.
Oh and note: 2 fans are going at this thing to help dry it out faster. I picked up 3 grits from 80 to 220 today of sanding blocks to help speed things along tomorrow taking off all that surface. It’s gonna be a looooooong sanding session.
Waited a bit for things to get tacky - now skim coat on the new board is done (see the fresh parts by color?) - now just waiting for it to dry before sanding!


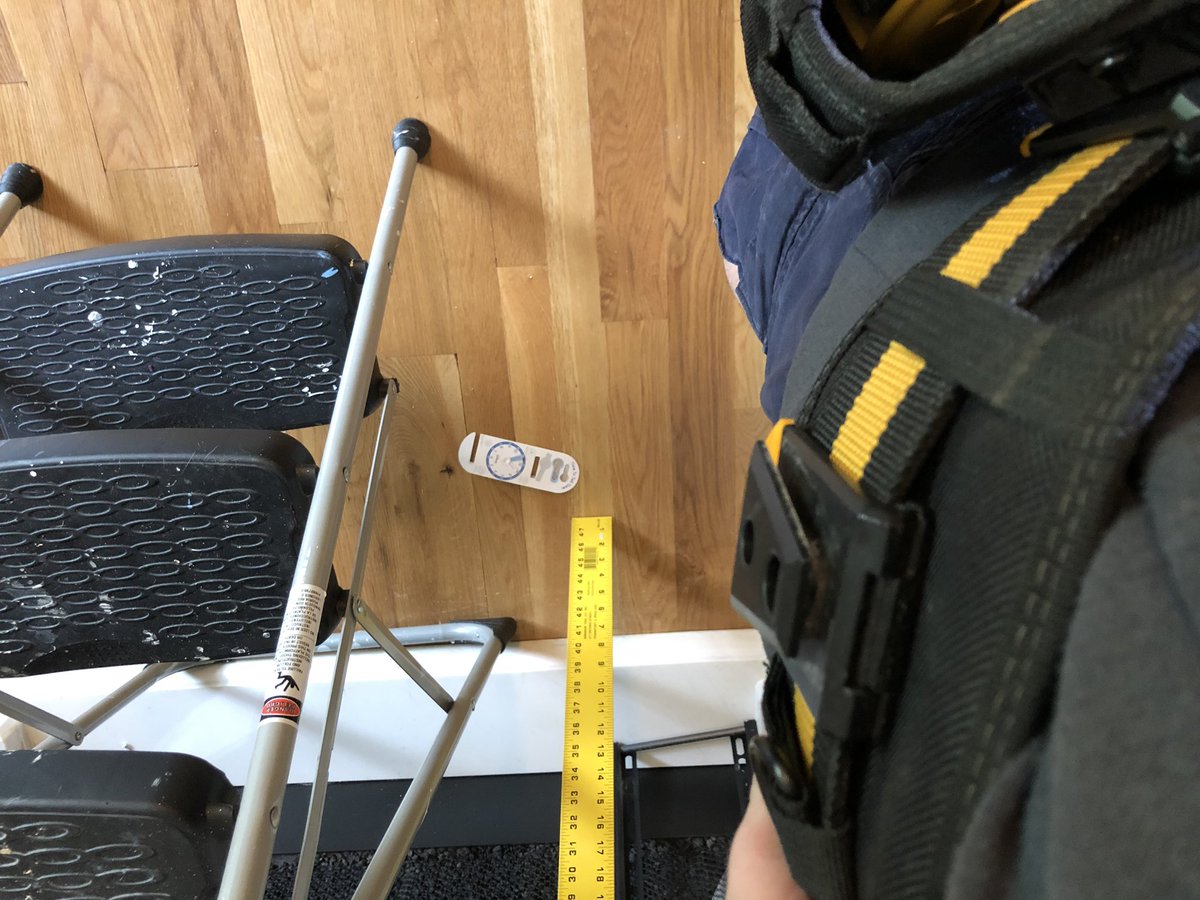
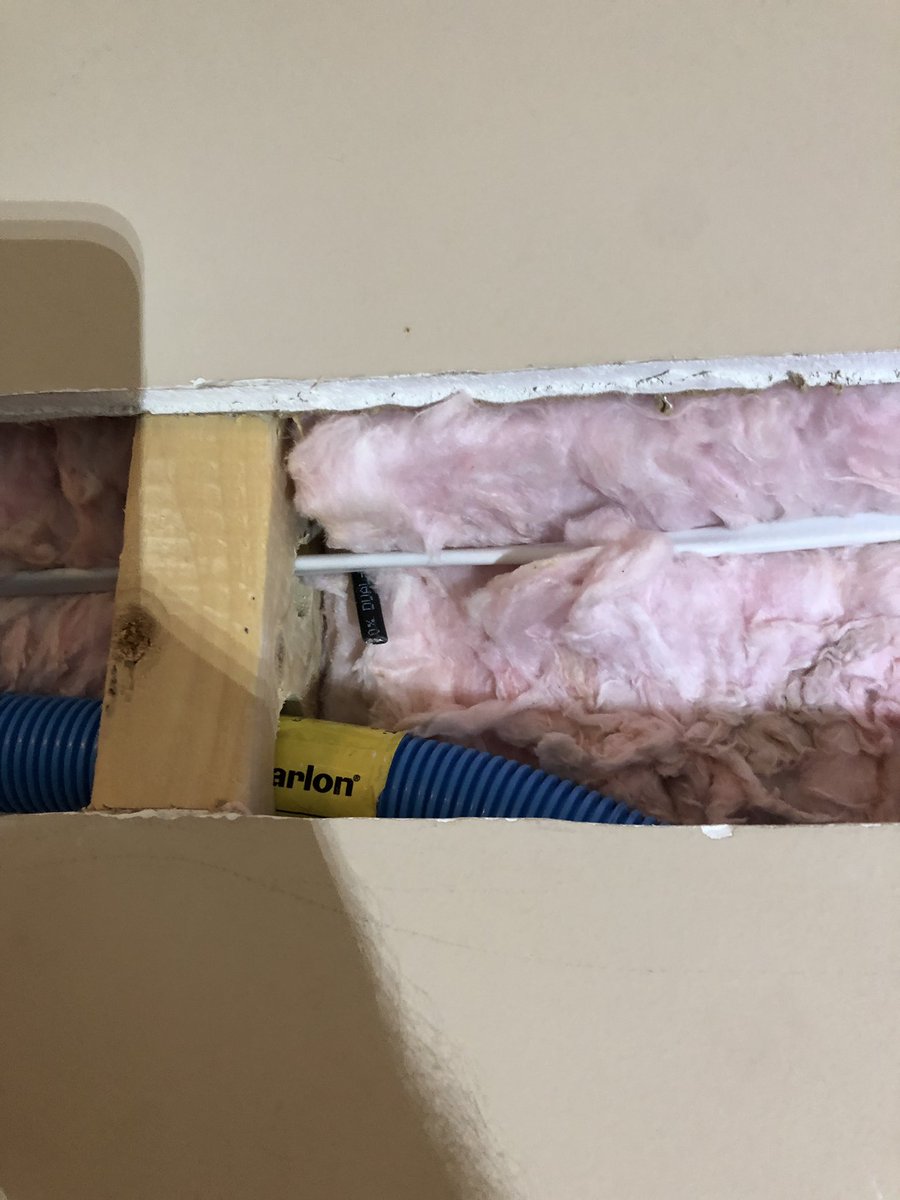
Went to drill up for Ethernet and hoopoooly crap is the joist placement bad. I should have looked at this days ago. I have a plan though. Off to Lowe’s for a very long drill bit!


Plan F: drill down from above.

This feels ridiculous.


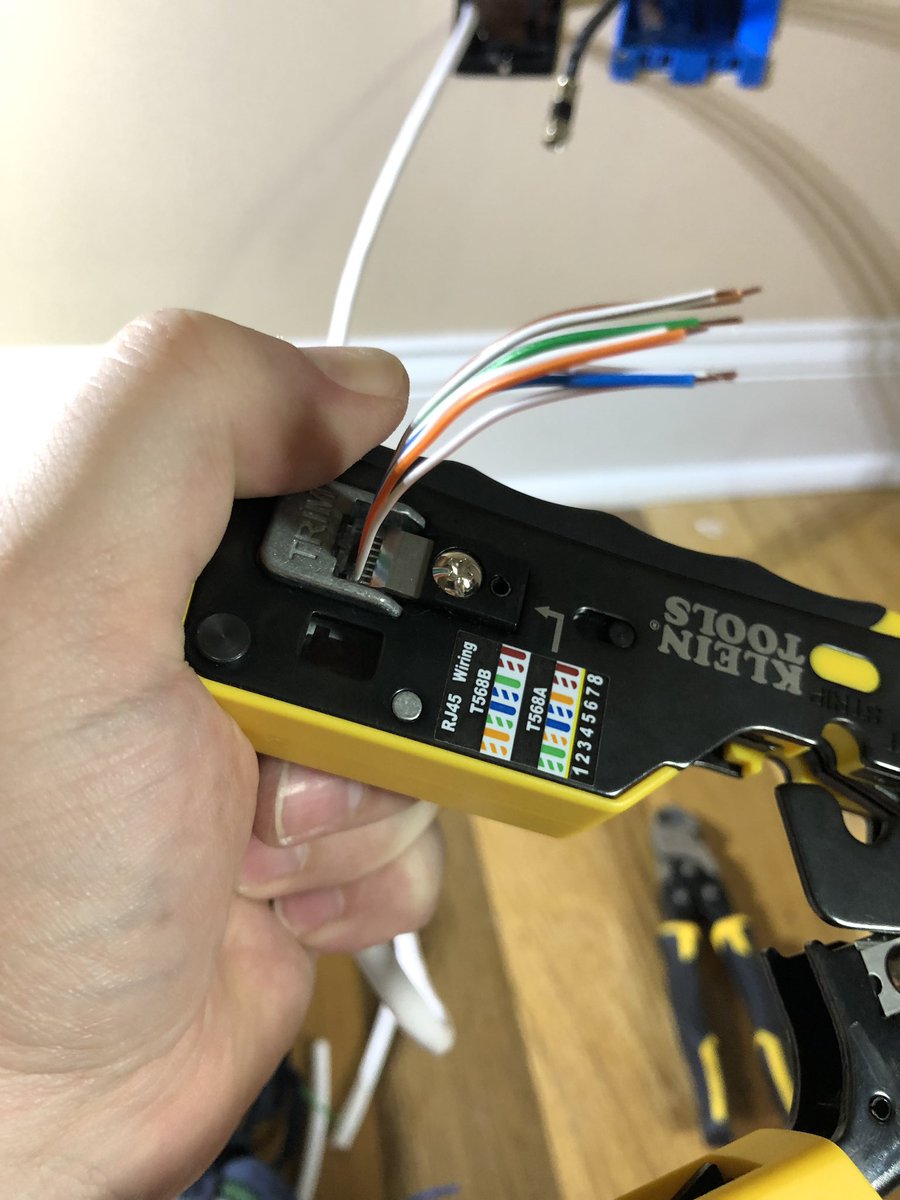
Preparing to run cable!


Cable run - putting some ends on various legs next.


Luckily crimping these pass through connectors and slicing the ends (which happens in one motion) is pretty straightforward:


Downstairs is a temp line to a coupler hooking to the basement switch...I’ll run a line up to the US-8-150W switches upstairs later and switch that temporary non-booted end in the coupler.

Upstairs end on and tucked away with the cable in one plate (I’ll just do dual brushes in the 2-gang box).


And we have connectivity! I’m debating whether to install the antenna for the bedroom in the attic today or not...probably not tonight since sanding is going to be exhausting by itself.


Drywall before tonight:


Drywall after sanding! But I didn’t do awesome in some spots - most of it has a good edge transition but an area up top and on the far right need another feather pass. I’m out of compound and really tired today though...so I’ll probably wait to get more and do that tomorrow.


I'm a little discouraged by the results mainly because this part sucks and I just want to be done with it...but honestly for as little drywall finishing as I've done it in my life, it's going really well. Just need more joint compound, 20-30 minutes, and final sanding on it.
If you look back in the pictures that blue box is slightly askew because of that super stuff conduit pushing hard on the right. We’ll have to see with plates on and...I dunno. I’ll figure out something. Ultimately, it’ll be hidden. But it’ll bother me whether it’s visible or not.

I think maybe taking the left black box out (temporarily) and sticking in a cut 2x2" leg in the wall to support the blue box on the right-hand from the bottom plate to give it structure would work. Maybe, I'm winging it here.
Though I’m too tired to do much else today, we’re going to need a new shelf/media thing for equipment on the right. Easy to remember dimensions: 56”x36”x16”.
I’m going to go play in CAD and design something that fits our scrapbooks, yearbooks, and all the electronics.
I’m going to go play in CAD and design something that fits our scrapbooks, yearbooks, and all the electronics.


Yeah I dunno - this looks silly at the moment, not sure if we want 2 sets of mini-shelves up top, or maybe just doors on both sets up top, the left having shelves...or something else. Also need to measure electronics and space those smaller shelves accordingly.

Almost every time I do something dusty I think I’ve made the whole house this dusty/foggy mess, until hours later I realize...

Was beat yesterday, but today: more pancake batter! Feathering out those far edges a bit more with a 12” for a super smooth transition. After this dries, it should be sanding and ready for paint. For now, back to a laptop and some .NET Core migration action.


It’s probably hard to see much progress in those photos but I just sanded everything down with 60, 220, then 320 grit blocks and wiped it all down. It’s now silky smooth and the room is ready for paint this weekend. More progress then!


Time to prep for paint tomorrow. Here’s a messy living room before we started:


Bits moved away from the walls first, as always:

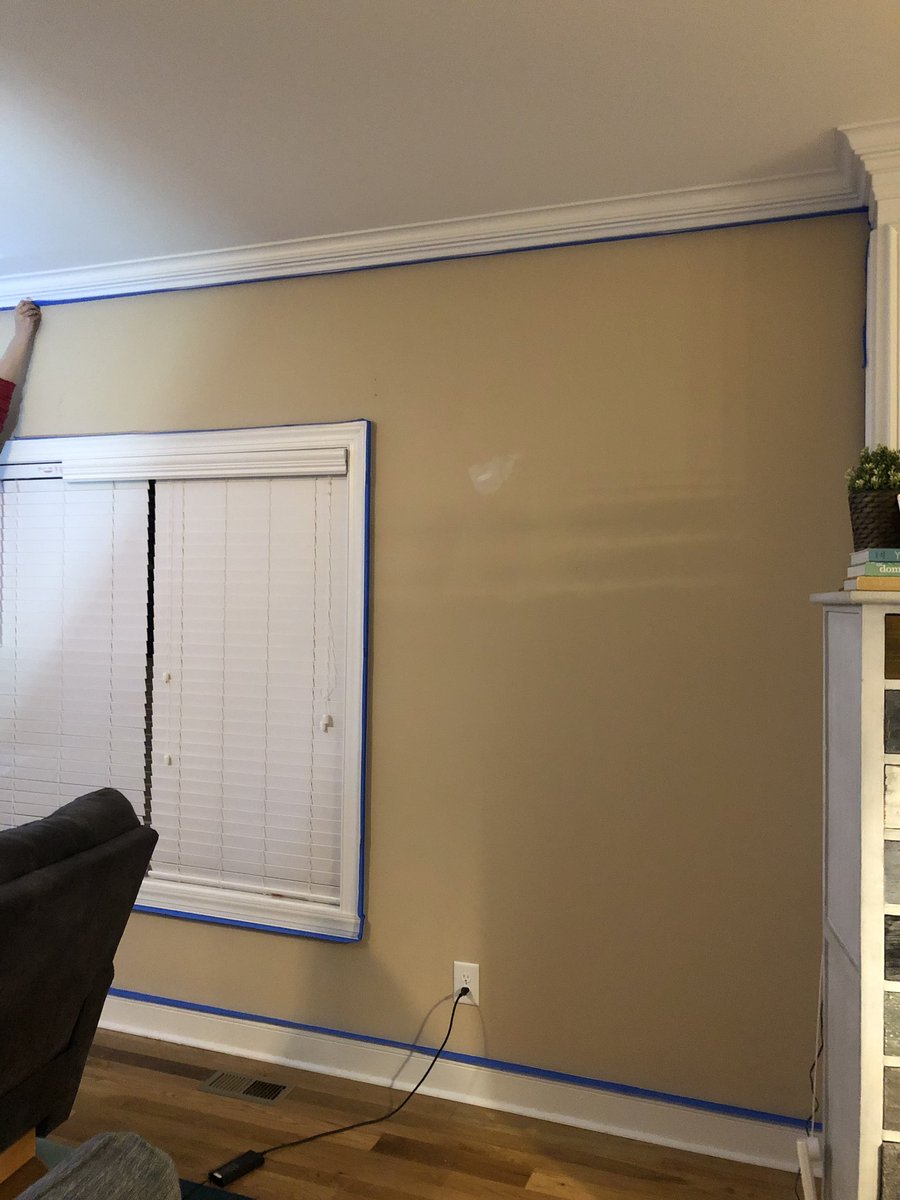
And the new Sheetrock has been primed. @E_Craver is doing her taping thing now, then we’re good to go for a coat in the morning.
I'm gonna call this project <center>.
Taped and prepped - painting starts next!


Finally hiding the evidence! I hate painting...but this is sooooooo damn satisfying.


Coat number 1 done! Nervous puppy is nervous, we’ve got ourselves a foot pile.


2 coats on (this one was all @E_Craver, my left should is fubar) - tape removal up next!
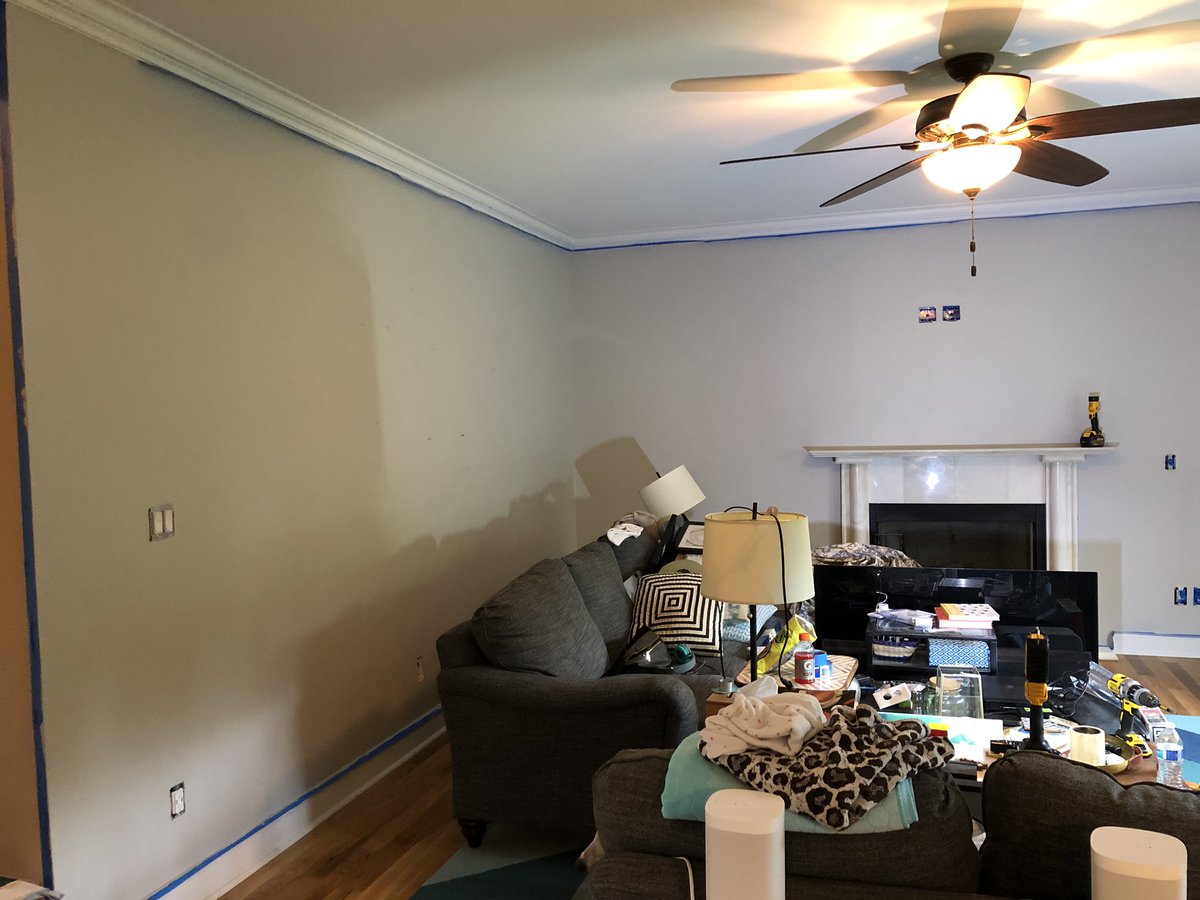
Painting complete! It needs a bead of caulking top and bottom for polish, but stuff can go back in place soon. I’ll probably mount the TV, Sonos, cut out the Sonos conduit, and run cables tomorrow. But tomorrow is Mother’s Day, so we’ll play it by ear - whatever Momma wants done.


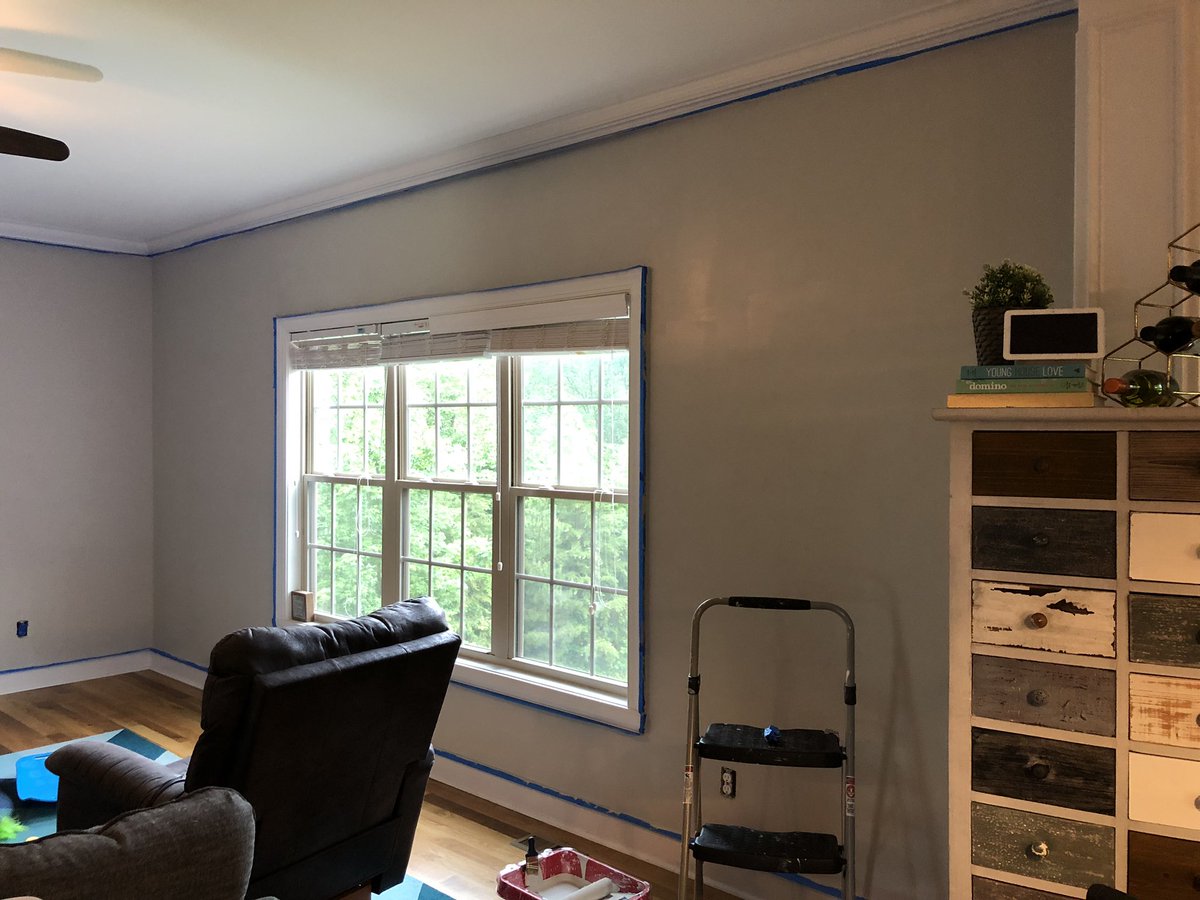
Here a view of old vs new paint color that’s a lot easier to make out:

Top outlets installed for the TV, Chromecast, and Sonos:


Plates on (brushes will come off to feed cables...just test fitting everything) and room kinda back to normal layout...need to get Sonos mounted next then I can measure where we want the TV mount exactly. Oh and those curtains I guess, it is Mother’s Day after all.


Sooooooo in the spirit of “everyone has a plan until they get punched in the face”, I’ve lost my stud finder. Cable runs it is!
I went with HDMI to Mini-HDMI for conduit runs, and an adapter on the other end afterwards. A little electrical tape is a cheap way to make life easy:
I went with HDMI to Mini-HDMI for conduit runs, and an adapter on the other end afterwards. A little electrical tape is a cheap way to make life easy:


Yay conduit! As stiff and annoying as the 1” conduit is...it’s super easy to run cables in. HDMI is in place, running some cat6a to go between the switches next.


Okay...changing my mind yet again. There’s plenty of room in the brush plates and it’ll be cleaner up top with a dedicated keystone...going to run and grab some more keystone gangs I’m out of to terminate the Ethernet run (female to female style...I still much prefer crimping).
Took a break there for other house stuff, but back at it. Bottom panel is now done:


Top Ethernet is wired up as well. Test looks good! We have connectivity and PoE to the top switch is working fine. I need to go address the Sonos next so I can run those cables down and close up the top box. Then: mounting Sonos, switch, and TV.


Sonos hole...I hope I put this box in the right place! In retrospect, I should have put a magnet in the box that I could find super easy through the drywall...but hindsight is 20/20. Next time!


Yayyyyyyyy, box located! Which is great, because we’d be right back at drywall otherwise. Sonos mounted and looks super clean. I’m very happy with how that piece turned out:


Deciding where I want the PoE switch to go - I think parallel to the outlets with ports facing down is best. Let’s do this.


Tip: don’t measure a lot when you’re hanging something with slide holes. Get some cardboard and make life so much easier. I usually go rectangle, mark on all sides, connect with a ruler, and I have my punch points very quickly.


Switch mounted and powered up...so we’re down to just the TV mount now.
Is a switch up here overkill? Yeah maybe, but I’d rather not pull cables again unless I have to. For now, it’s just for TV and Chromecast, but who knows what streaming devices we’ll have a year from now.
Is a switch up here overkill? Yeah maybe, but I’d rather not pull cables again unless I have to. For now, it’s just for TV and Chromecast, but who knows what streaming devices we’ll have a year from now.


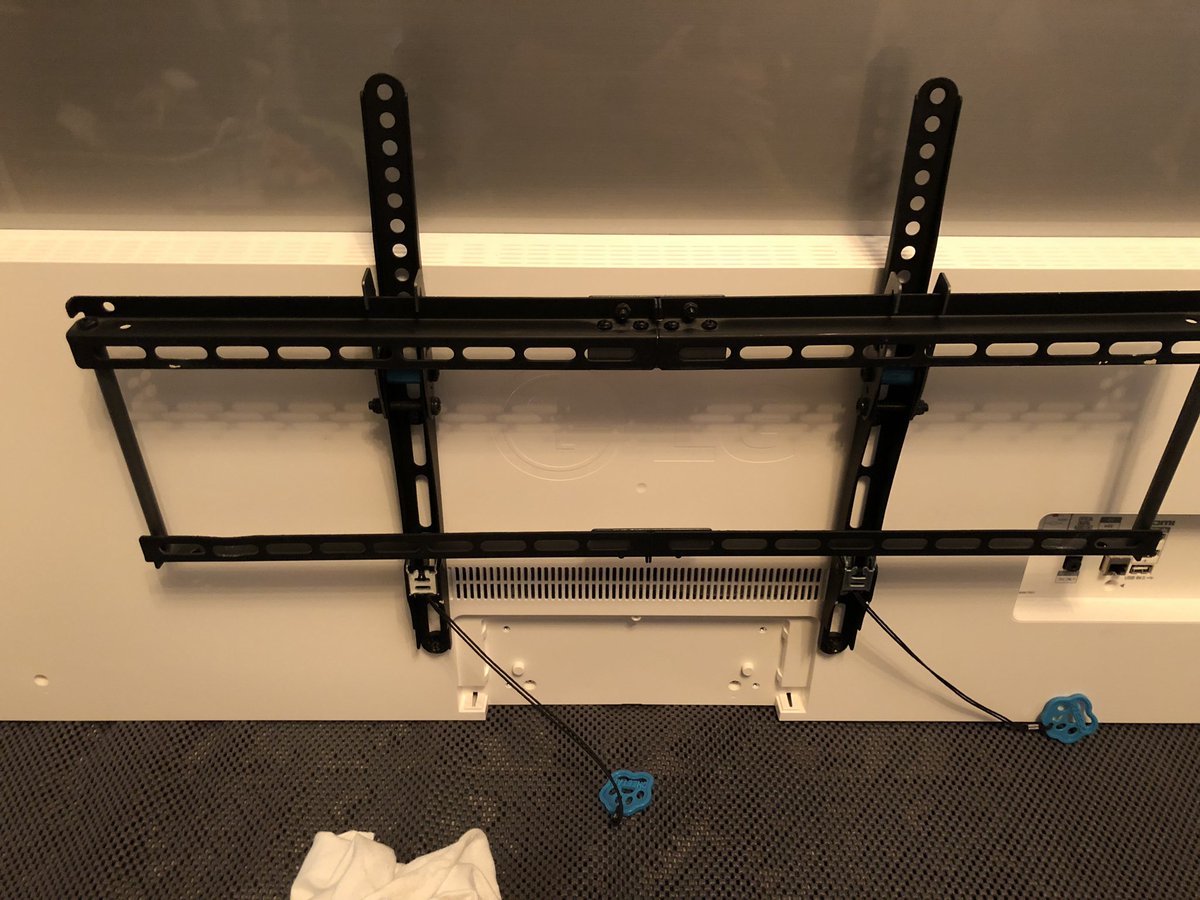
Just missing a TV!
I like to mount the stand completely to the TV, decide how far up the bottom of the TV should be from X (Sonos in this case) then measure. Figuring out where it ends up with what mount configuration is...ugh. Just assemble and measure. It’s far more reliable.
I like to mount the stand completely to the TV, decide how far up the bottom of the TV should be from X (Sonos in this case) then measure. Figuring out where it ends up with what mount configuration is...ugh. Just assemble and measure. It’s far more reliable.

Get your mount all together, then measure! Be sure to press up on it to take the play out of things though, because hanging down the gravity will be the end result and some of these have quite a bit of play. It looks like we’re about 9” to the bottom. Cool. But first, dinner.


TV mounted, but unfortunately that Sonos HDMI cable (for ARC) is about 2” too short. Dammit! I’ll get a proper extension later but used a gratuotious cable for now.


Old media center thingymagigger reinstalled for now (see the outlet plates peeking out in top, that’s gonna bug the shit out of me) - cables and are came out pretty clean though! Xbox will need to find a new home eventually - hasn’t been used in years.


Until we spec and build a new media center, that’s it for now. Thanks for following along! Here’s a before and after of the TV wall - we’re very pleased with how it turned out. Except the mantle...she doesn’t like the mantle and you know what that means...