,
34 tweets,
16 min read
Read on Twitter
We've been busy in the workshop but quiet on here for the last year. Here's a thread of what we've been up to:
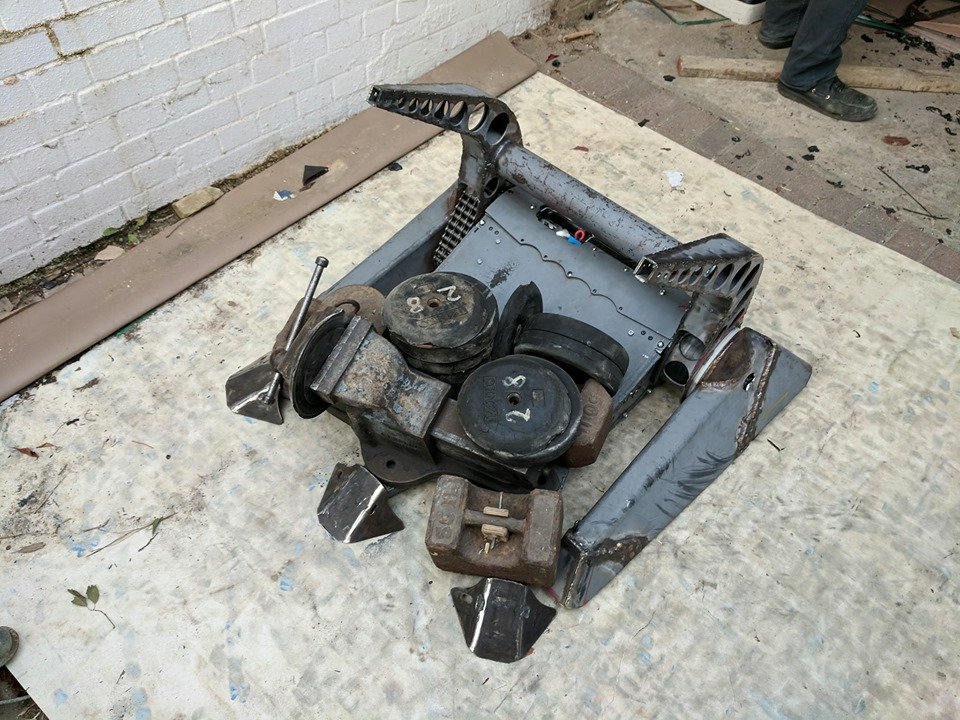
Lots and lots of lift testing, mainly to get the chains reliable.
Most of the testing was with weights…
#robotwars #battlebots #robotcombat #robotics
Lots and lots of lift testing, mainly to get the chains reliable.
Most of the testing was with weights…
#robotwars #battlebots #robotcombat #robotics
Some of the testing was a deliberate 'jammed lift' (or lowering, in this case), to simulate what would happen if we got stuck.

We've also built a mock-opponent, dubbed Timb-awe, from an old packing crate. It’s about the size of an average UK heavyweight and we can add weights inside.
The score of Timb-awe vs Deadlock is about 10-1 :-(
The score of Timb-awe vs Deadlock is about 10-1 :-(

This is approximately what the inside of Deadlock looked like a year ago. 3 VESCs for drive and clamp, and an MGM for the lifter. 06B1 and 06B3 chains, plastic chain guides, fixed gearbox position and separate idler and layshaft bearing holders.

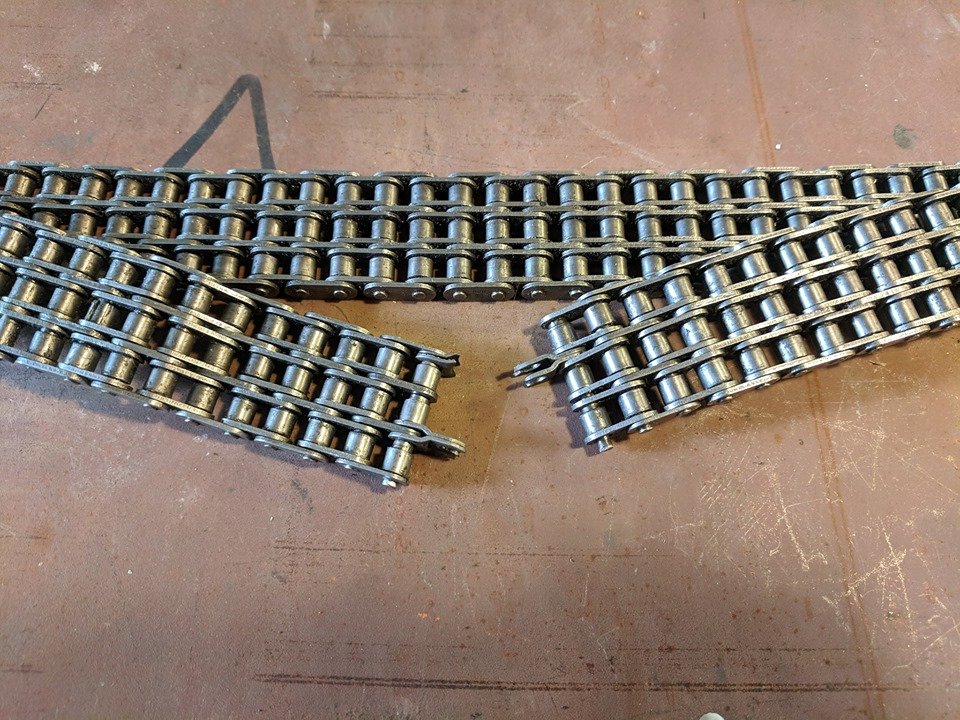
But we just kept snapping chains, both in fights and in testing. No matter what we did to reduce shock, friction or change gear ratios, the chain always stretched and snapped.
This 06B3 chain has an average strength of 30kN or ~3000kg/6000lb
This 06B3 chain has an average strength of 30kN or ~3000kg/6000lb
The chains would also weirdly bunch up.

In a desperate attempt to reduce the bunching we tried a plain roller on the idler shaft but it made no difference.

Whilst this was happening we also had plenty of needle roller bearings fail. We eventually figured out it was because we were retaining them with a grub screw in their centre groove, which must have caused a stress concentration.

The weapon gearbox started rotating in its clamp (tightened with 4 x M8 bolts), so we welded on a round 'key'

...and machined a matching notch in the clamp
This has worked very well for us, no more rotating and a repeatable position.
This has worked very well for us, no more rotating and a repeatable position.

We also added an adjustment screw to the baseplate, so we could tune where the gearbox sat. We found chain load (on the right in this picture) made the gearbox rotate, pulling the input end forwards, which then caused alignment issues.

Throughout this testing we only had two issues with the gearboxes themselves (remember they were super cheap and not intended for the loads or speeds we're subjecting them to).
One of the changes was a retaining 'nut' to keep the input bearing aligned rather than floating.
One of the changes was a retaining 'nut' to keep the input bearing aligned rather than floating.


Bearing retainer fitted.
Without this, the input bearing holder was retained by a circlip but could move into the gearbox, and side load from the chain made it sit at an angle.
Without this, the input bearing holder was retained by a circlip but could move into the gearbox, and side load from the chain made it sit at an angle.

Gearbox strip downs to check for wear.
We also welded in the loose pins in the planet carriers.
We also welded in the loose pins in the planet carriers.


The other wear we had was on the output bushing*. That's about 4mm of wear in a 10mm thick bit of steel.
*not really a bush, the output was steel-on-steel.
*not really a bush, the output was steel-on-steel.

So we bored out the gearbox and fitted a proper oilite bush


During testing, we kept losing teeth from the original cast sprockets (unsurprising, we never wanted to use brittle cast sprockets but that was all we could find at the time)
after extensive searching, we managed to find some Real Steel sprockets, which we machined to fit
after extensive searching, we managed to find some Real Steel sprockets, which we machined to fit

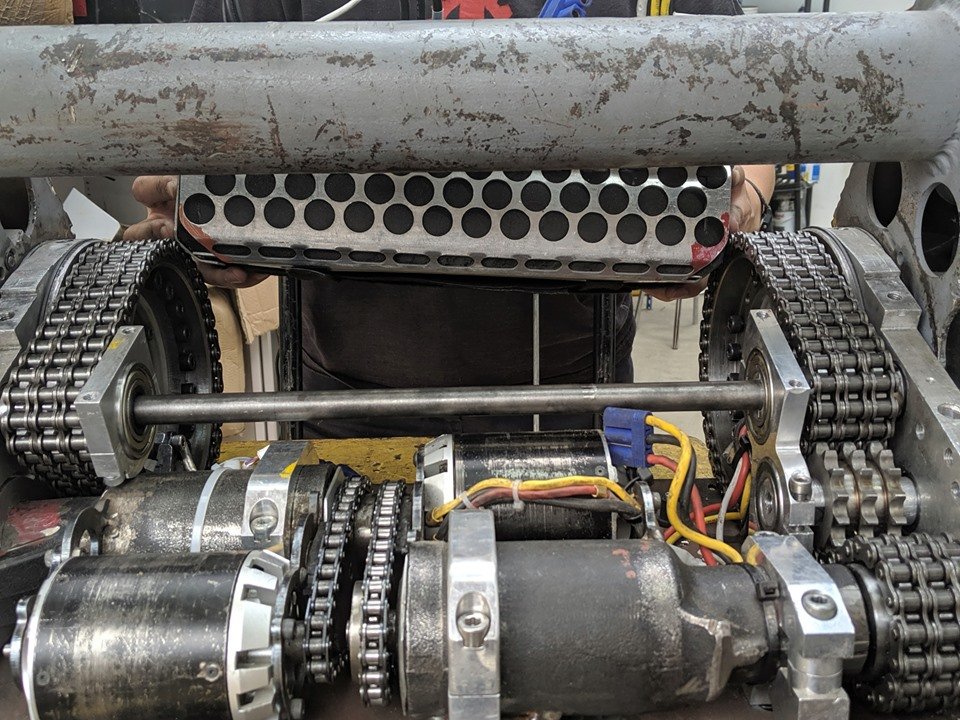
But it wasn't enough. Eventually we had to try 08B3. Here's the size comparison. We never had much clearance around the 06B3 chains, so we weren't confident we could fit the larger chain.
08B3 is rated at about 60kN, or twice the strength of the old chain
08B3 is rated at about 60kN, or twice the strength of the old chain


As well as changing the chain, we also continued our tensioner and chain guide journey. Here's an aluminium replacement for the HDPE tensioner we used to have


The old HDPE tensioner was adjusted by turning a screw, but the HDPE deformed under load. This new aluminium tensioner wasn't adjustable, but by putting different size cable ties or allen keys behind it, we could make small adjustments.

With the larger chain, we needed an adjustable tensioner. This was a quick hack with a nut welded to the gearbox & a threaded rod pushing on the bearing mount. We added a 'shoe' made from another weldnut to spread the load a bit.
Needless to say, it fell off quickly in testing.
Needless to say, it fell off quickly in testing.

We replaced the single nut with a longer block, still with a nut to avoid having to thread the block. We added a steel plate to push on, rather than pushing directly on the aluminium bearing holder.
This worked better but still failed under load
This worked better but still failed under load

Whilst thinking of a better design, we realised the spare gearbox clamp we have could be repurposed into an adjustable tensioner.

Here's that tensioner in place, again with a nut so we had a steel thread. This seemed to work ok, until the M8 bolt snapped!
In this picture you can also see the bearing mount had broken, been repaired with extra aluminium welded to either side, and that had failed too.
In this picture you can also see the bearing mount had broken, been repaired with extra aluminium welded to either side, and that had failed too.

Here's the current tensioner, a 15mm thick steel bar with 2 x M12 adjustment screws. Both the screws and the bar bent slightly in testing.
We've since added a shaped spacer between the bar and the gearbox (made from the original aluminium tensioner) to stop the bar bending.
We've since added a shaped spacer between the bar and the gearbox (made from the original aluminium tensioner) to stop the bar bending.


Another recent change is this wedge above the gearbox. It's there to support the top armour from hammer hits & stop the gearbox & baseplate flexing up under chain tension. This was spotted when we filmed a lift with a GoPro looking at the chain, to figure out what was happening.

Broken 'Bunny' integrated bearing holder and new stronger design.
These were originally made from 4pieces, 2 per bearing, one holder attached to the top armour & one to the baseplate, but we found there was too much flex. By integrating them it's less serviceable but much stiffer
These were originally made from 4pieces, 2 per bearing, one holder attached to the top armour & one to the baseplate, but we found there was too much flex. By integrating them it's less serviceable but much stiffer

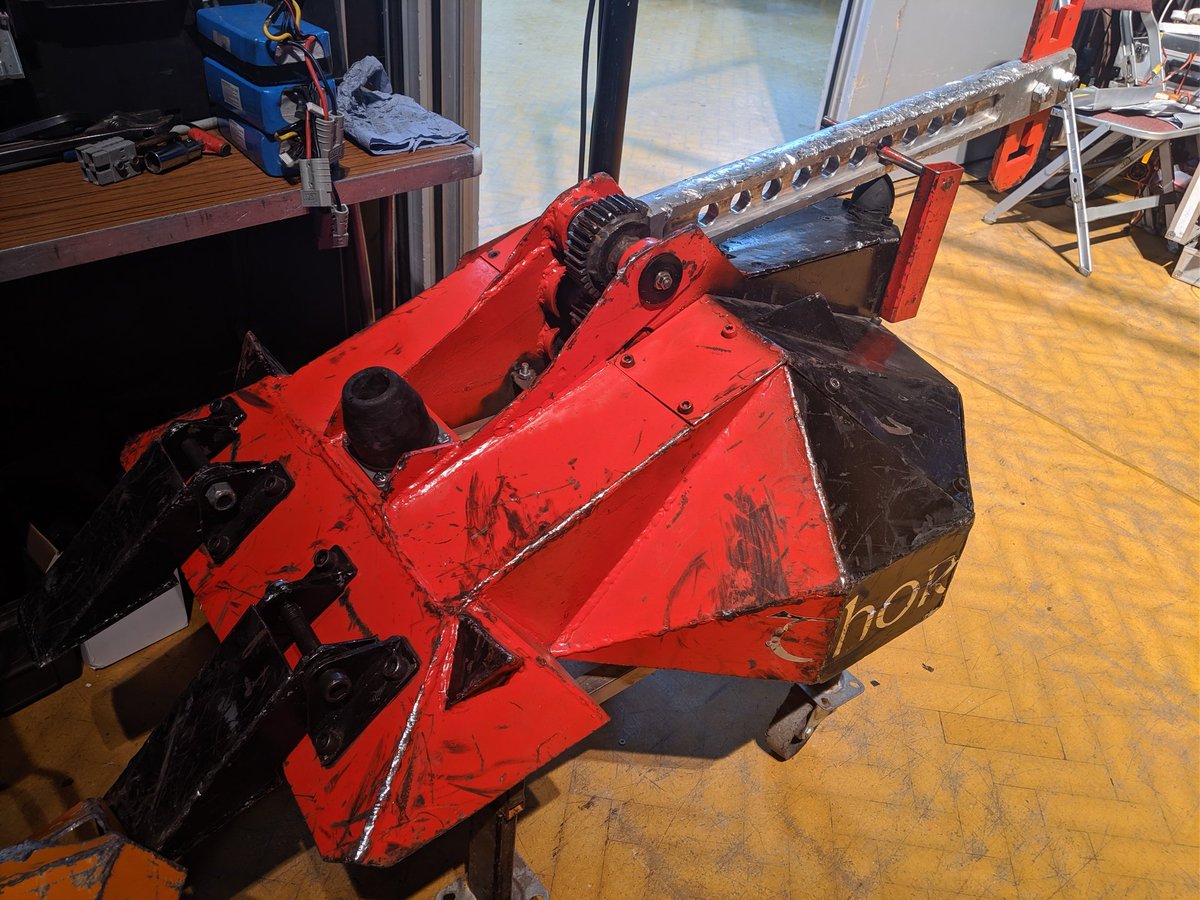
Back to the chains. Here's what it looked like with the new 08B3. There’s less clearance, but everything fits. Unfortunately, whilst the electronics could fit where it goes, it could no longer be removed. By trimming off the areas marked in red, we can now remove it when needed.
The chains continue to be a challenge, we can lift with full stall current without any slipping in most orientations, but sometimes in testing (or every time we fight) the sides get out of sync. We now think we know why. Hopefully we can get it fixed for the next event.

As well as the lifter, we've also been working on the drive. The original "60A" VESC controllers couldn't give our motors what they needed. We could drive ok at the start of a fight but the controllers would overheat & shut down about half way through the fight. Very frustrating!


Shortly after Deadlock was finished, these 100A VESCs became available, so we had to try them. They were much better, but still didn't have the power we were looking for, and the drive motors were capable of.
The wooden mounting plate here was a quick fix to let us test them.
The wooden mounting plate here was a quick fix to let us test them.

Later, Freefly ARC200 controllers came out, with 2x the current capability. More £££, but the watts/£ was good, we machined new aluminium mounts with rubber isolation washers.
We're still getting to grips with the controllers, the drive isn't sorted yet, but it’s getting there.
We're still getting to grips with the controllers, the drive isn't sorted yet, but it’s getting there.


We've also progressed the spare Hardox we've had for a while. A big change is the rear armour. We originally had a Hardox and plastic combo, with HDPE in a Hardox frame, to save weight. It didn't save much, was weaker and the plastic clashed with the new chains, so had to change

That brings us up to date. The latest challenge was a busted magnet, courtesy of @Thorrobotwars's hammer at the @extremerobots Colchester 2019 event. Luckily we have a spare bell from an old motor we burnt out, so it should be a straightforward swap.