About 9 years ago, I made a storage rack for small parts for my workshop. Its little drawers hold various nuts, bolts, and washers. 1 
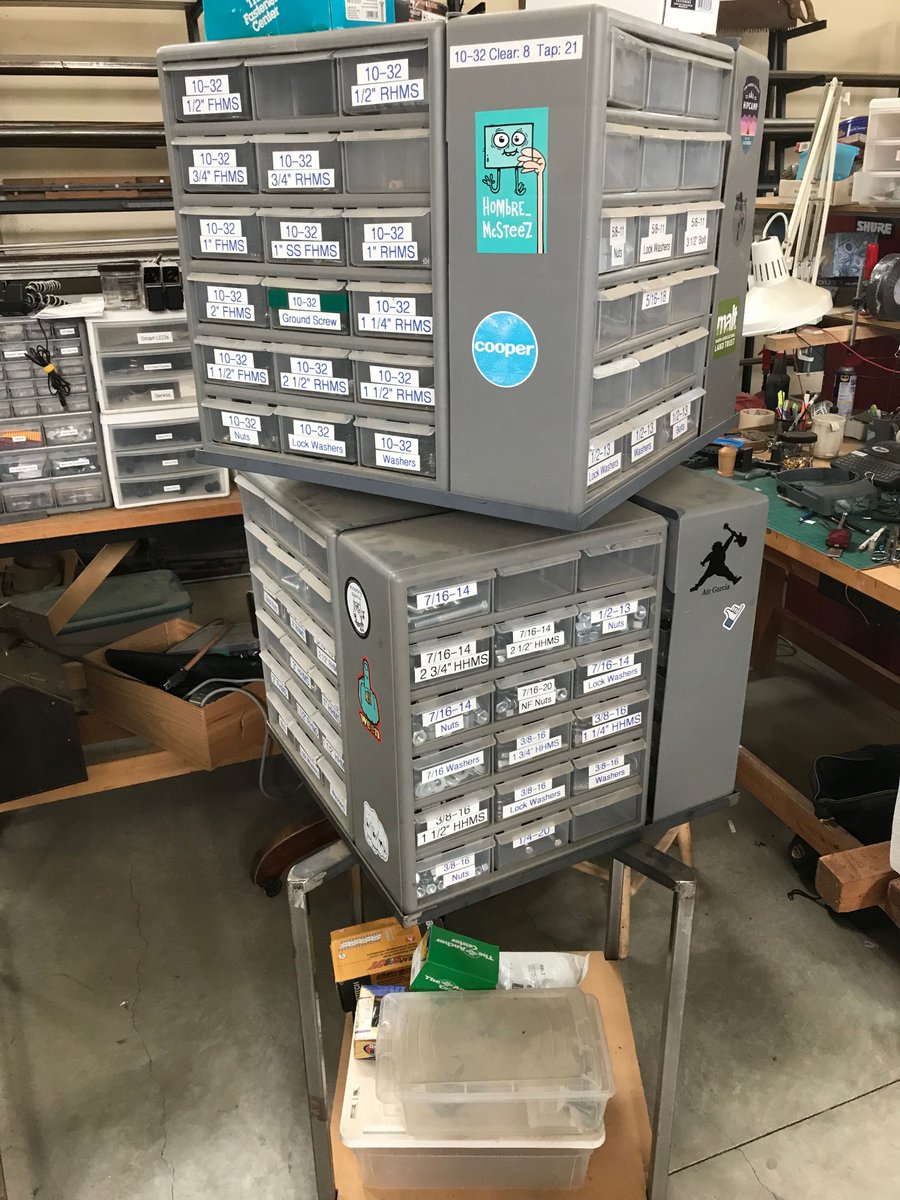
It’s made of welded structural steel, but uses commonly available commercial plastic drawers. Each level of 4 boxes rotates independently on a lazy susan bearing. The whole unit is on casters, so I can move it around the shop to where the action is. 2
It was such a success in the shop that, a couple years later, I welded up another one! 3
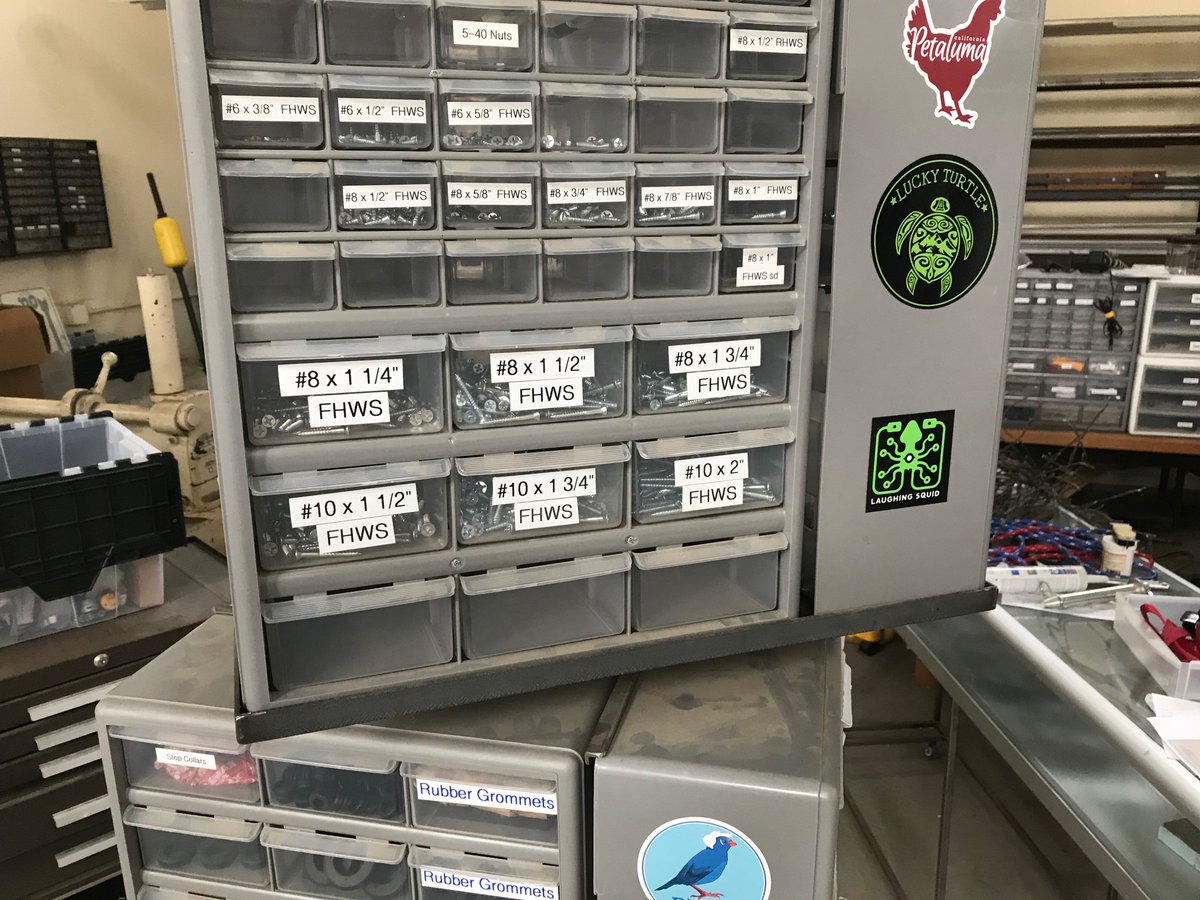
“FHWS” means Flat Head Wood Screw.
“HHMS” means Hex Head Machine Screw.
Etc. 4
“HHMS” means Hex Head Machine Screw.
Etc. 4
Each plastic carcase (that’s the term of art for the enclosing box of a cabinet) holds 18 drawers. There are 4 drawers per level, and 2 levels per tower. That’s 144 drawers per tower. The new tower even has some smaller drawers for #8 and smaller screws. 5
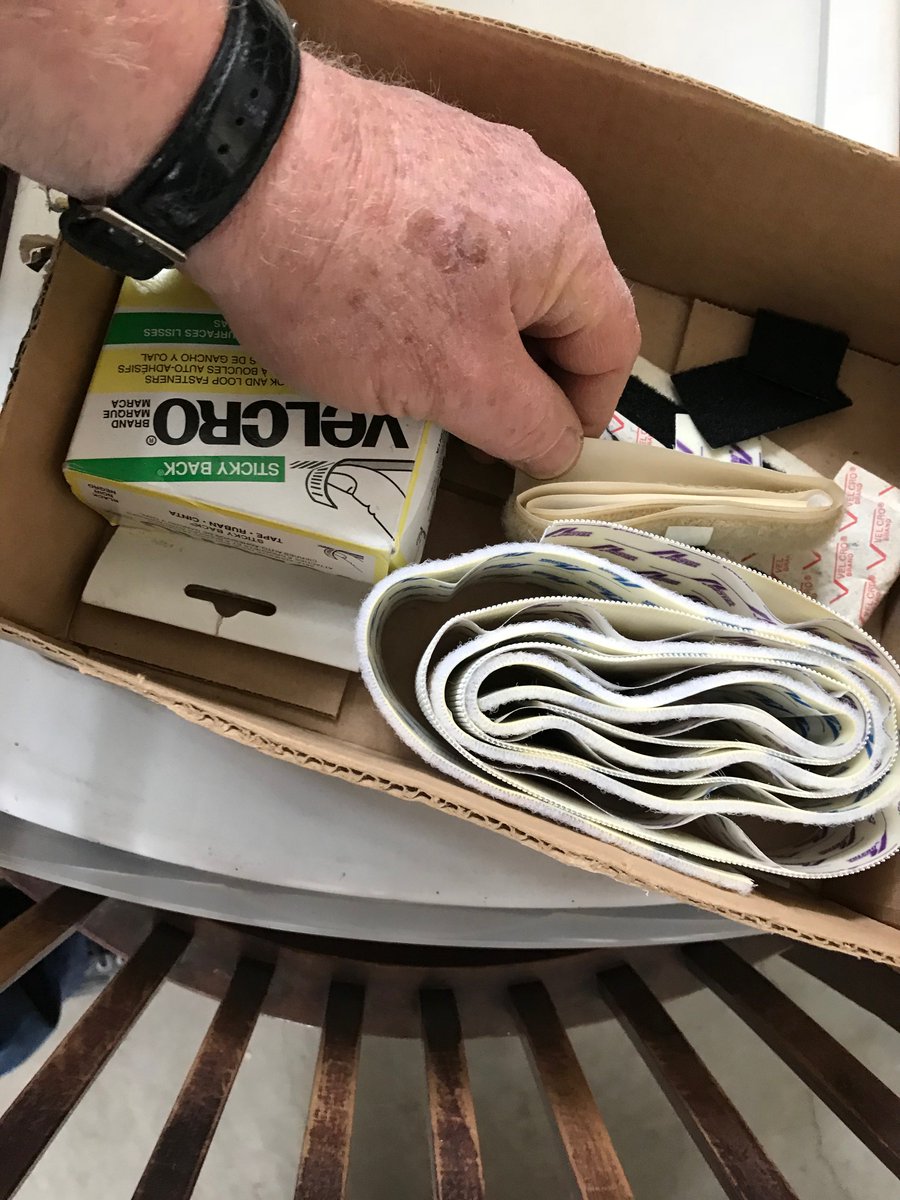
But what do you do with bigger stuff, or bigger collections of finger sized parts? Servos, glands, clamps, velcro…my shop is full of this stuff, and getting fuller. 6
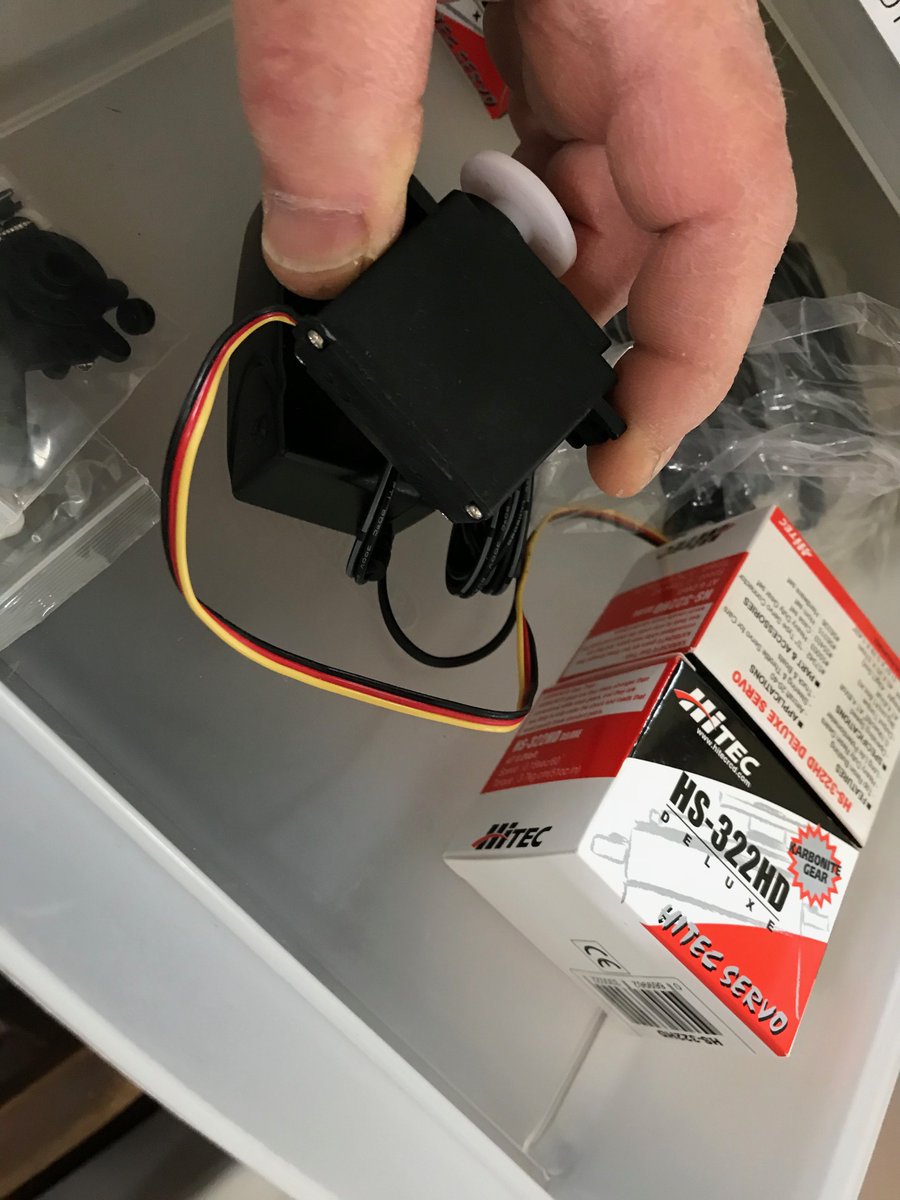


So I went looking for a commercial plastic set of bigger drawers. They exist, but I need ones that won’t go off the market and are a standard size I can use. I couldn’t find ‘em, so I decided to build ‘em. 7
I opened up my old Sketchup plans for the first two towers and modified it for bigger, wooden carcases and drawers. 8
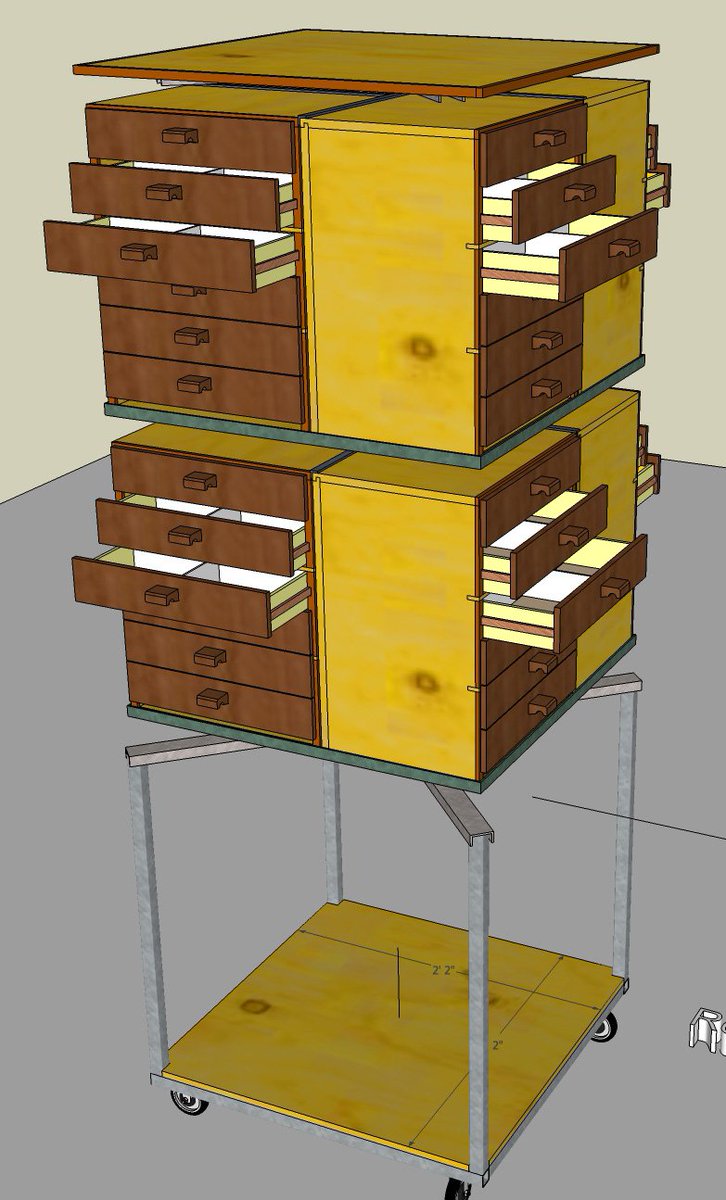
That’s 4 carcases per level, times 2 levels, with 6 drawers per carcase, or 8 carcases with 48 drawers. 9
Each carcase has five sides plus a single blade to maintain the precise width. That’s 48 total pieces. Except that four of the sides—made of 1/2” Russian birch plywood—has a thin strip of cherry trim. 10
But the drawers have even more parts: Two sides, two ends, a bottom, a front, a handle, and two guides. That’s 9 parts per drawer, and 48 drawers. 11
To keep everything light and compact, the drawers are made of 1/4” Russian birch plywood (the insides of this good quality ply has no holes or gaps). The bottom is 1/8” (!) plywood. The front is resawn 1/4” cherry. 12
The tolerances are very tight. The carcase is 1/16” wider than each drawer. This means that the construction has to be very precise. The key to precision is joinery, and painstaking setup. 13
Painstaking setup is a pain, except that once you’ve used scrap wood to test everything and adjusted to perfection, you can run dozens or hundreds of bits of wood through the same setup pretty quickly. Bingo! that’s the payoff. 14
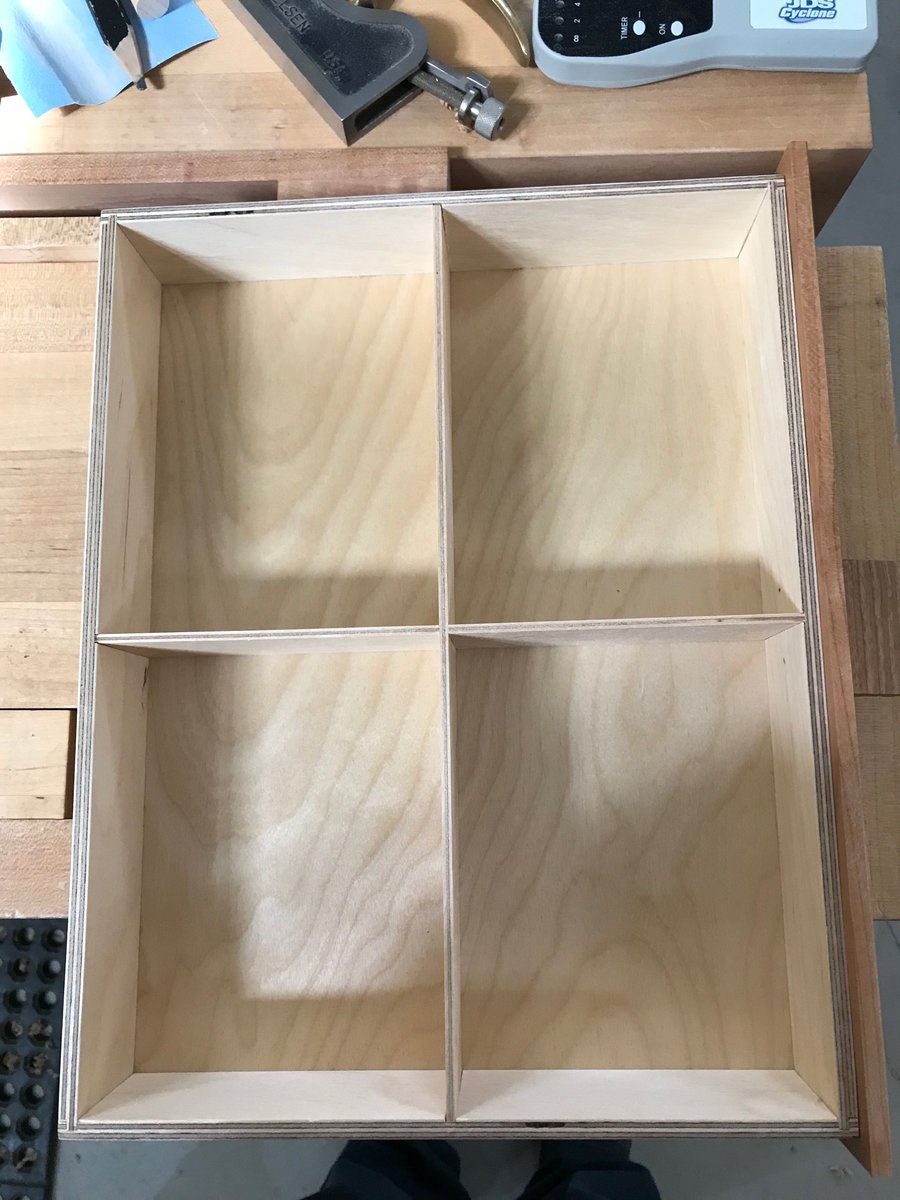
I designed the drawers so that the fronts and backs are identical, as are the sides, making only two different pieces. The sides get three dados and the ends get a dado and two rabbets.15
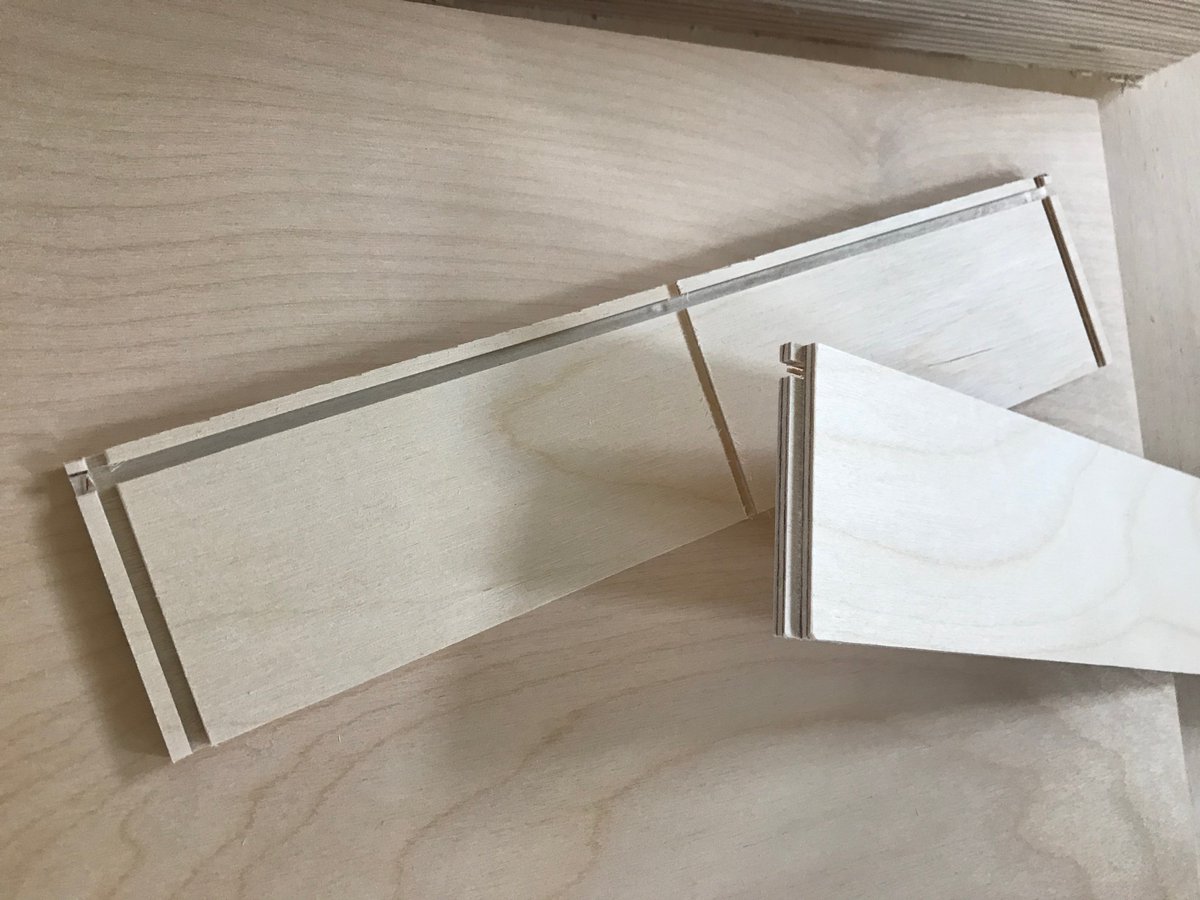
On the table saw, the rabbet is one setup, and the dado is another. Only two setups for everything! That’s efficiency! 16
Of course, I did have to (get to) purchase an FTG blade. That means Flat Top Grind: the teeth aren’t beveled to the sides, and the cut has a perfectly flat bottom. It’s precisely 0.125” inch wide, or 1/8”, which is exactly half the thickness of the 1/4” ply. See? 17
But, once you commit to making 8 carcases and 48 drawers, you figure, why not make a few more? And then your wife says, “Hey, can I have one of those?” and your neighbor says, “That would be really nice to have.” 18
And besides, you know you’re gonna screw up a few of them as you get your systems squared away, so you need extras anyway. 19
Then you start cutting up plywood, and accidentally make an extra set of sides, so you make an extra back and ends so they won’t be wasted…and that’s how you end up making 14 carcases. 20
14 carcases with 6 drawers each equals 84 drawers. And 9 parts per drawer—oh, wait a minute—I forgot about the two dividers for each drawer, so that makes 11 parts each, for a grand total of 924 parts for the drawers. 21
So it’s been like a factory here, making drawers and carcases. By the time you do a dozen or two of each, you begin to develop systems that makes things better and faster and easier. I really enjoy that process. 22
The last step, of course, is the finishing room. I’m spraying everything with lacquer. I’m set up to spray the lacquer quick and easy, and one good coat is sufficient. 23
Varnish would be better, but I’m lazy, and I don’t enjoy finishing as much as the other steps. Varnish would require multiple coats, and each one by hand. No thanks. 24
After all of the woodwork is completed, I will make the steel chassis. Cutting and welding. Each one I make gets a little better. Fun! 25/
Someone asked about how many clamps I have. Thanks for the question, @DrumMinor, I have lots of Bessey F-clamps that I use for the carcases. Years ago I made this roll-around rack to hold them all. 26
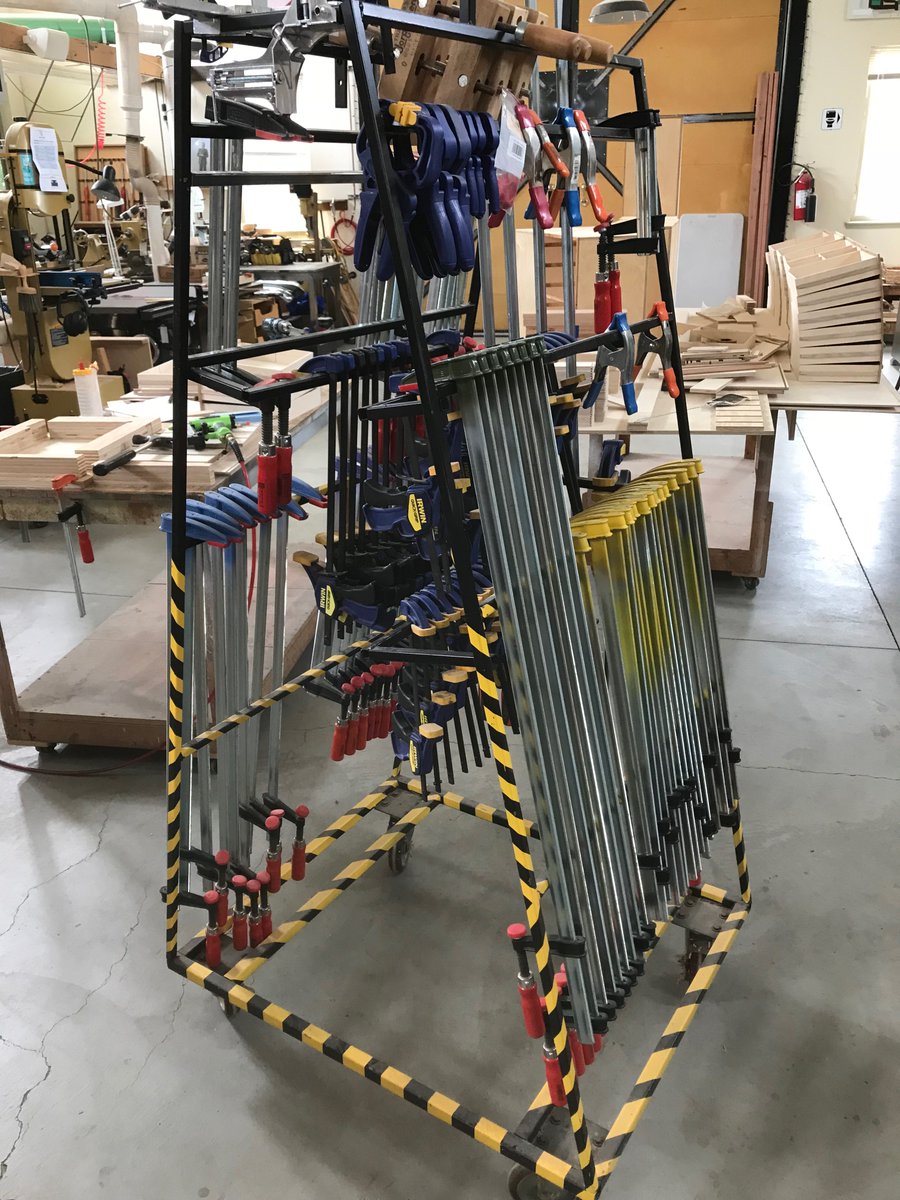
But as I was making various prototypes of the drawers, it became clear that F-clamps weren’t going to work. 27
The clamps are heavy and the drawers are light. The clamps put point pressure, but I need very even pressure spread out. Each drawer has to be precisely and exactly square. Remember, 1/16” off and they won’t slide. 28
So I built a drawer clamp. It’s made out of three layers of 3/4” shop plywood glued together, then cut into strips. Two of the strips were cut on a 10 degree angle. 29
Then I glued the strips down in a perfect square the precise size of the outside of a drawer. 1/2 of each pair of angled pieces is glued, the other slides against it. 30
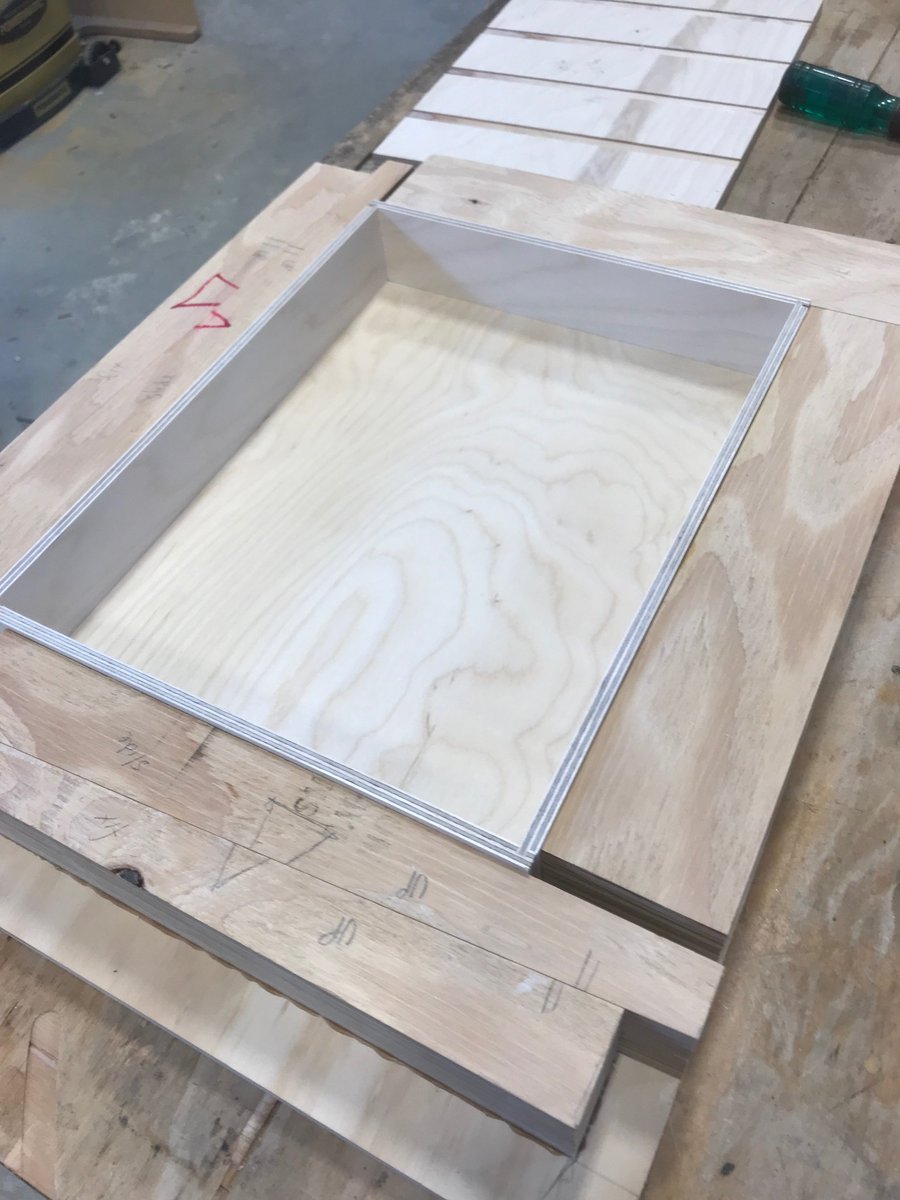
Here’s the clamp with a drawer box in it. Once there’s glue on the rabbets and dados, the box rests in the clamp, and the slides are hammered home. All 4 sides of the drawer are given even pressure in a perfect square of the precise size. 31
I apply the glue evenly and sparingly, so it sets up nearly instantly. Each drawer has to sit in the clamp about 1 minute. Then I drive out the wedges and set the drawer aside. 32
BTW, there are no fasteners used anywhere in this process. No screws, no nails, just tight joinery and glue. Well, I used some 23-gauge headless pins to align the cherry trim to the carcase during the glue up, but they have little holding power. 33
Here’s a short vid of me cutting rabbets on the drawer ends. Take pains on the setup and you can breeze through the cuts. 34
You get the idea… 35


hey @threadreaderapp please #rollup this thread.