Tutorial Thread. How to use the pen tool to (relatively) quickly lay in the buildings on a city map. Works in both gimp and photoshop. Likely also in Illustrator.
And it’ll potentially save you from carpal tunnel syndrome. So that’s a plus.
And it’ll potentially save you from carpal tunnel syndrome. So that’s a plus.
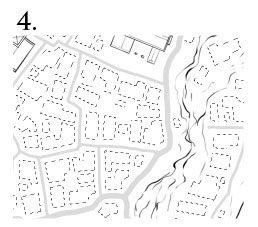
I’m jumping in where we’ve got the roads mapped out. The next step is filling the remaining space with buildings to turn a skeleton of a town into a town. The key is to give the impression of a large number of buildings, without drawing every single chimney pot and awning.
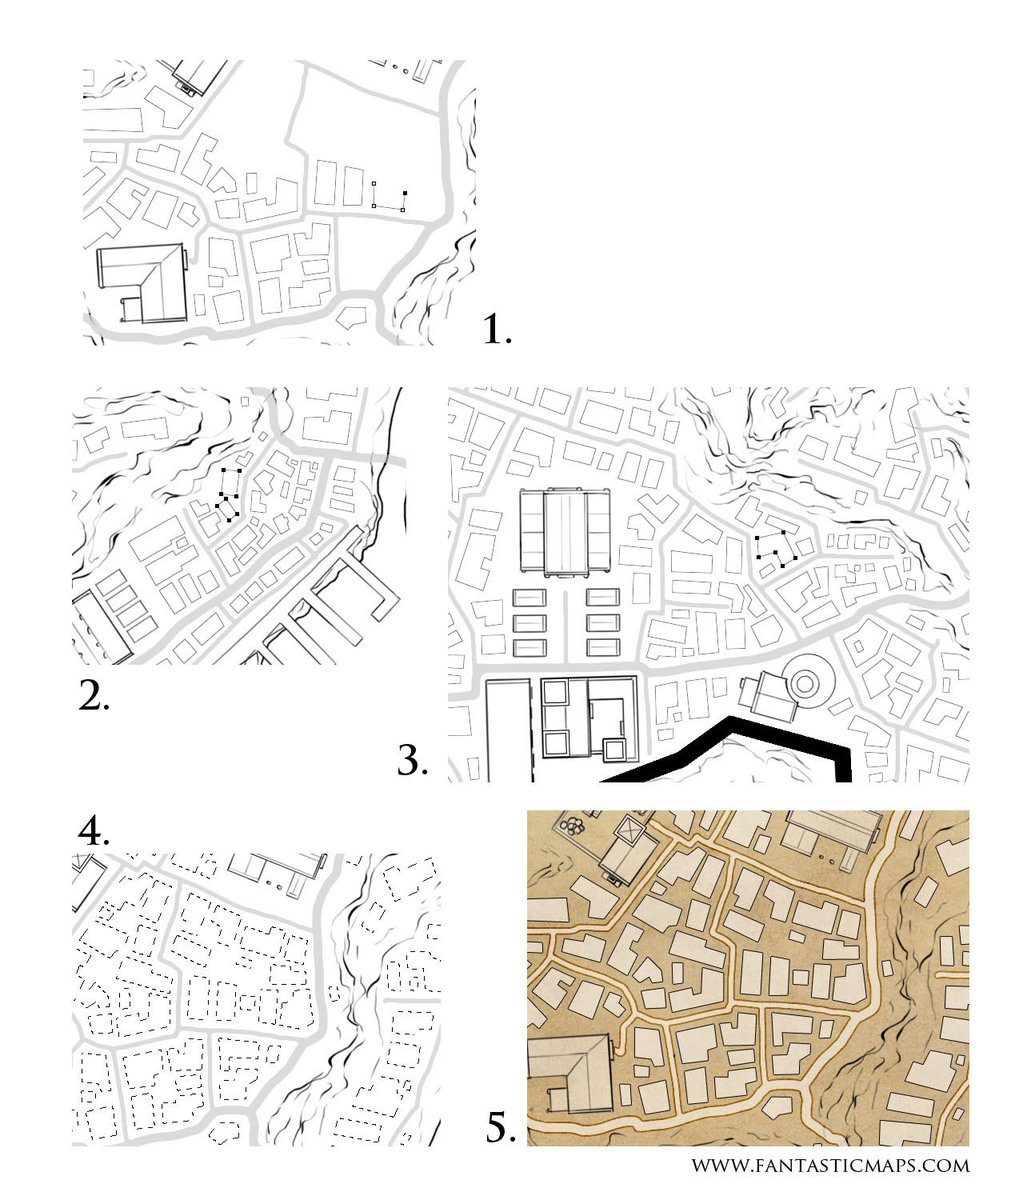
1. Using the Pen Tool
Here I’m using the pen tool in Photoshop (P) – you can also use the pen tool in Gimp (B). Under Paths, hit the New Path button, and give it a name. Here I’ve called it “Houses”. (Imaginatively)
Here I’m using the pen tool in Photoshop (P) – you can also use the pen tool in Gimp (B). Under Paths, hit the New Path button, and give it a name. Here I’ve called it “Houses”. (Imaginatively)
The advantage of using the path tool is that you can go back and edit any element of the city at any point. This is invaluable. This way, just use the direct selection tool (A) in Photoshop, or the pen tool (B) in Gimp and go back to edit the vector outline of the houses.
Many path tutorials will focus on using the path tool to create bezier curves. We’re not doing curves today. To lay a house polygon, click one for each corner. Because you’re clicking – rather than clicking and dragging – the path lays in straight lines between anchor points.
Click again on the first point (you should see a small circle appear under the pen cursor) and the path will close. In Gimp – you need to command-click the first point to close the path.
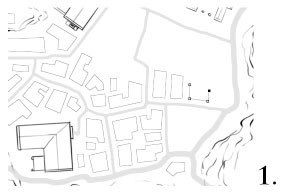
Click again somewhere else to start the next building, and you’re off!
Click again somewhere else to start the next building, and you’re off!
2. Use a Variety of Building Sizes
First of all, don’t worry about the shapes being precisely right. Any town map will have a lot of buildings, and the chance of a viewer looking at any one and judging the historical accuracy of the building shape are slim.
First of all, don’t worry about the shapes being precisely right. Any town map will have a lot of buildings, and the chance of a viewer looking at any one and judging the historical accuracy of the building shape are slim.
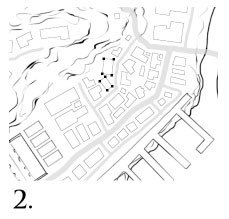
You want the impression of an urban sprawl without having to carefully design each bit of sprawl. So, work quickly, and don’t sweat the details. But – make some decisions about the blocks that you’re filling in.
A slum area should have smaller and more disorganised buildings – or solid tenement blocks. There shouldn’t be too much spare space. A wealthier neighbourhood might have bigger building with more empty space around them.
Use a variety of building shapes. It may well be that buildings are mostly rectangular, but a complete uniformity of buildings forms a repetitive pattern – and out brains are very good at spotting repetitive patterns. That’s part of the reason we’re doing these shapes by hand.
Add variety – t-shaped buildings, l-shaped buildings. It might start to look a little like the reject bin in the Tetris factory, but that’s okay. Remember, we’ll be seeing this zoomed out, not examining every single building in turn.
Also, use negative space. We see not just the buildings, but also the space around them. Leave courtyards and meeting areas, squares and plazas. Leave more empty space in some parts of town than others – even if you don’t have a reason why.
Either you’ll come up with a reason later, or your players will rationalise the difference for you, and add detail to your world without you trying.
3. Let the buildings flow
The roads and terrain have a flow to them – let the buildings work with that. Fill in the empty space around your featured locations, but use the buildings to describe lines and emphasise the larger shapes of the town.
The roads and terrain have a flow to them – let the buildings work with that. Fill in the empty space around your featured locations, but use the buildings to describe lines and emphasise the larger shapes of the town.
A line of similar size buildings all curving around a bend will suggest that the buildings are all the same, and might help to sell a barracks, or pre-built line of miner’s cottages. In contrast, a set of widely varied buildings might be the mansions of the wealthy.
Filling in the buildings takes time – lots of time – but the end result is worth it. I’ve got a few methods of laying out blocks that are more automated, and these help for cities, but nothing beats just drawing in all the houses.
4. Turn your path into a selection
Once you’ve tweaked your houses to your liking, turn the path into a selection. (Path’s palette – button at the bottom ‘Load Path as Selection’ -PS, or Path Tool -> Tool Options -> Selection from Path, Gimp).
Once you’ve tweaked your houses to your liking, turn the path into a selection. (Path’s palette – button at the bottom ‘Load Path as Selection’ -PS, or Path Tool -> Tool Options -> Selection from Path, Gimp).
5. Fill your houses with a colour
Create a new layer, and fill the houses selection with a colour of your choice to lay in all the houses! Here I’ve used some layer options. I filled with white, and set the fill opacity to 50%. I also added an inner stroke of 1px in black.
Create a new layer, and fill the houses selection with a colour of your choice to lay in all the houses! Here I’ve used some layer options. I filled with white, and set the fill opacity to 50%. I also added an inner stroke of 1px in black.
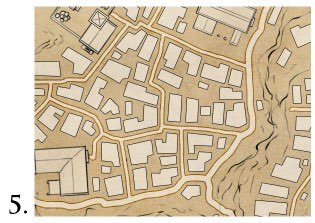
There are lots of good choices for layer styles that can give you a more satisfying set of houses from this selection, but that’s a tutorial for another day. For now, you’ve got a full layout of your town.
And done!
And done!